Expand to Full Screen for Best Viewing
Setting Activity Due Dates in the Apex Platform.
1. Select Course
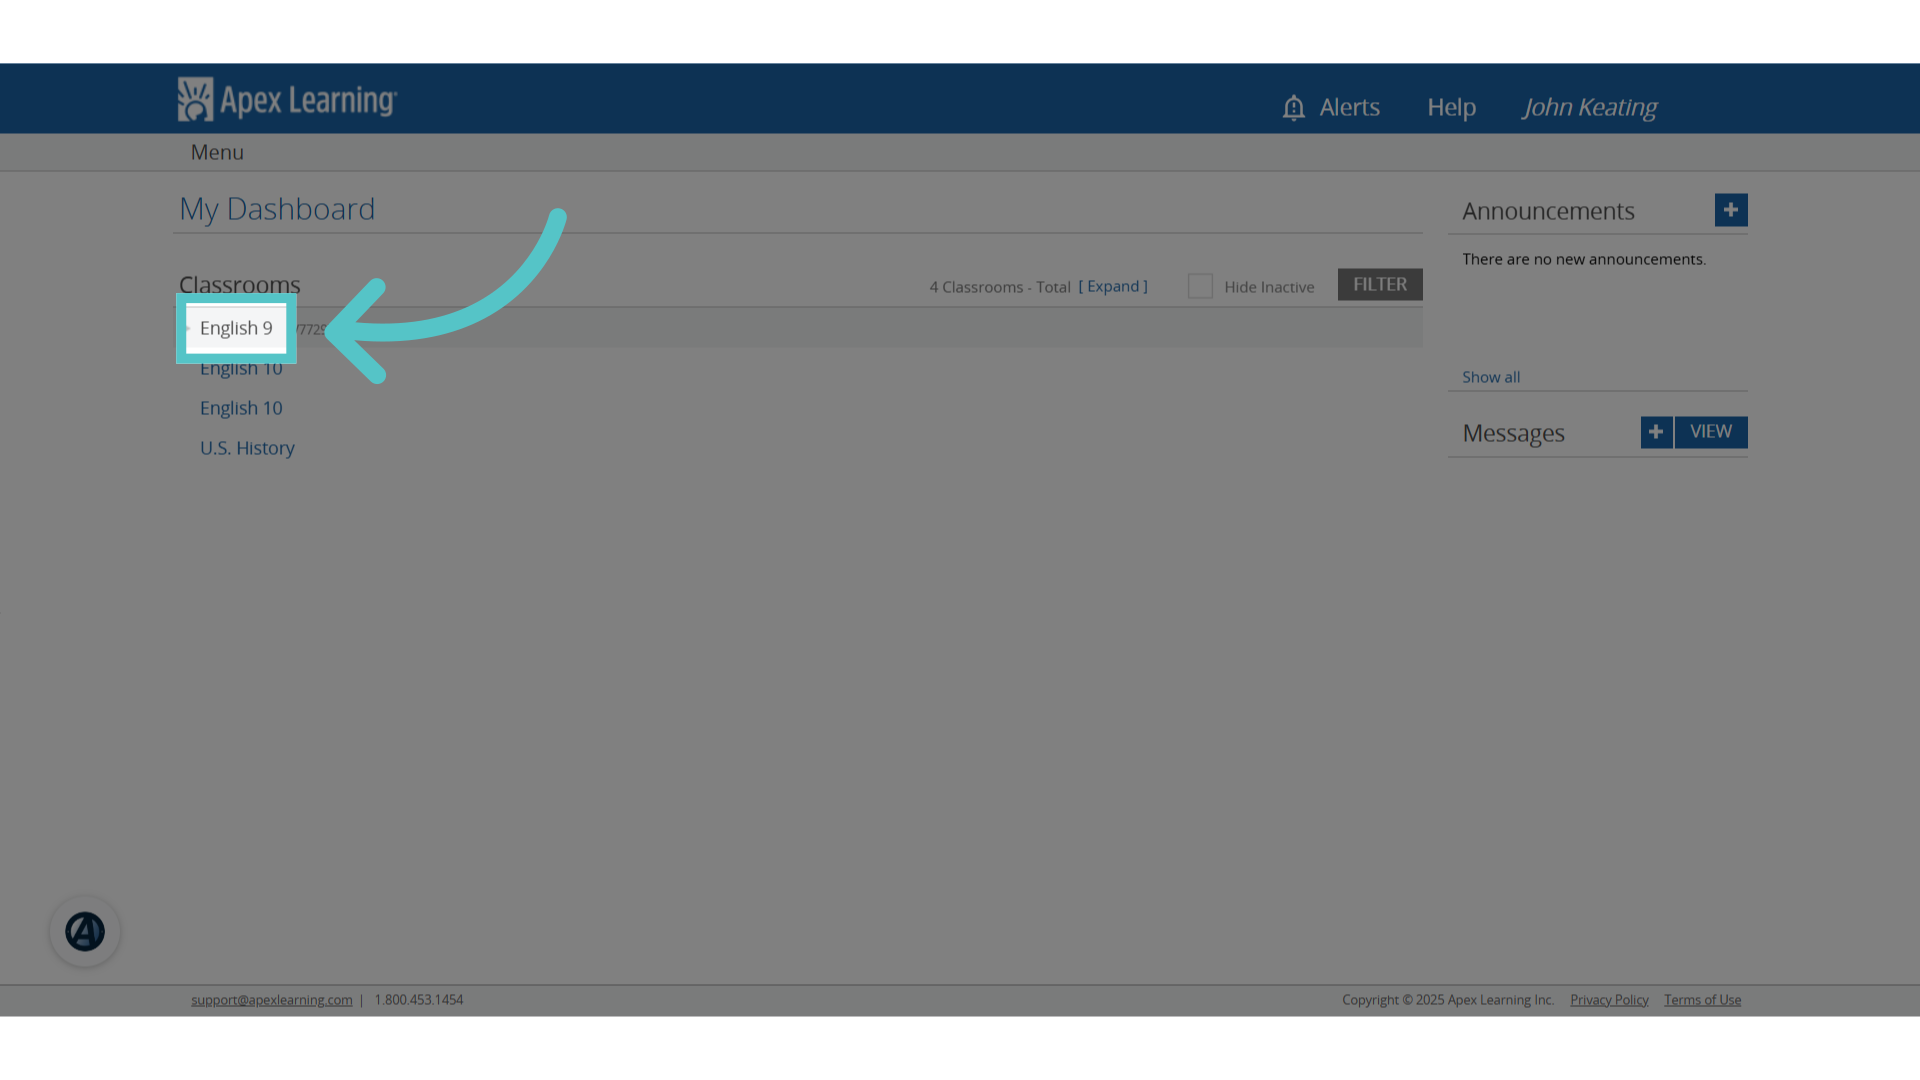
Select the course from the Apex Dashboard.
2. Select Gradebook
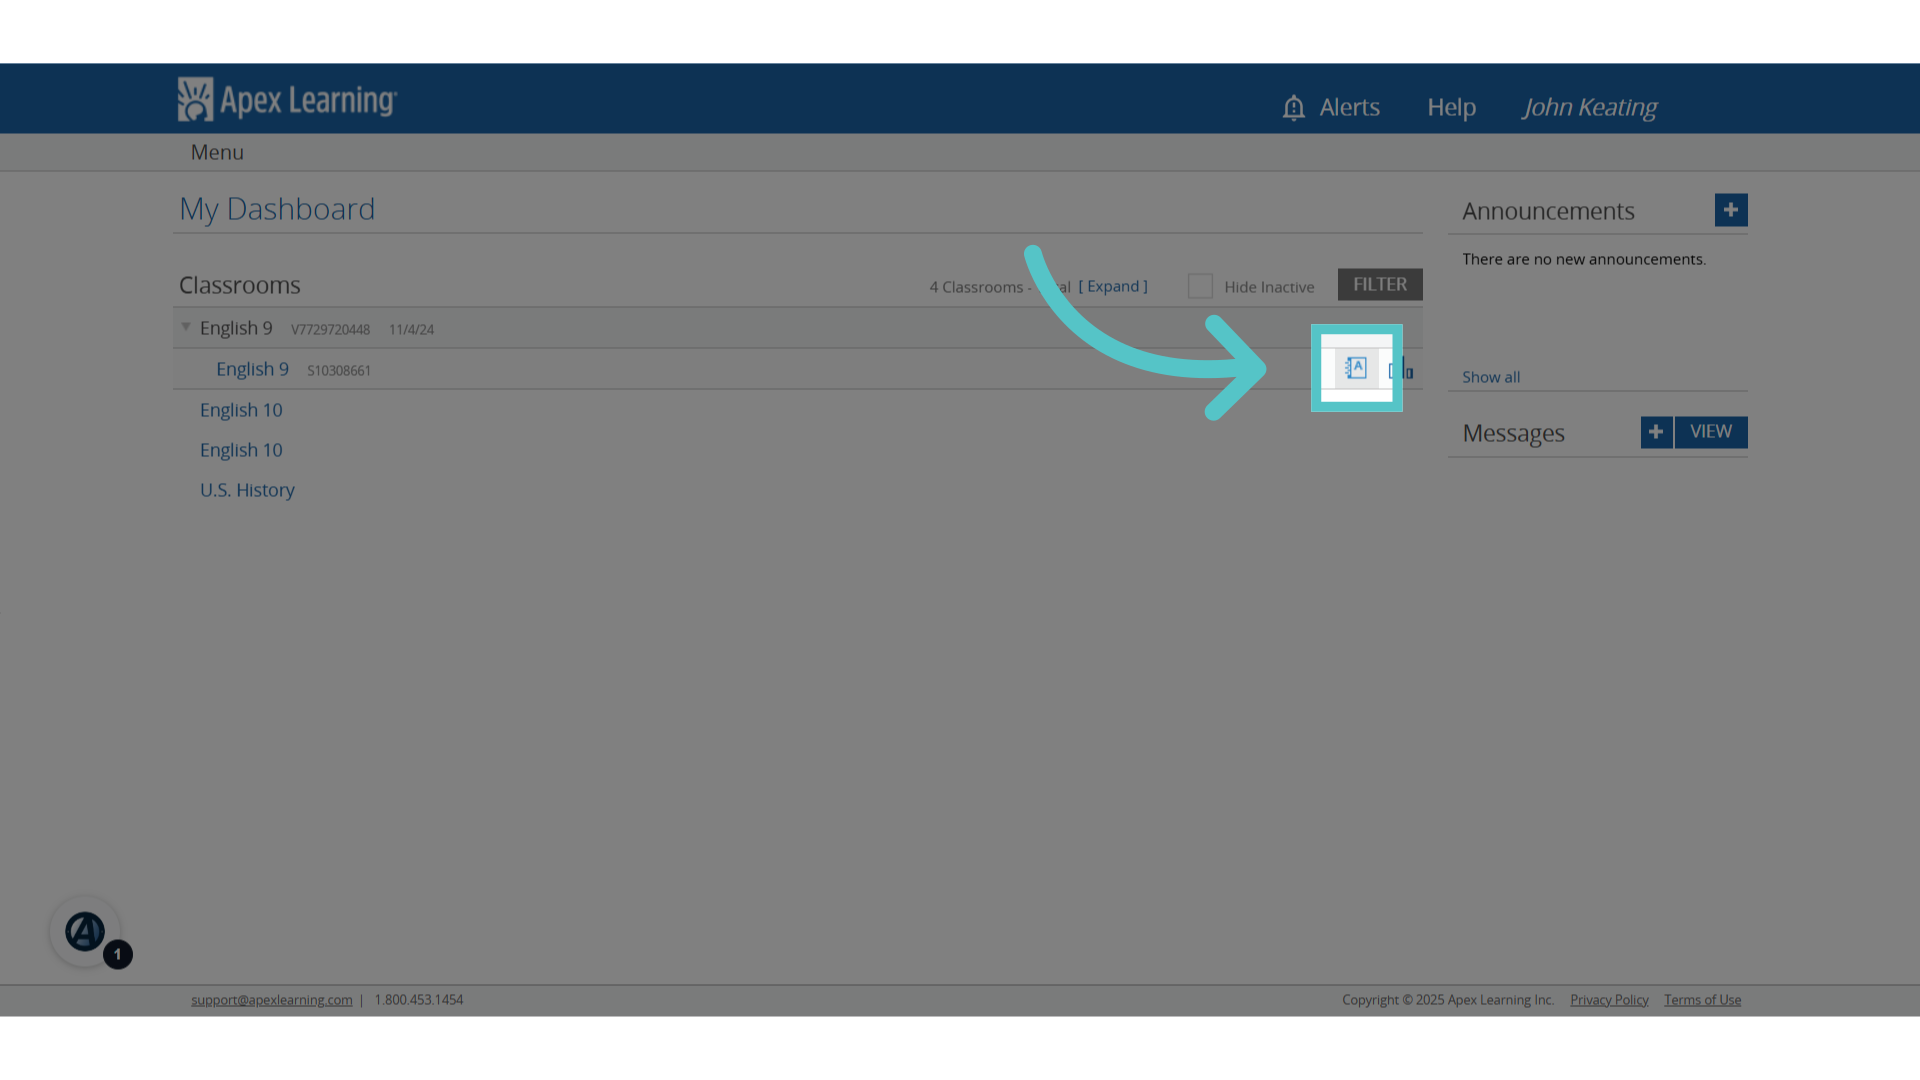
Click the Gradebook icon to access the course gradebook.
3. Last Due Date
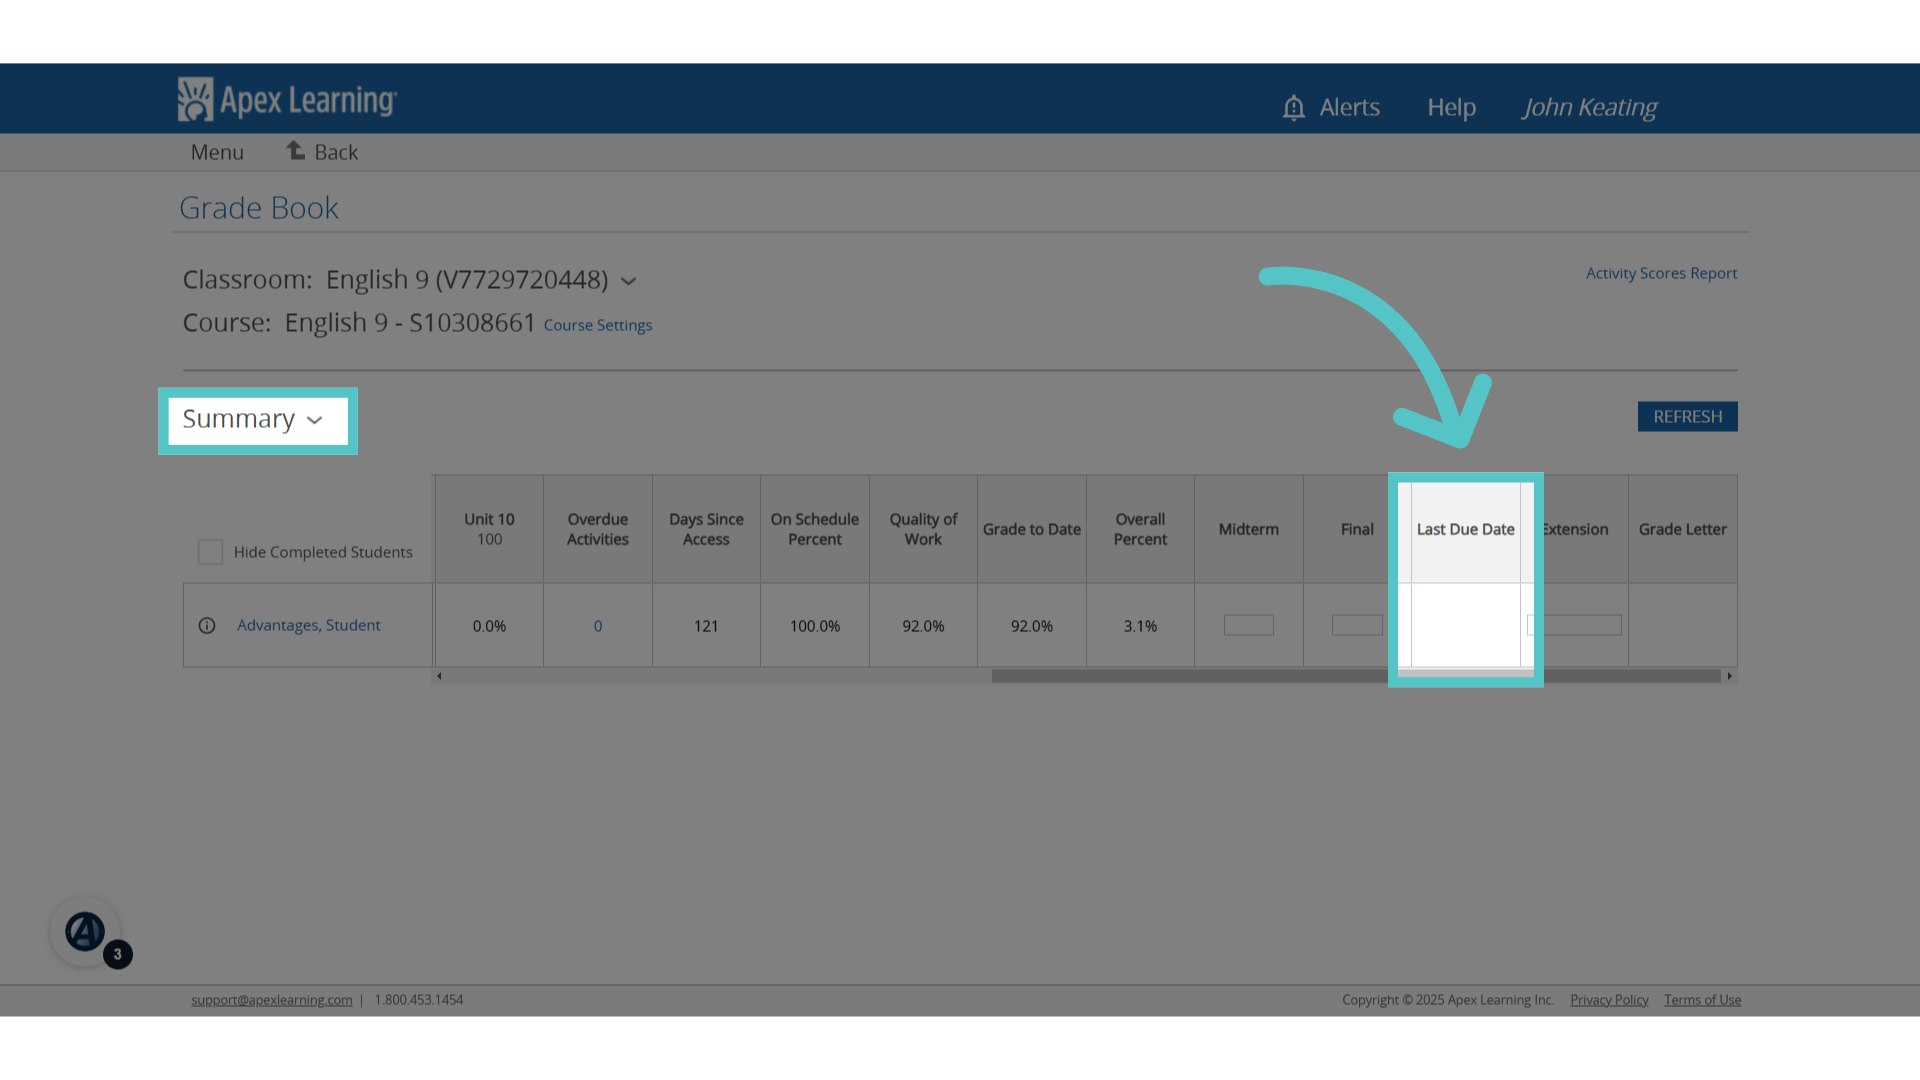
If due dates have been set for activities in the course, then the last scheduled due date will appear in the "Last Due Date" column. If this column is blank, then no due dates have been scheduled.
4. Select Unit
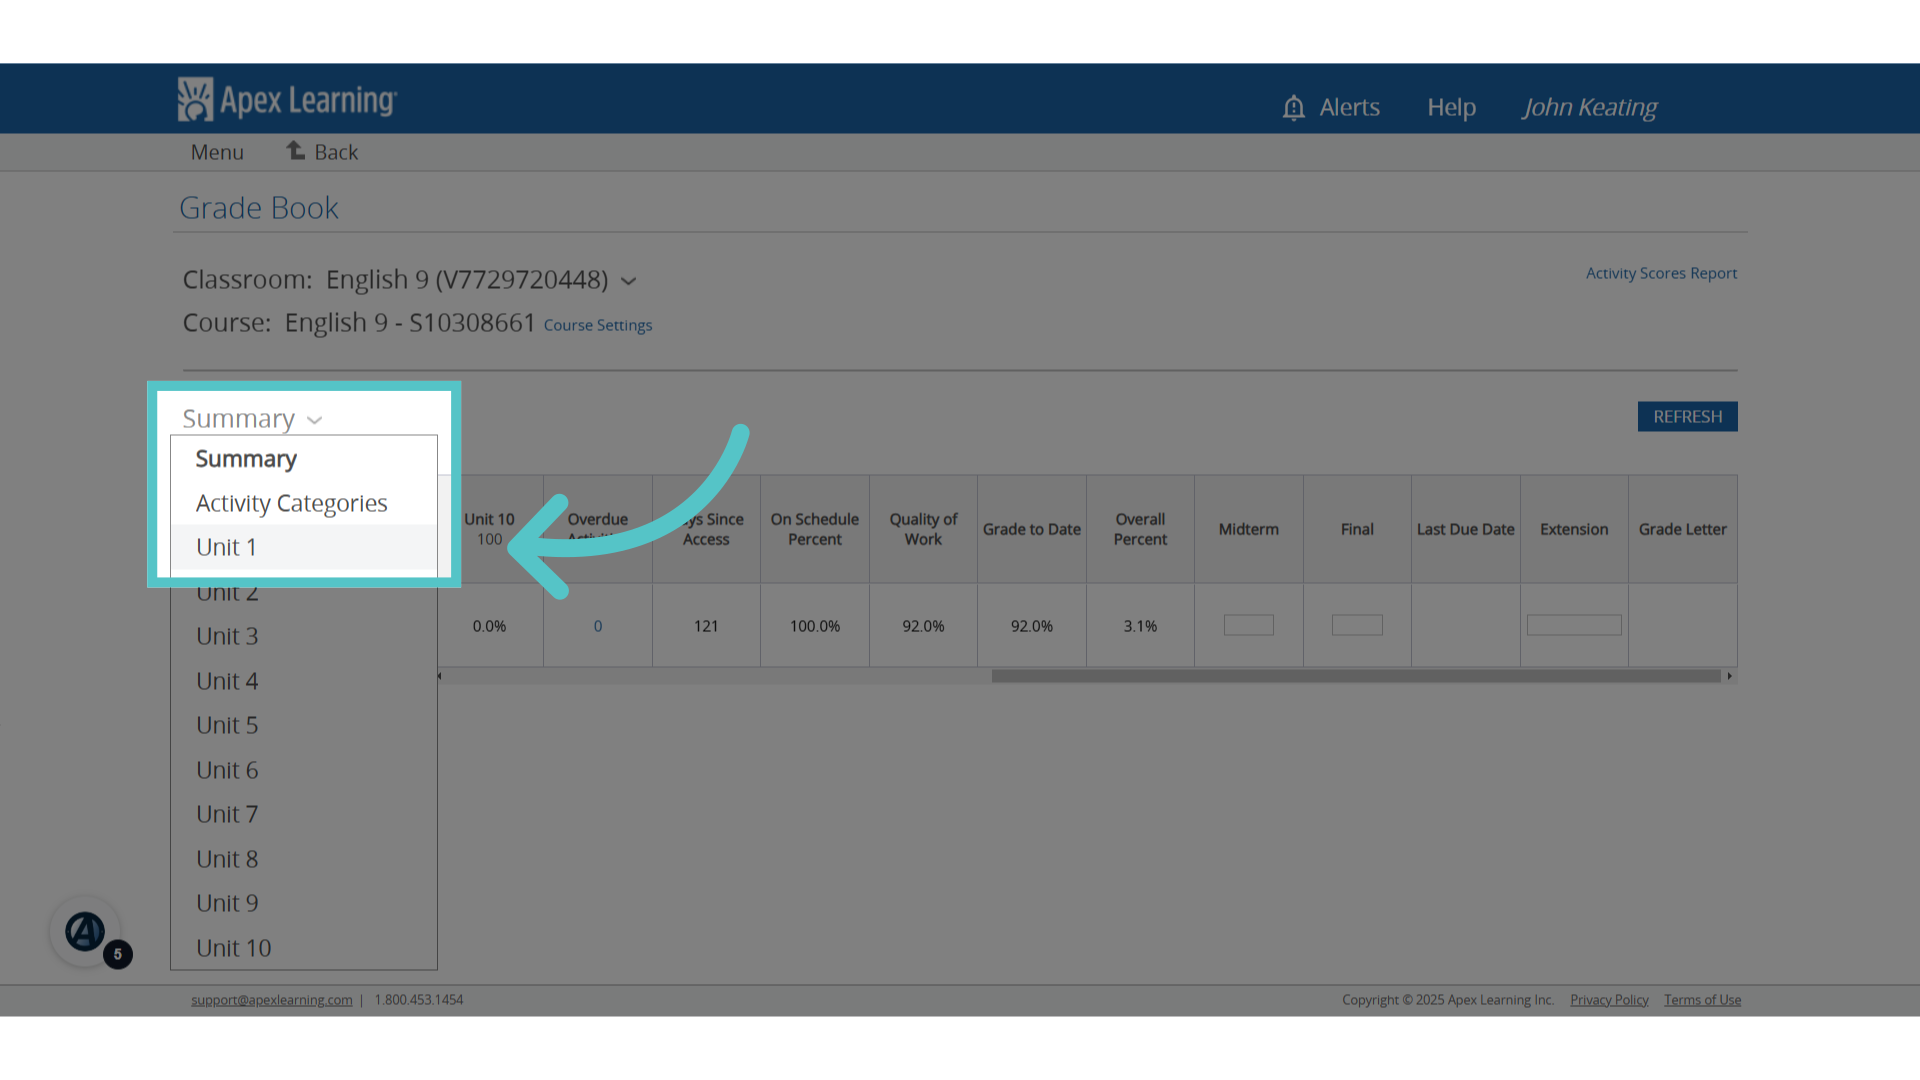
Use the dropdown menu next to "Summary" to select a unit for due dates to begin. If it's a new course, select Unit 1.
5. Course Calendar
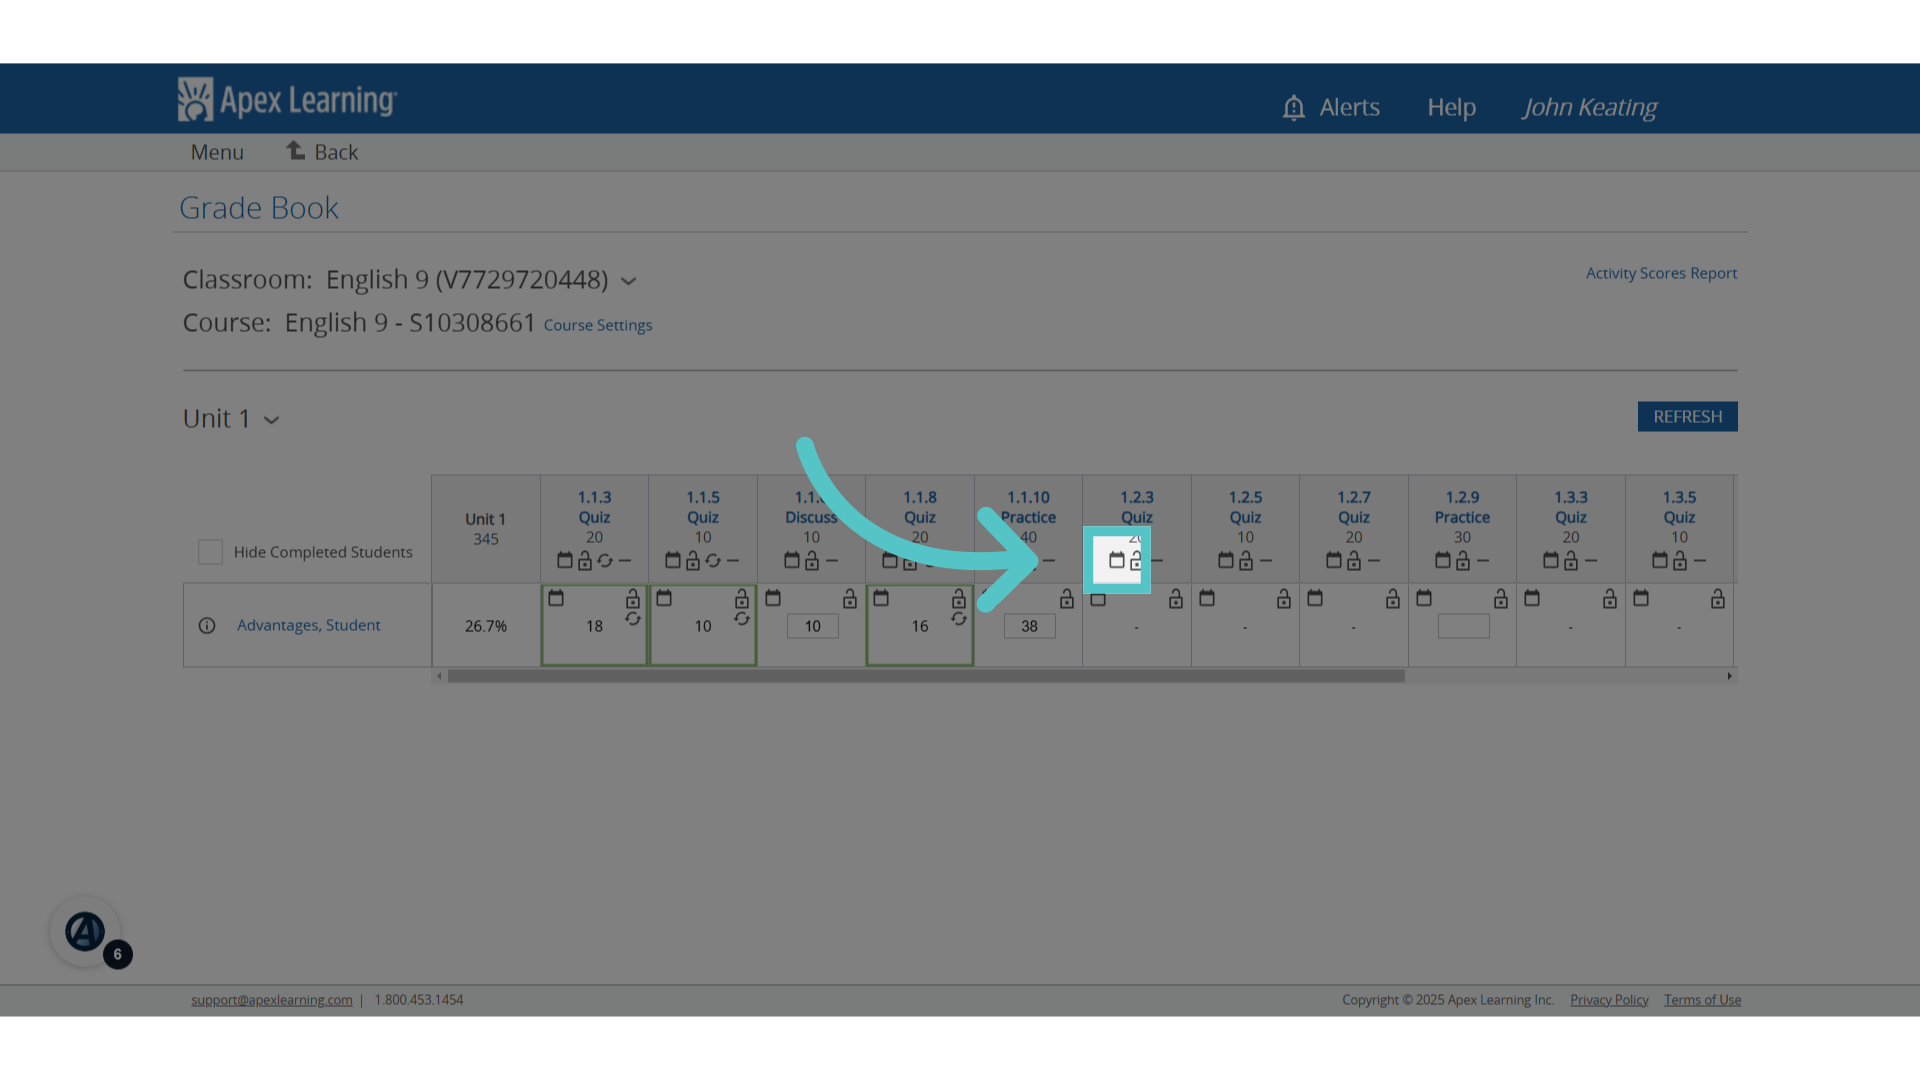
To schedule an activity due date that will apply to everyone in the course, click the calendar icon for that activity in the top, gray, row of the gradebook. Calendar icons in the gray row apply to all students in the course.
6. Select Due Date
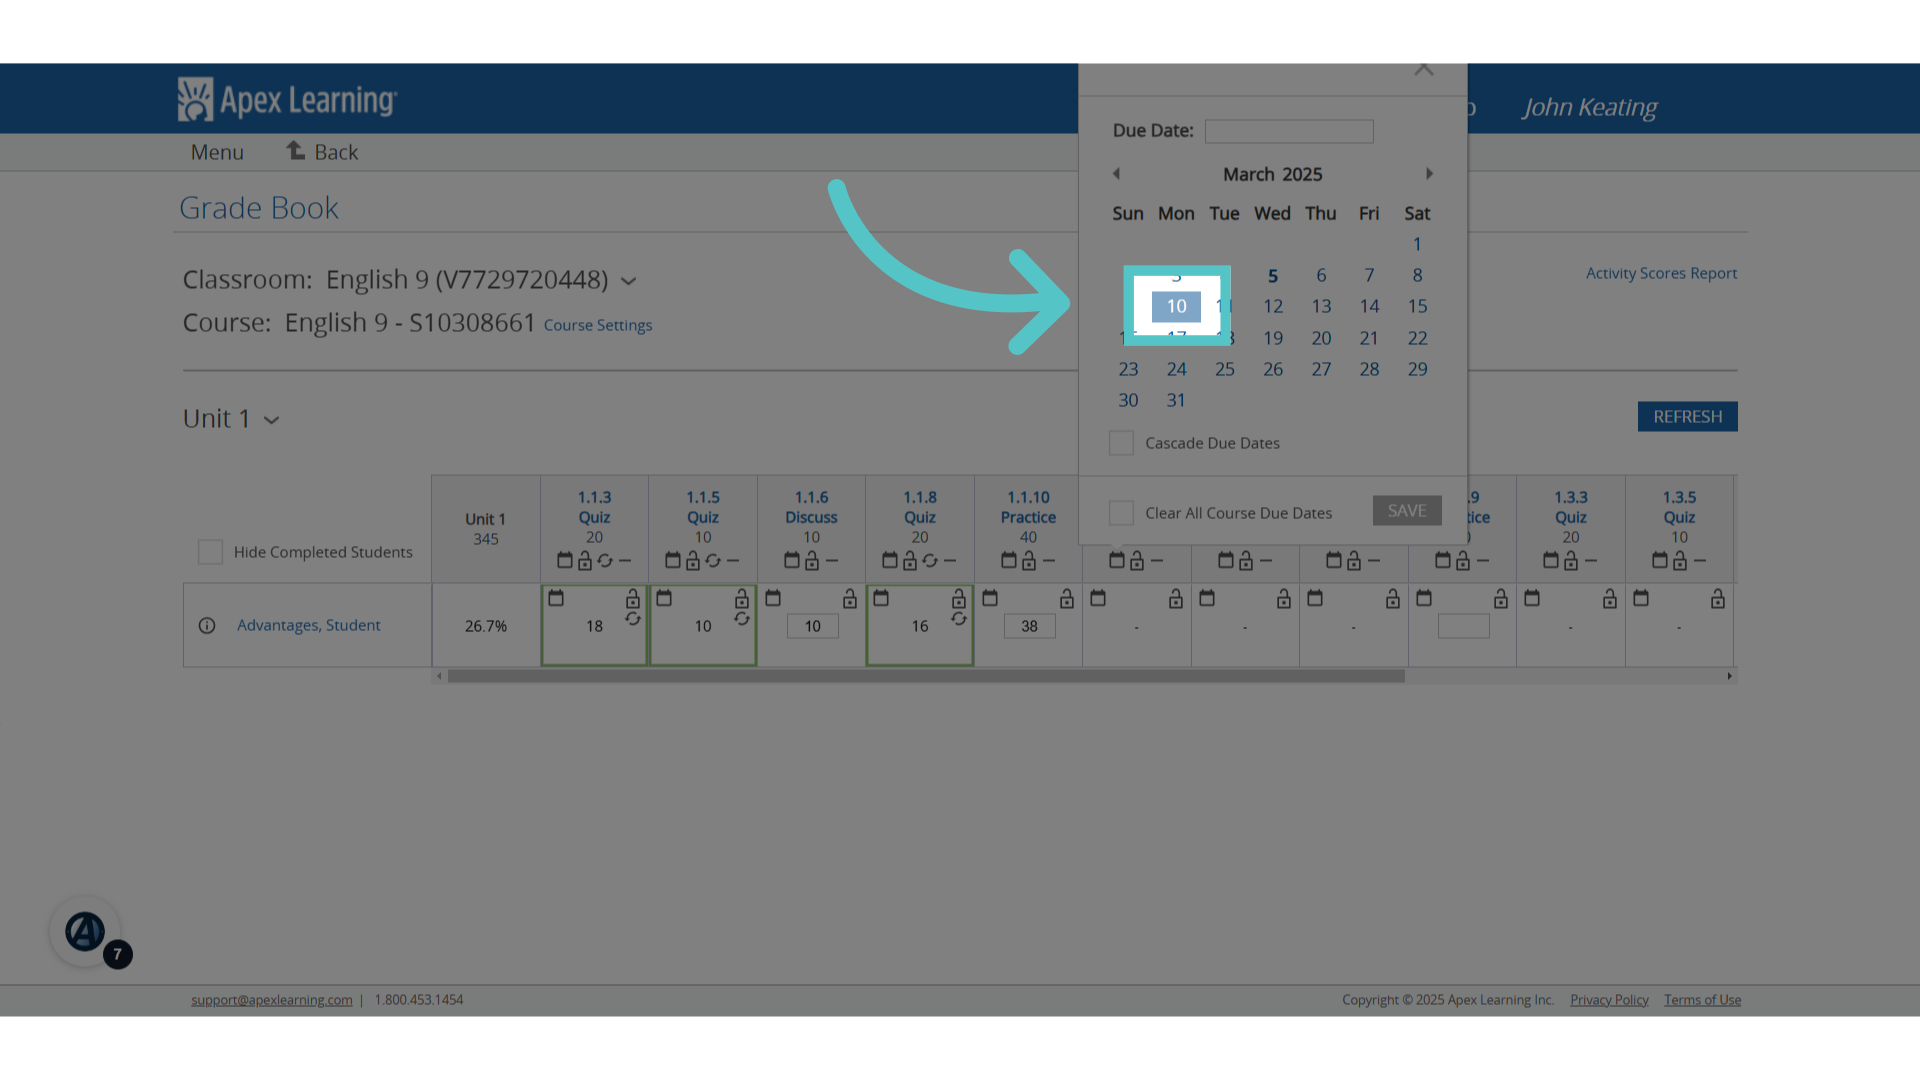
Using the calendar, select a due date for the activity.
7. Cascade Due Dates
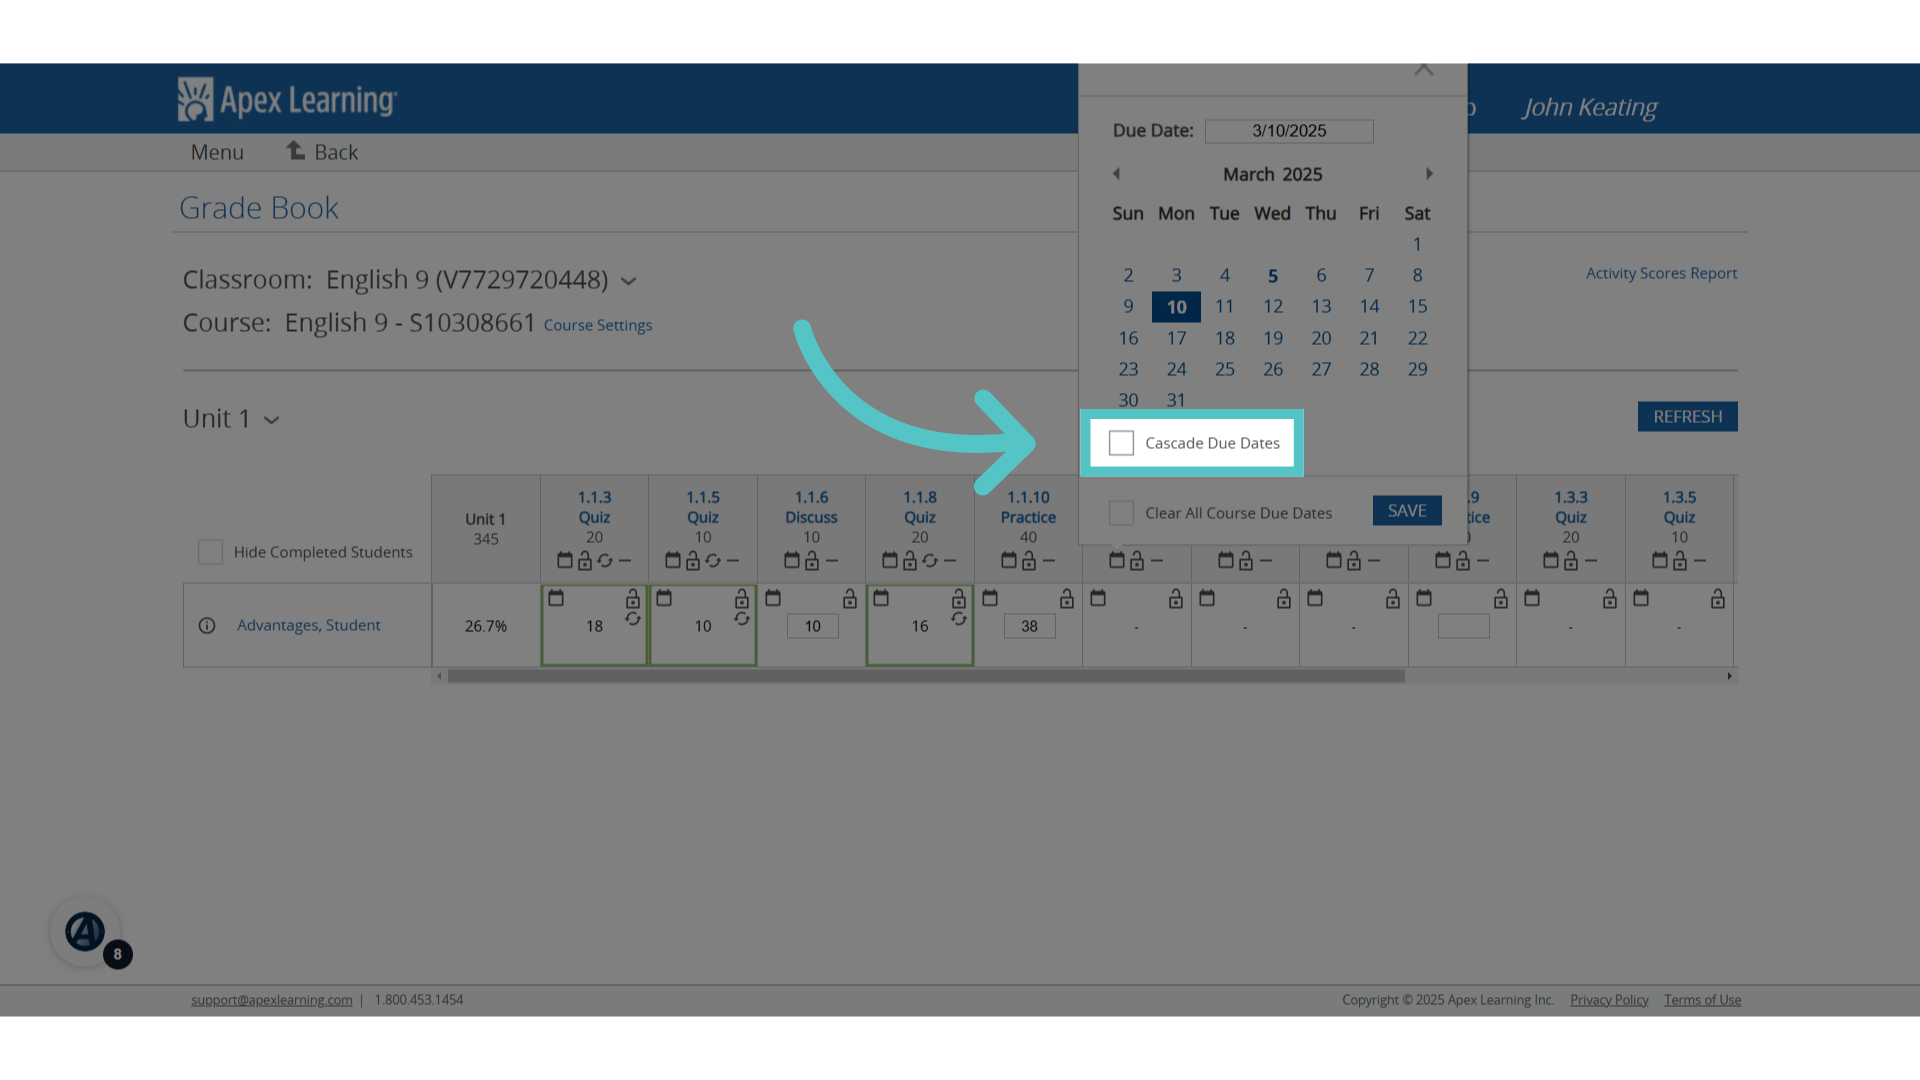
Saving here will set one due date for one activity. To have the computer continue setting due dates for all activities in the entire course, select the box for "Cascade Due Dates."
8. Select End Date
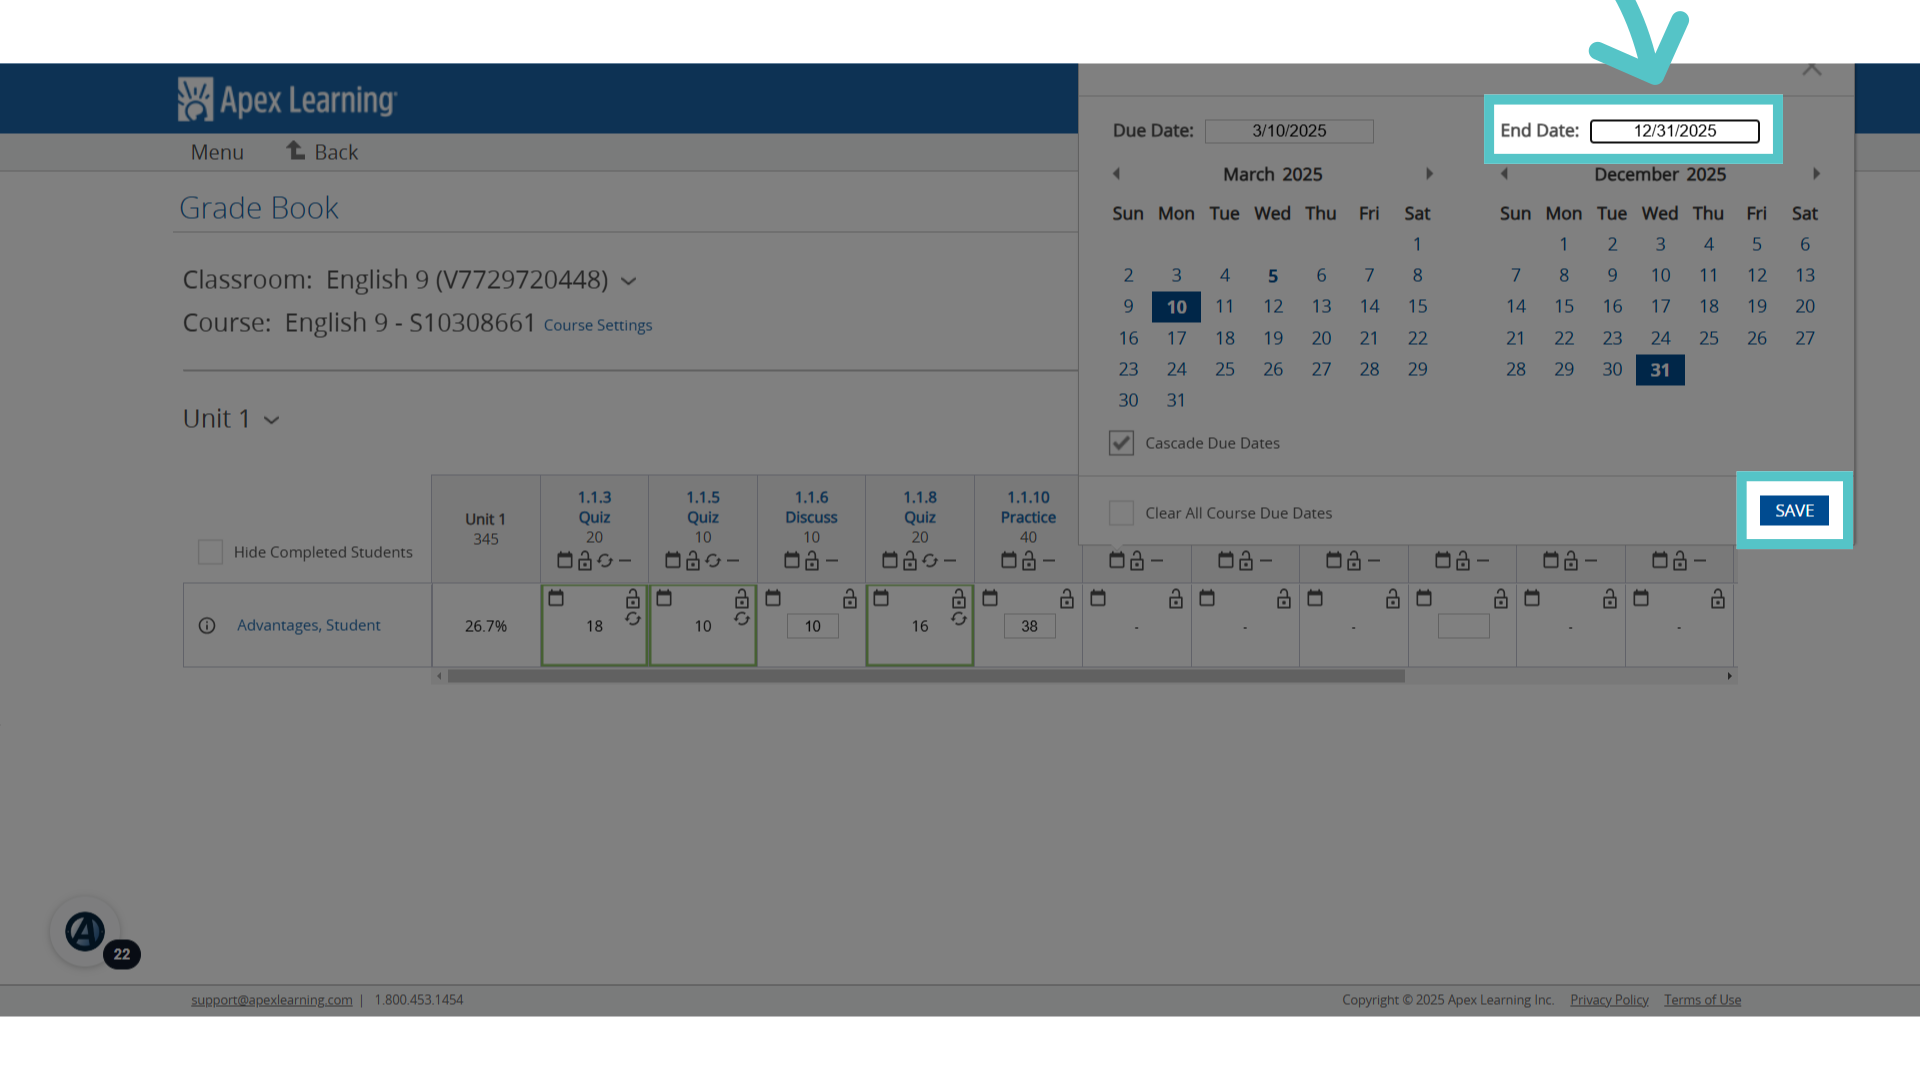
A second calendar will appear. Enter the end date for the entire course. Activities will all be given due dates that are paced to end on this course end date. Be sure to save your dates.
9. Scheduled
Calendar icons in the gradebook will turn blue with a checkmark in the middle, indicating that the activity has a scheduled due date. Hover the mouse arrow over the calendar icon to see the due date.
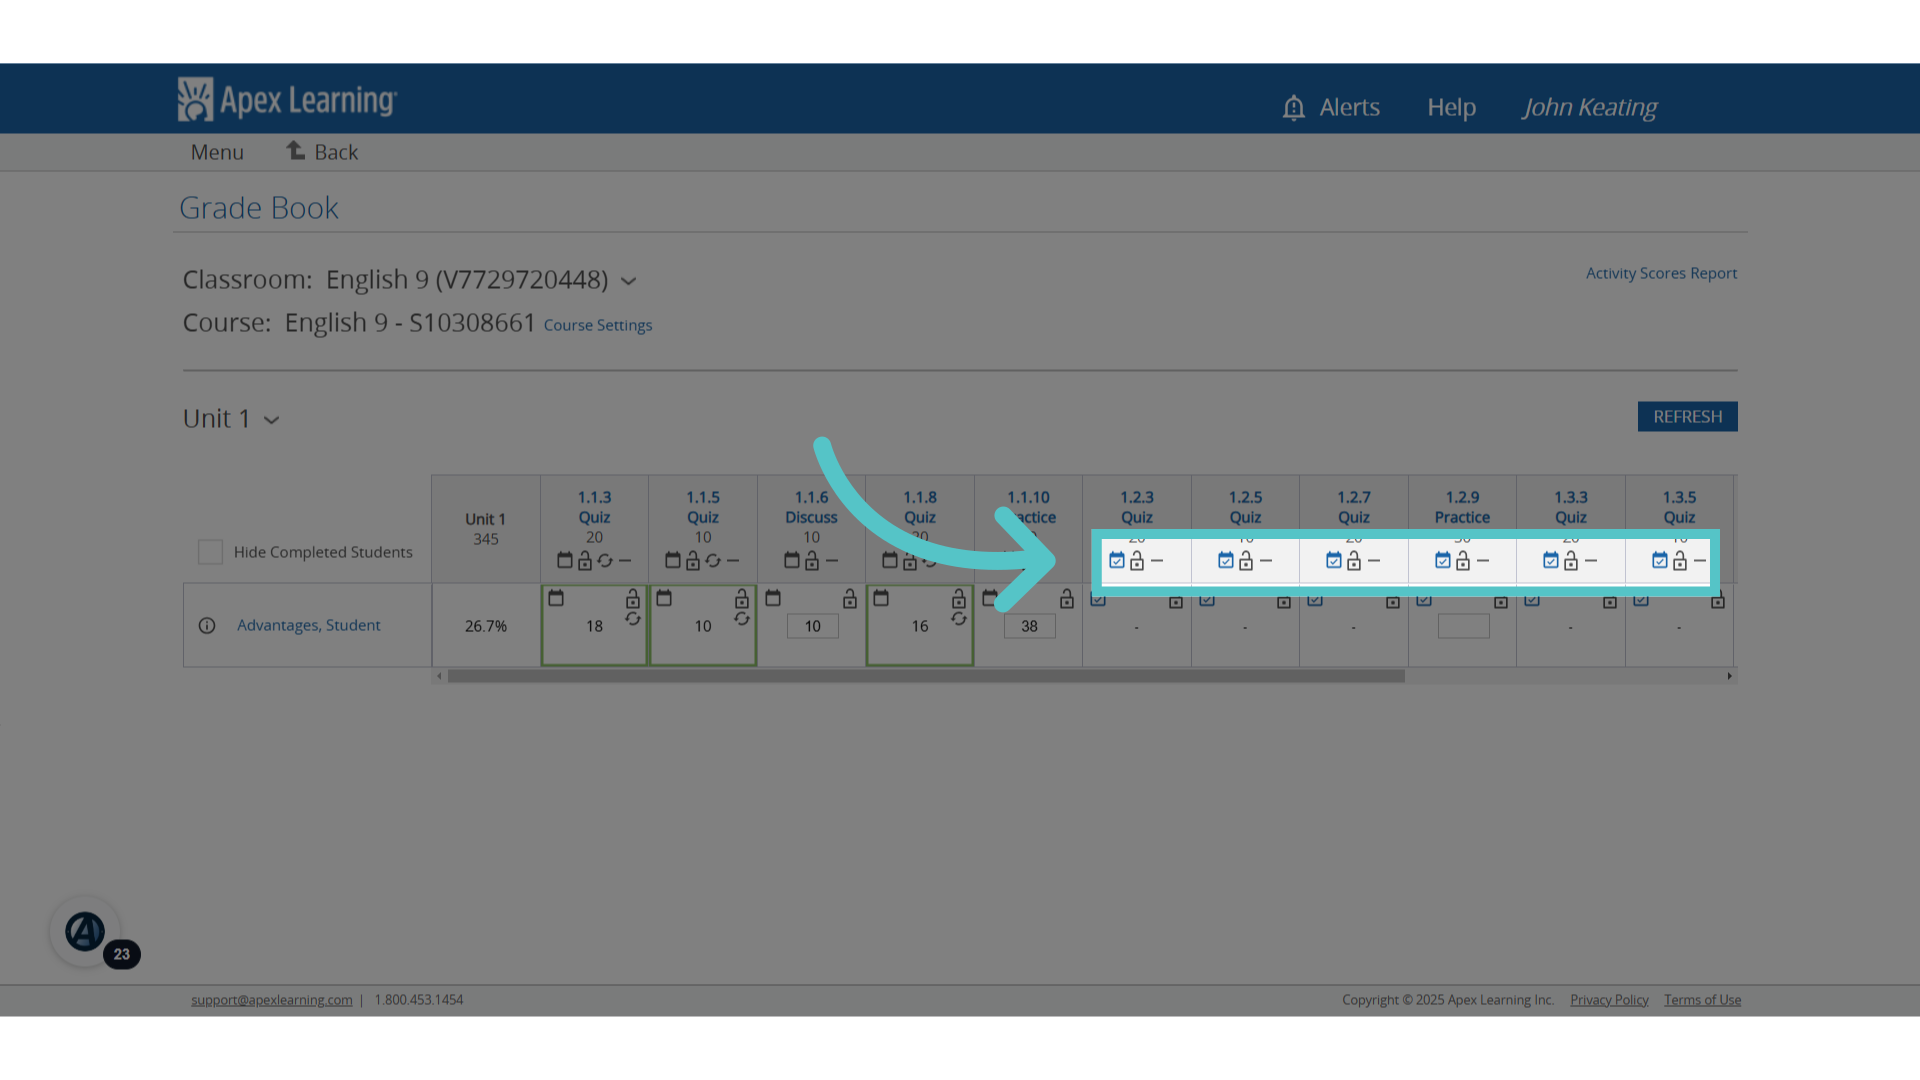
10. Student due date
Due dates can be set or edited for individual students using the calendar icons on the student row. Click on the calendar icon for an activity in a student row if their due dates need to be individualized.
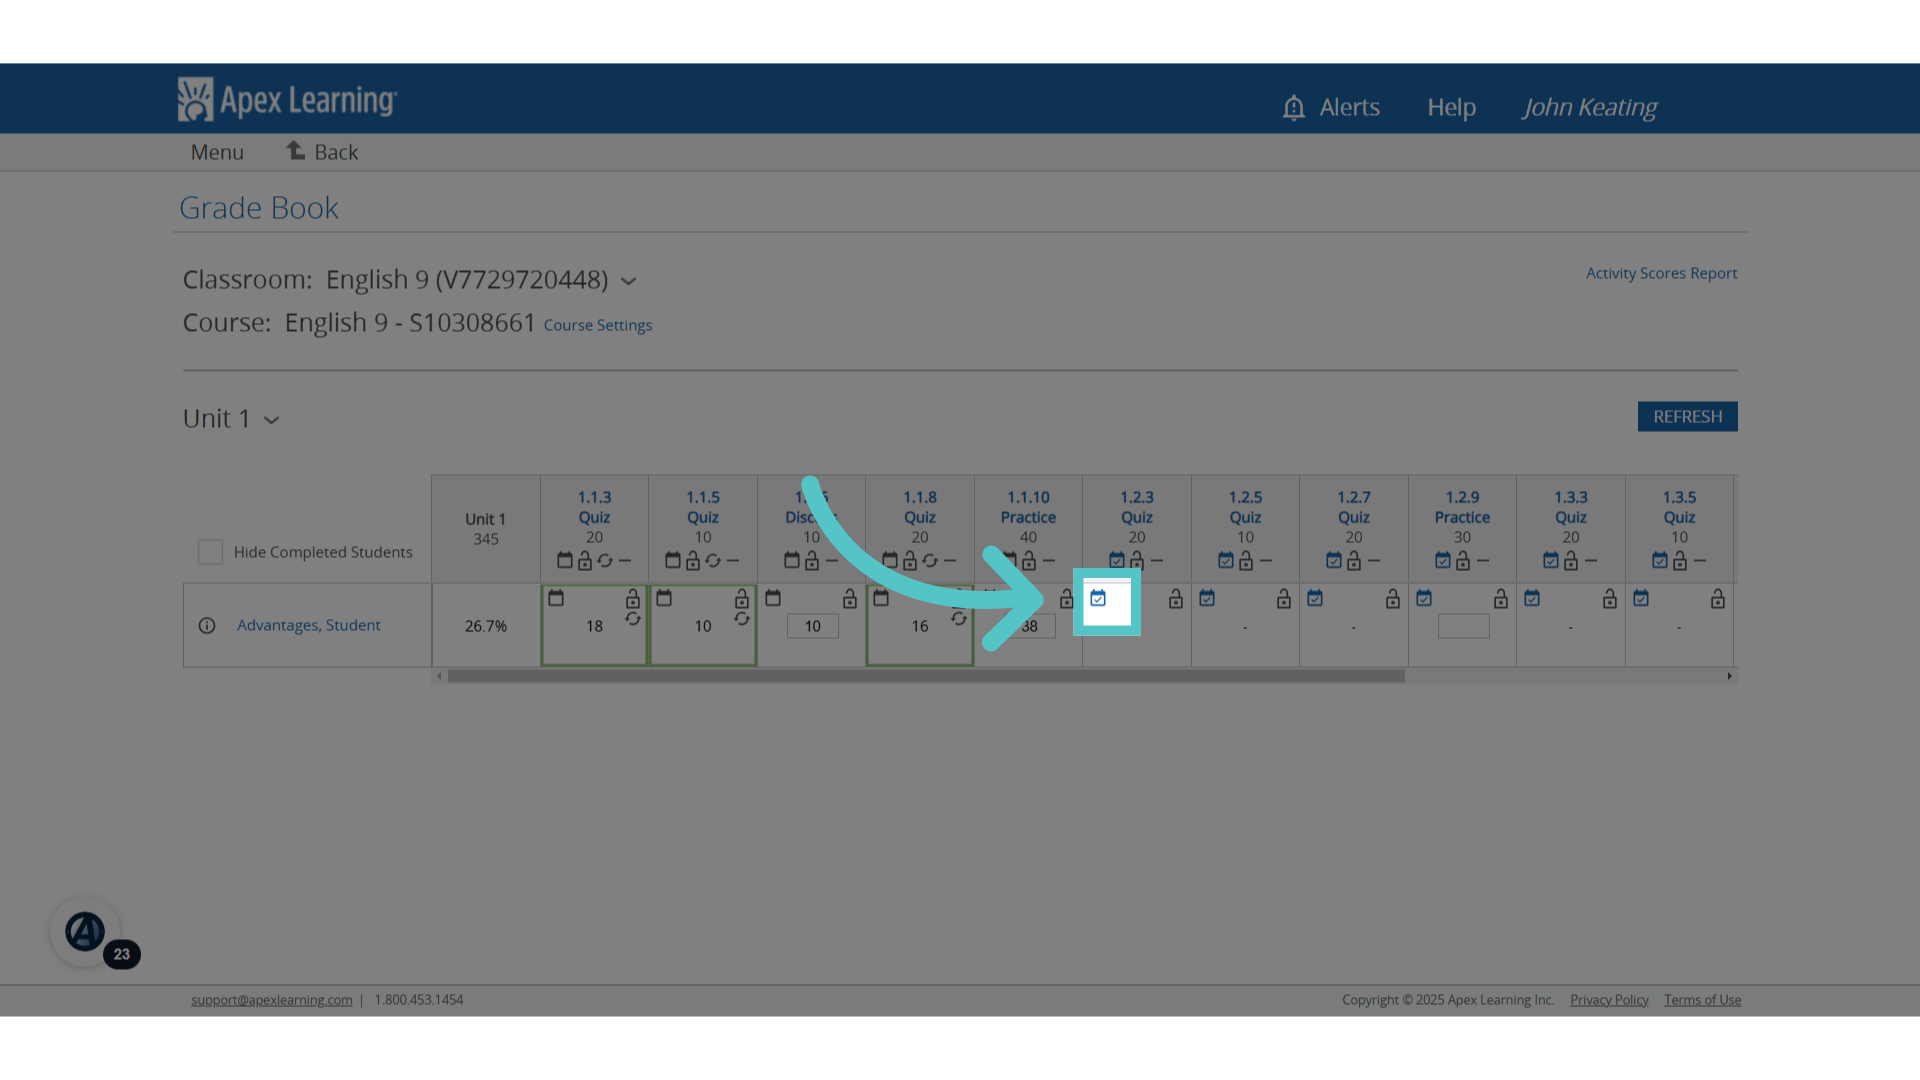
11. Individual Due Date
Set or change a due date for the activity for this student. This will not affect due dates that have been set for any other students in the course.
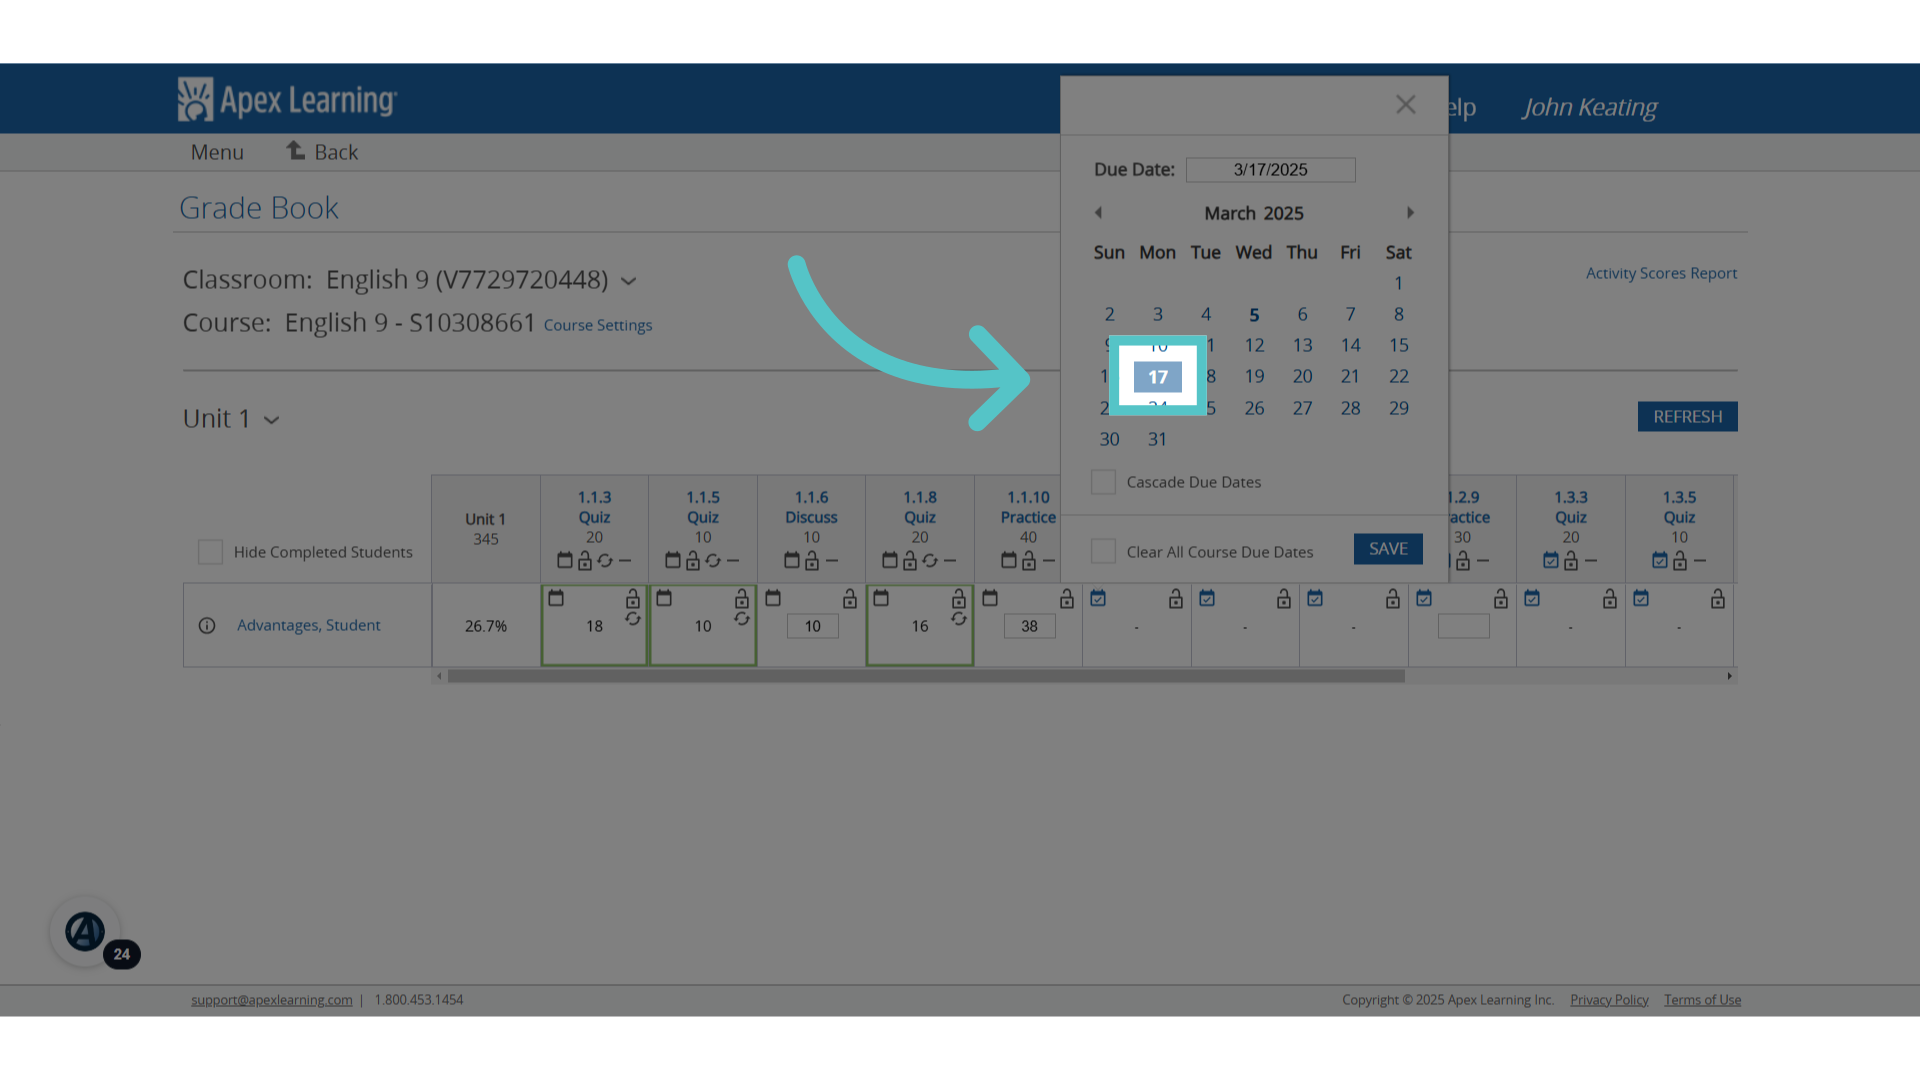
12. Individual Cascade
Check the "Cascade Due Dates" box to individualize the course pace and set an end date for this student. This will not change the course end date or assigned due dates for other students in the course. Be sure to save.
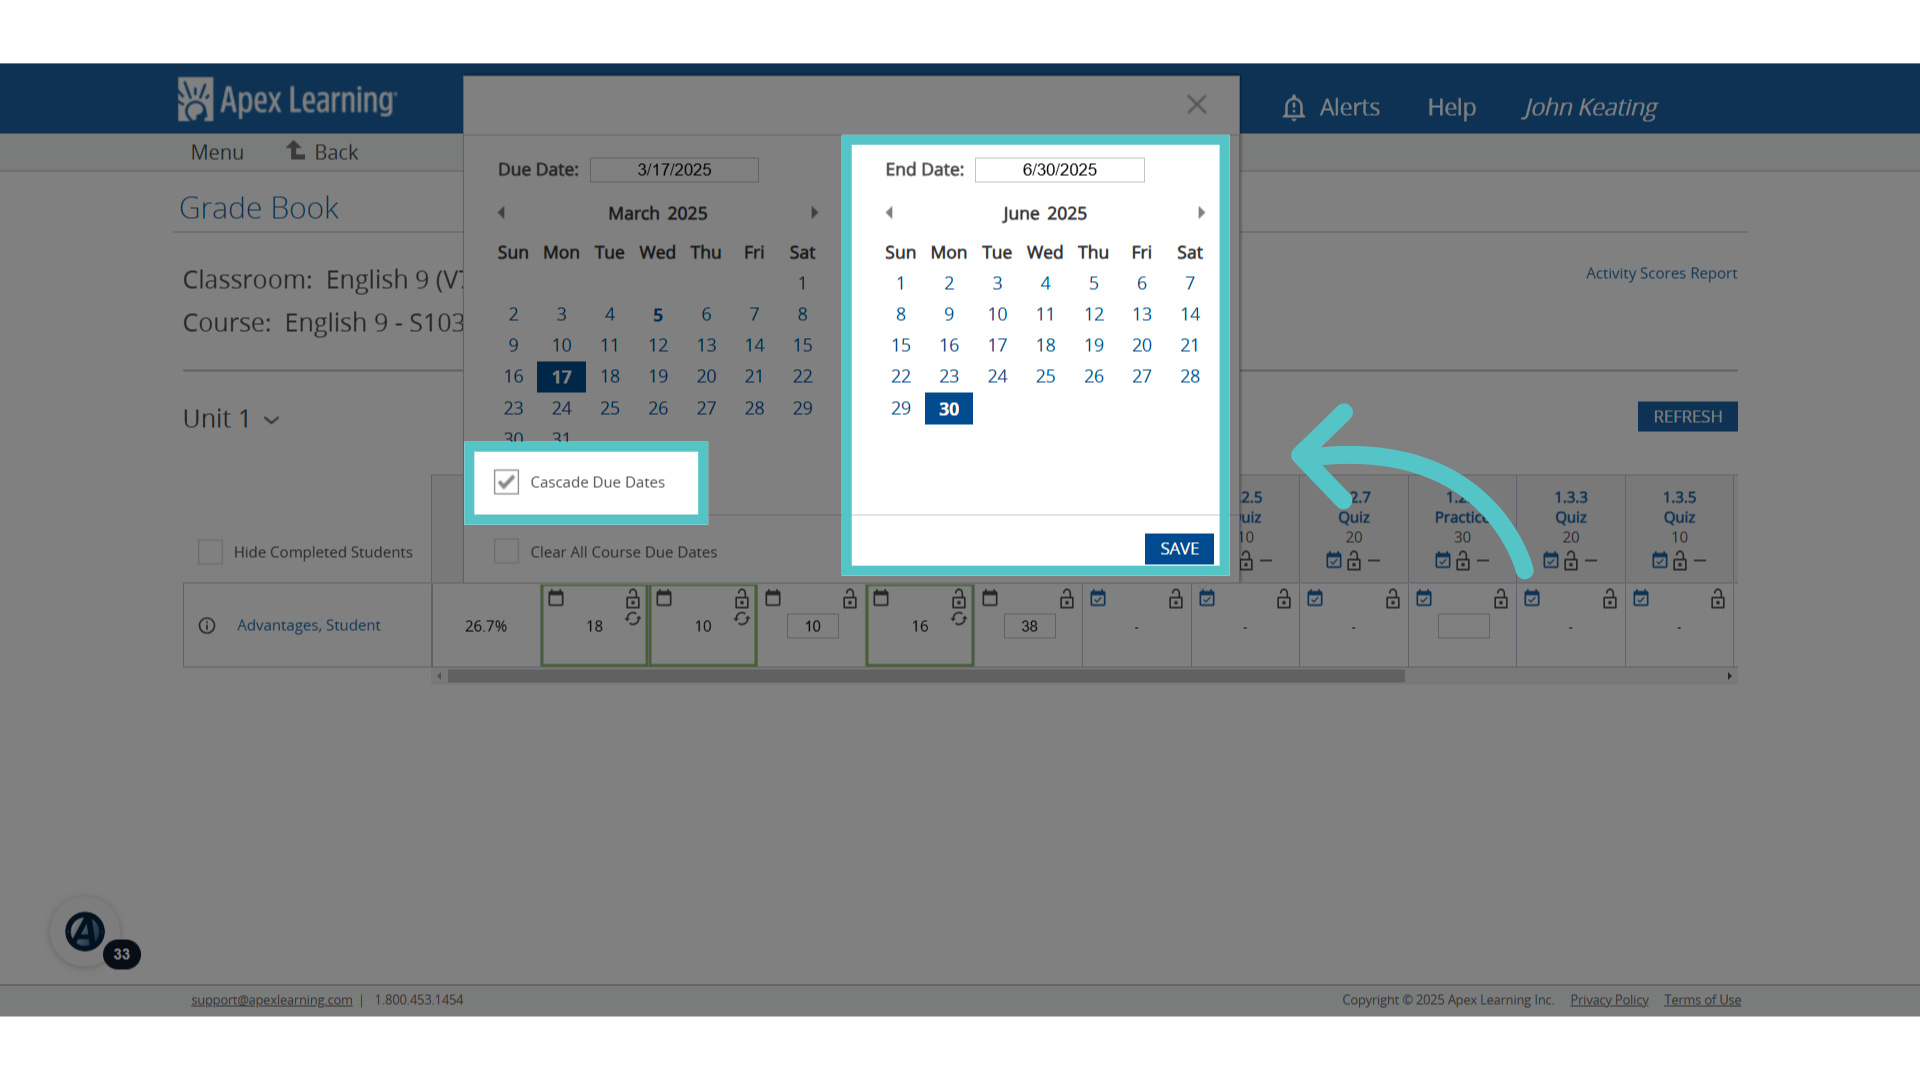
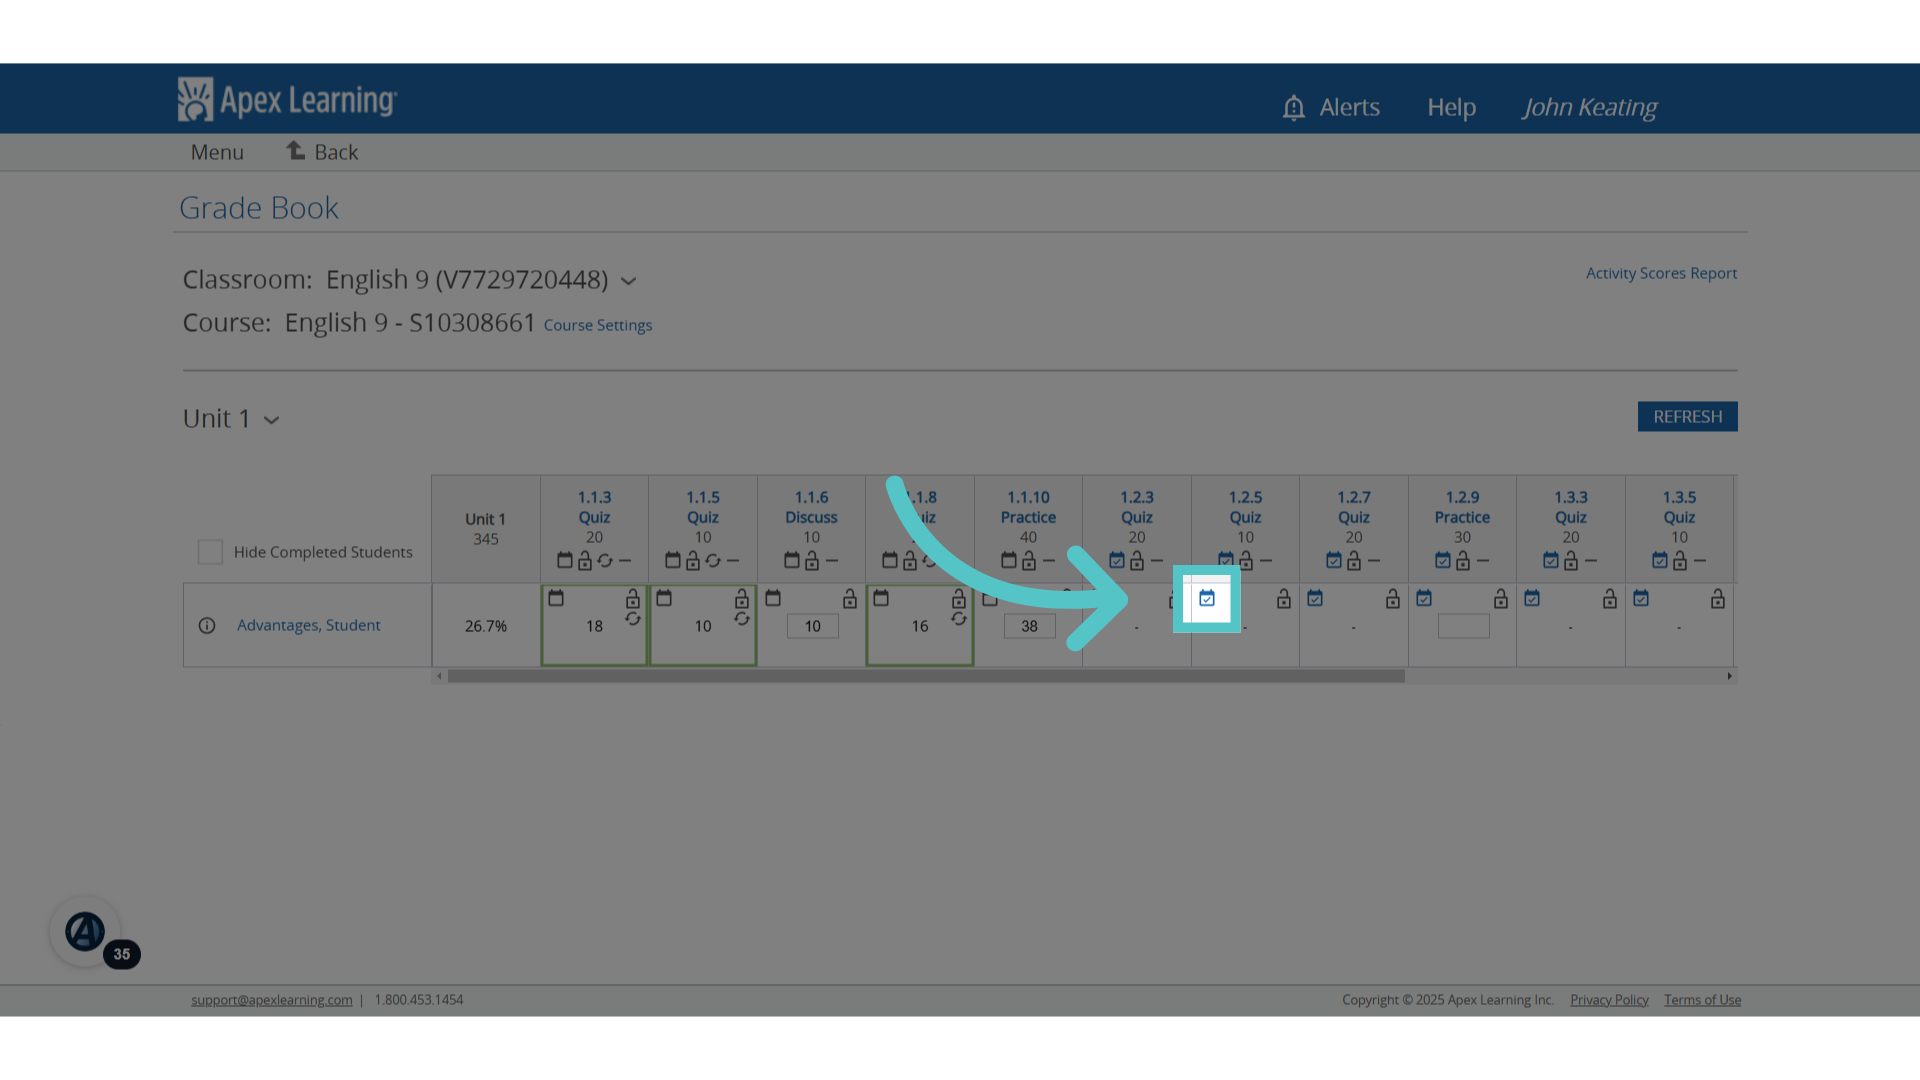
13. Hover
Hover the mouse over the calendar icons to see the dates set for individual students.
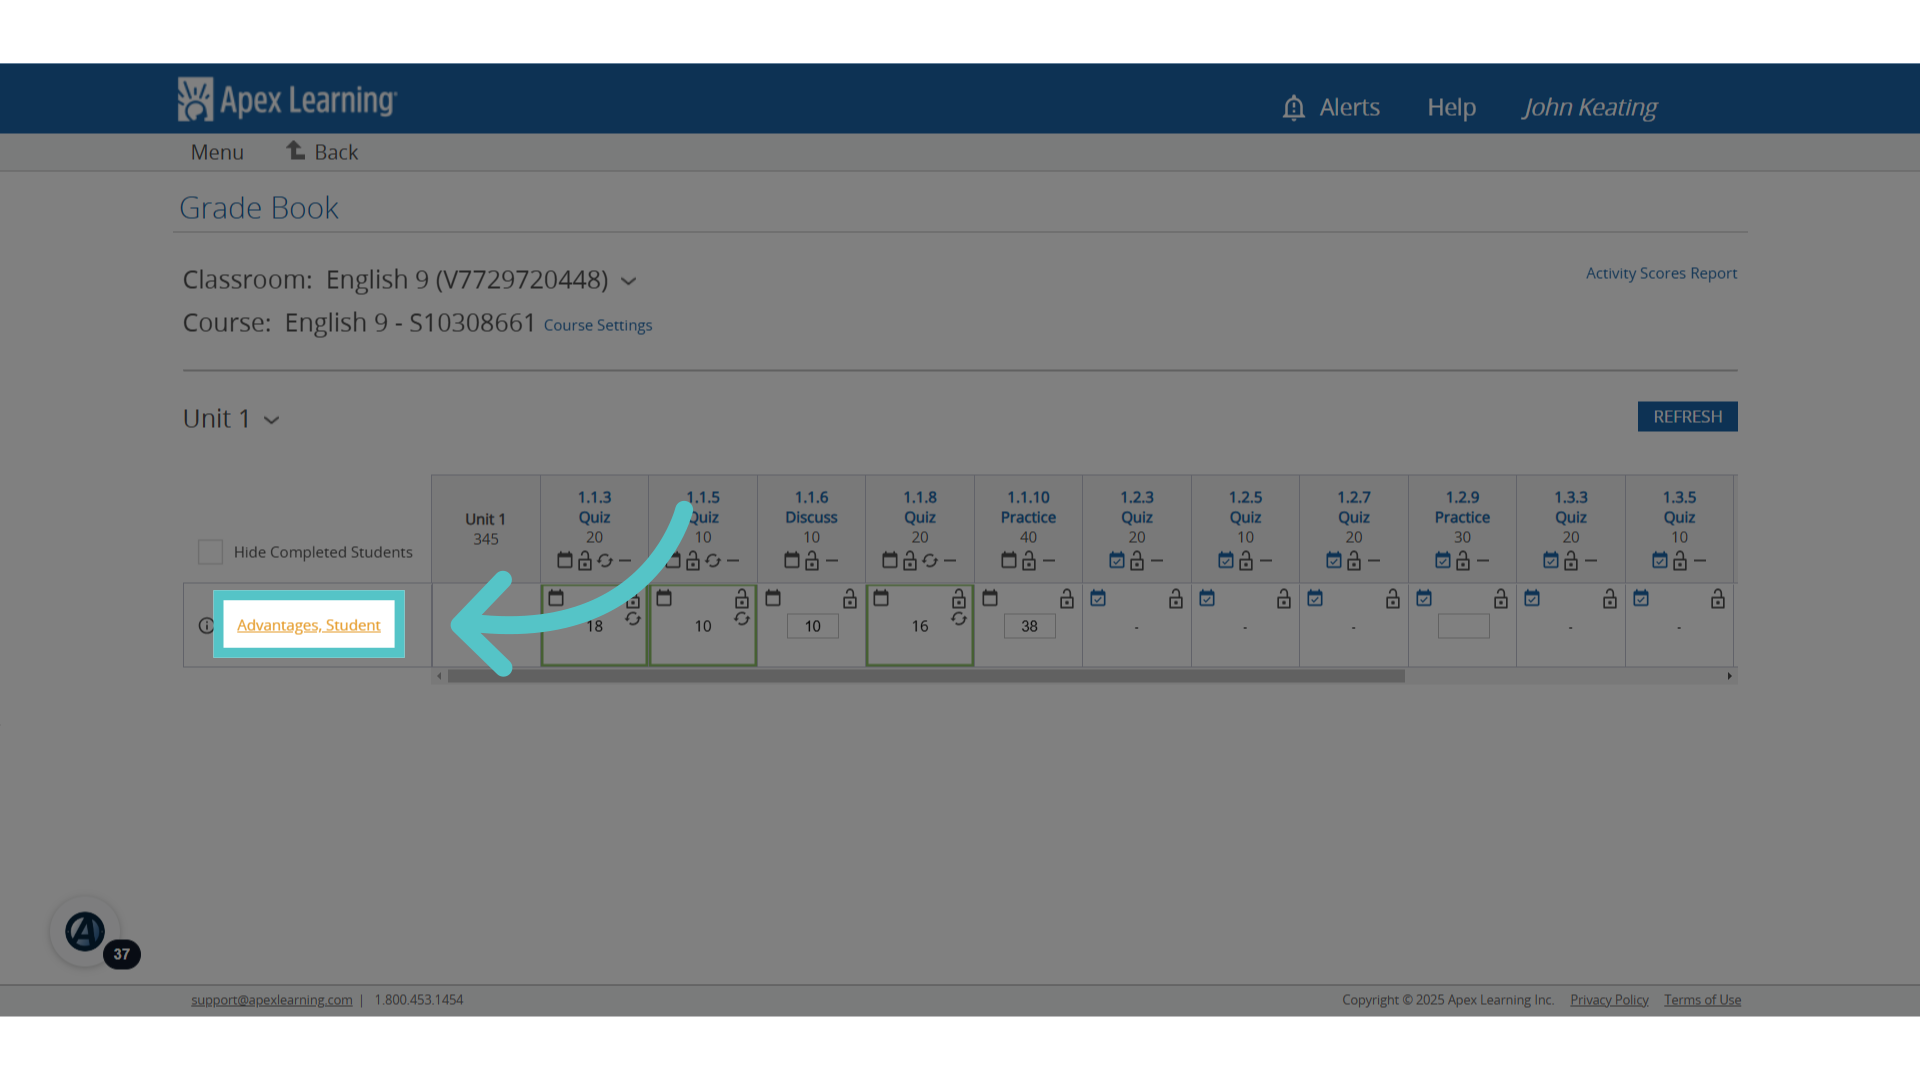
14. Click Student Name
Click on a student name from the roster to see the due date timeline for all activities in the course.
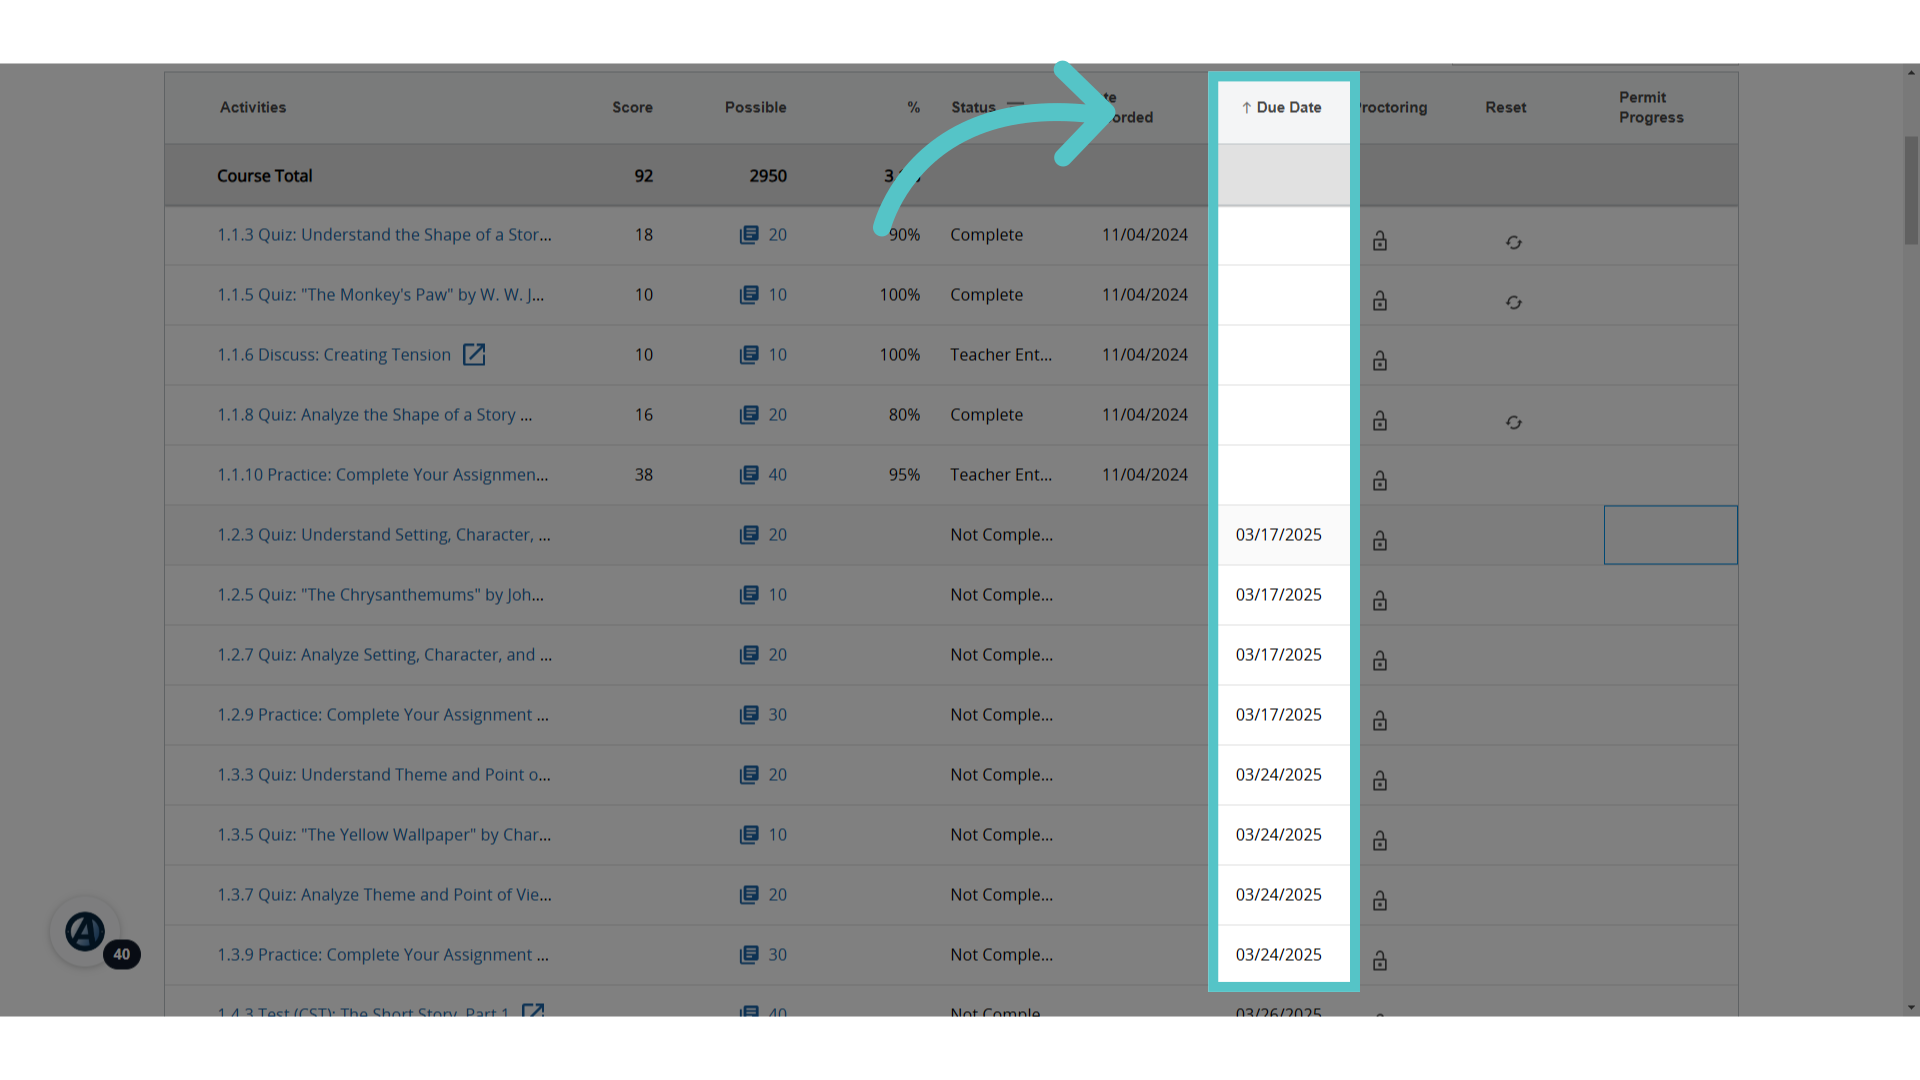
15. Due Date Timeline
Every activity in the course will be listed with the scheduled due date.
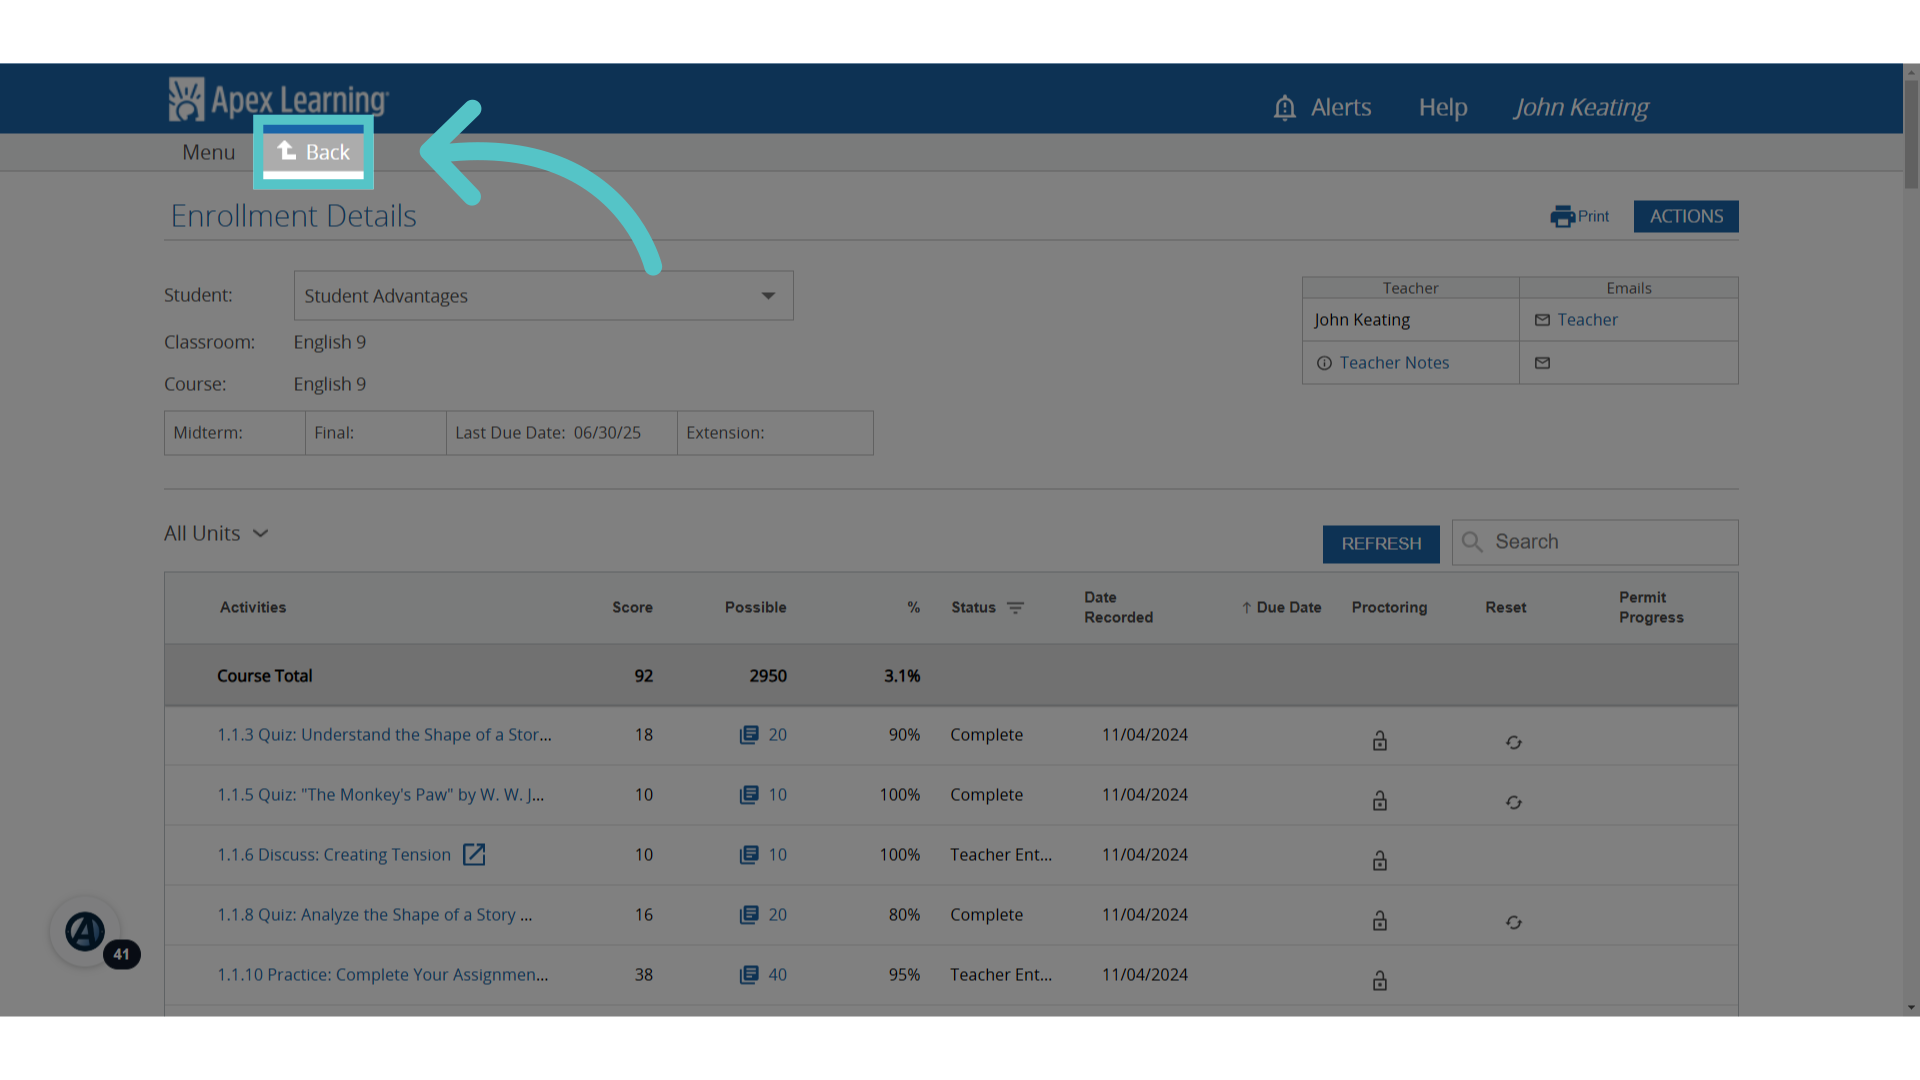
16. Click "Back"
Click the "Back" option to return to the gradebook view.
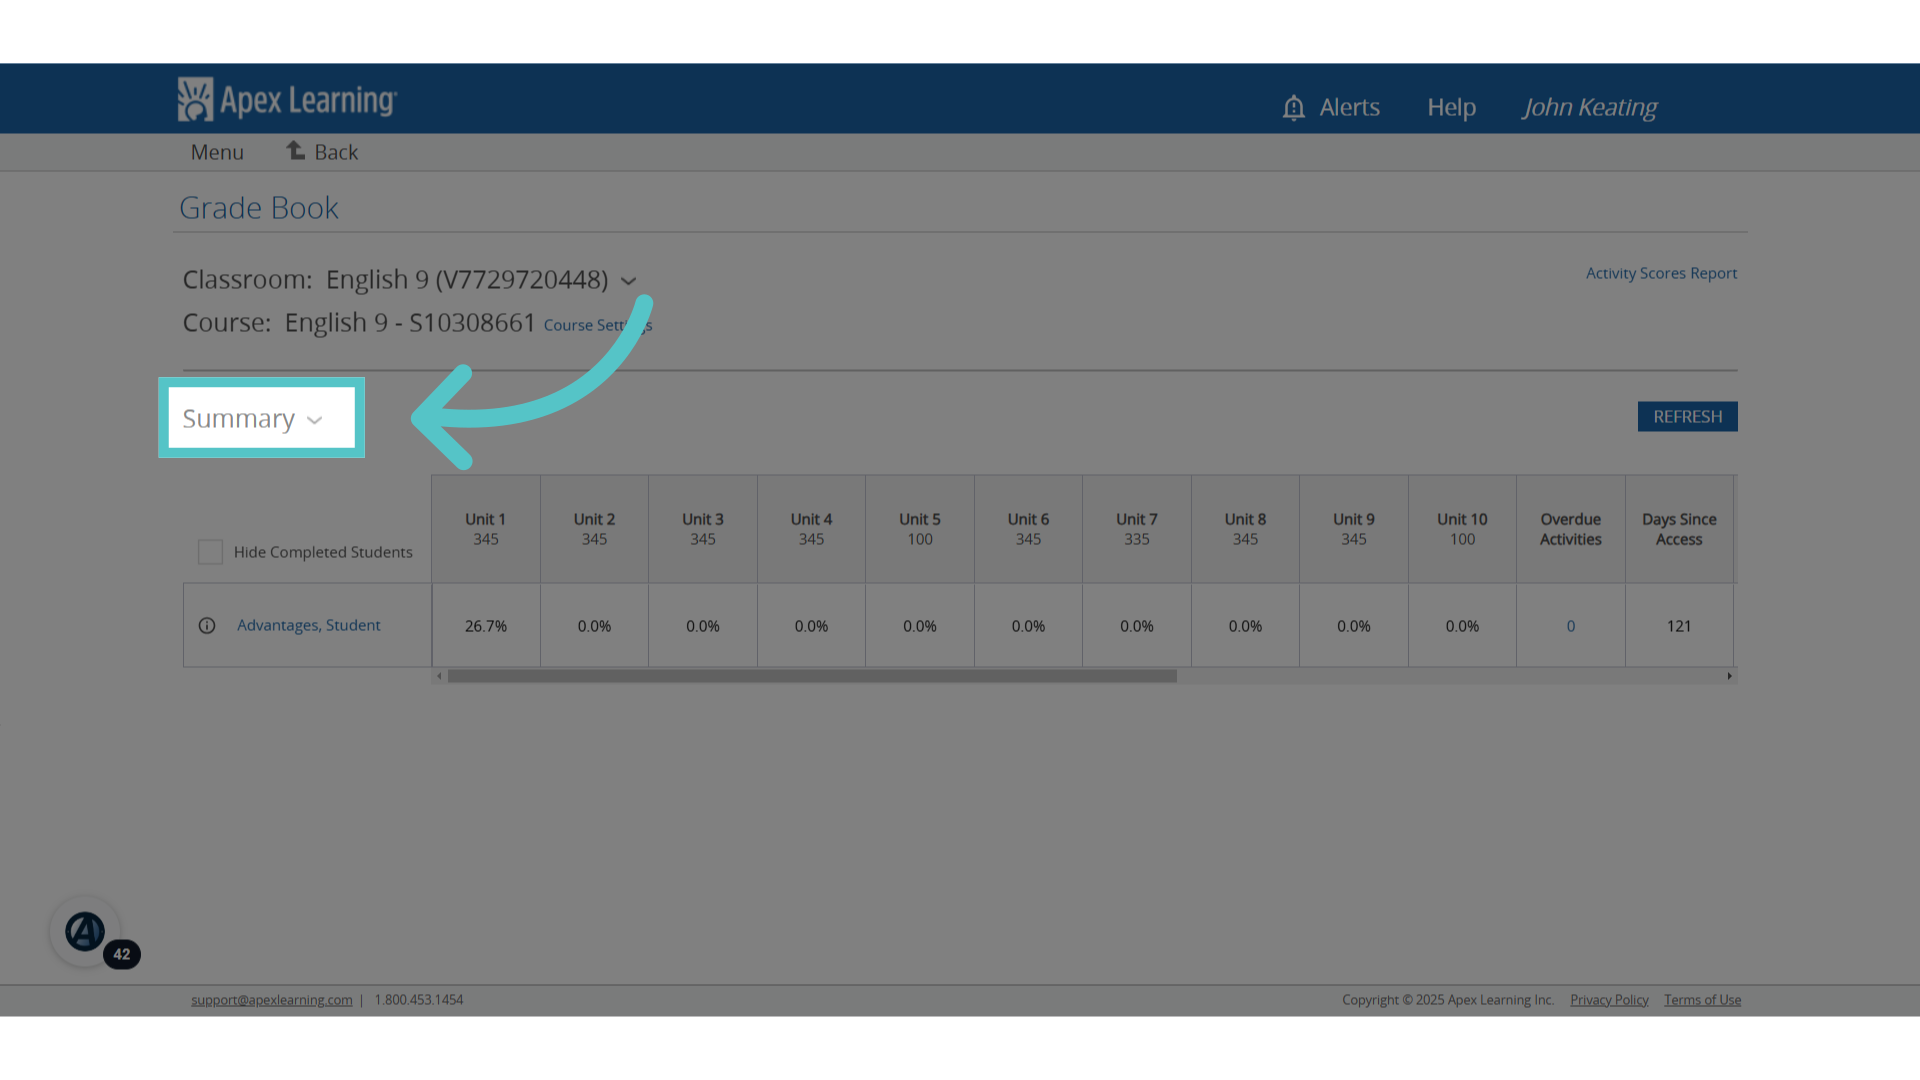
17. Click "Summary"
Return to the Gradebook Summary Page.
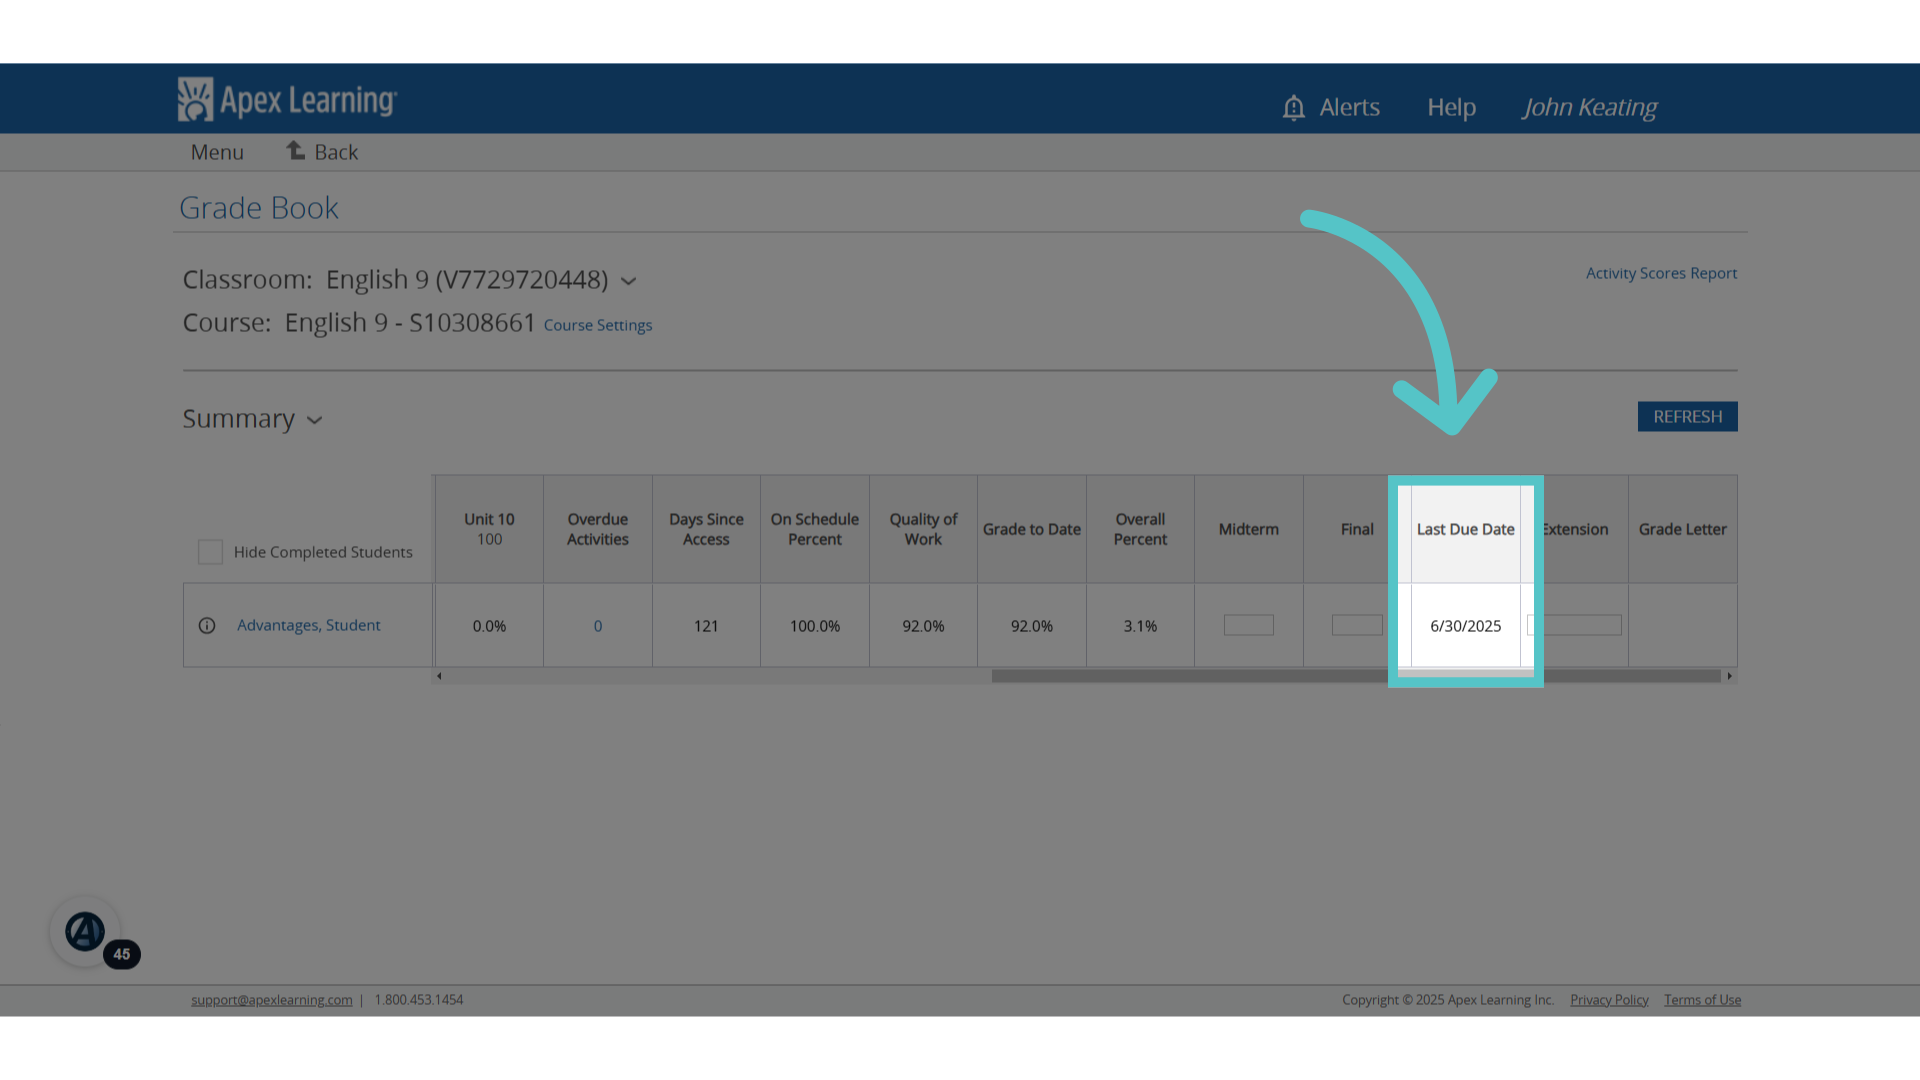
18. Last Due Date
Once due dates are set, the final due date for the course will be listed in the Last Due Date Column. All due dates will appear on student calendars in ASSIST.
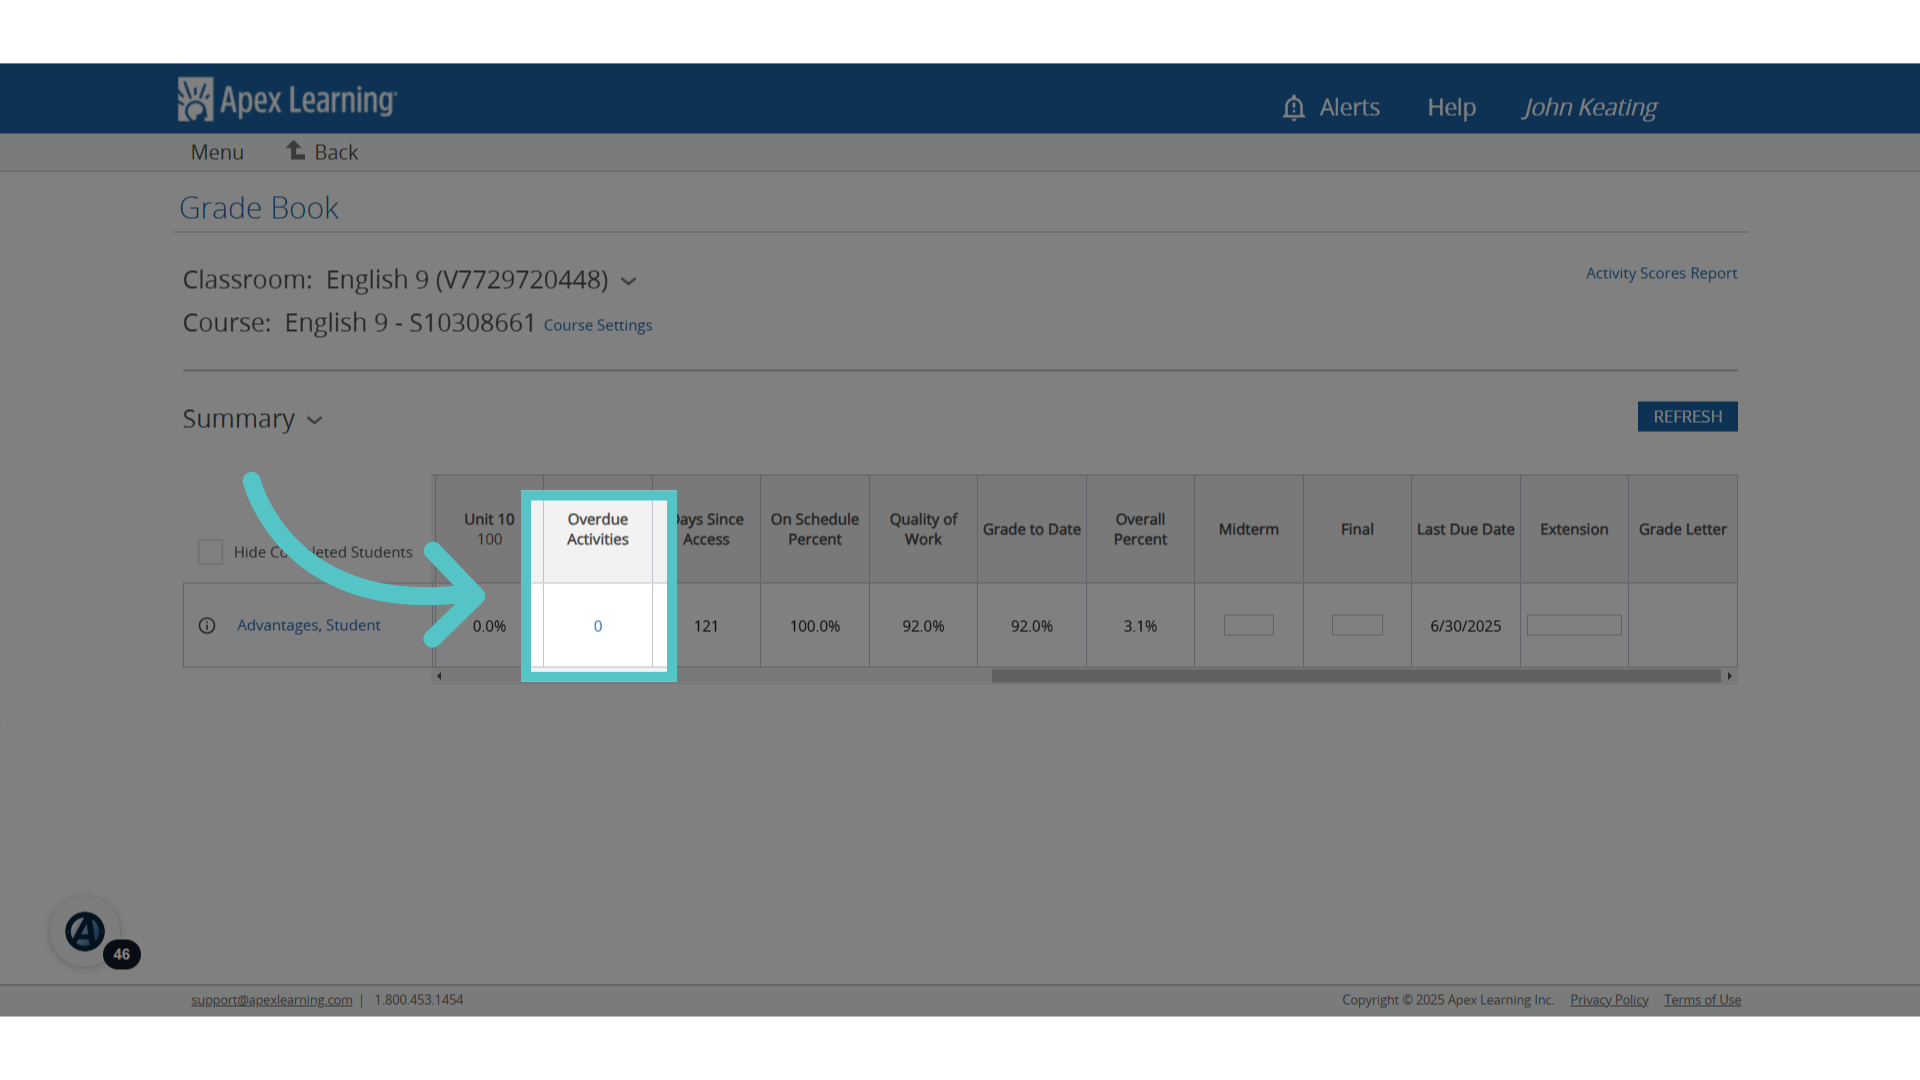
19. Overdue Activities
Please note: Overdue activities will be calculated as a zero in the student grade-to-date until they are submitted and scored. Full credit can still be earned.
If you have any questions about the information in this tutorial, please click "Contact Support" to submit a help request. Contact Support