Expand to Full Screen for Best Viewing
This guide will walk you through the process of enrolling students into a course from the section in ASSIST. From accessing the learning section to finalizing the enrollment, each step is detailed to ensure a seamless experience.
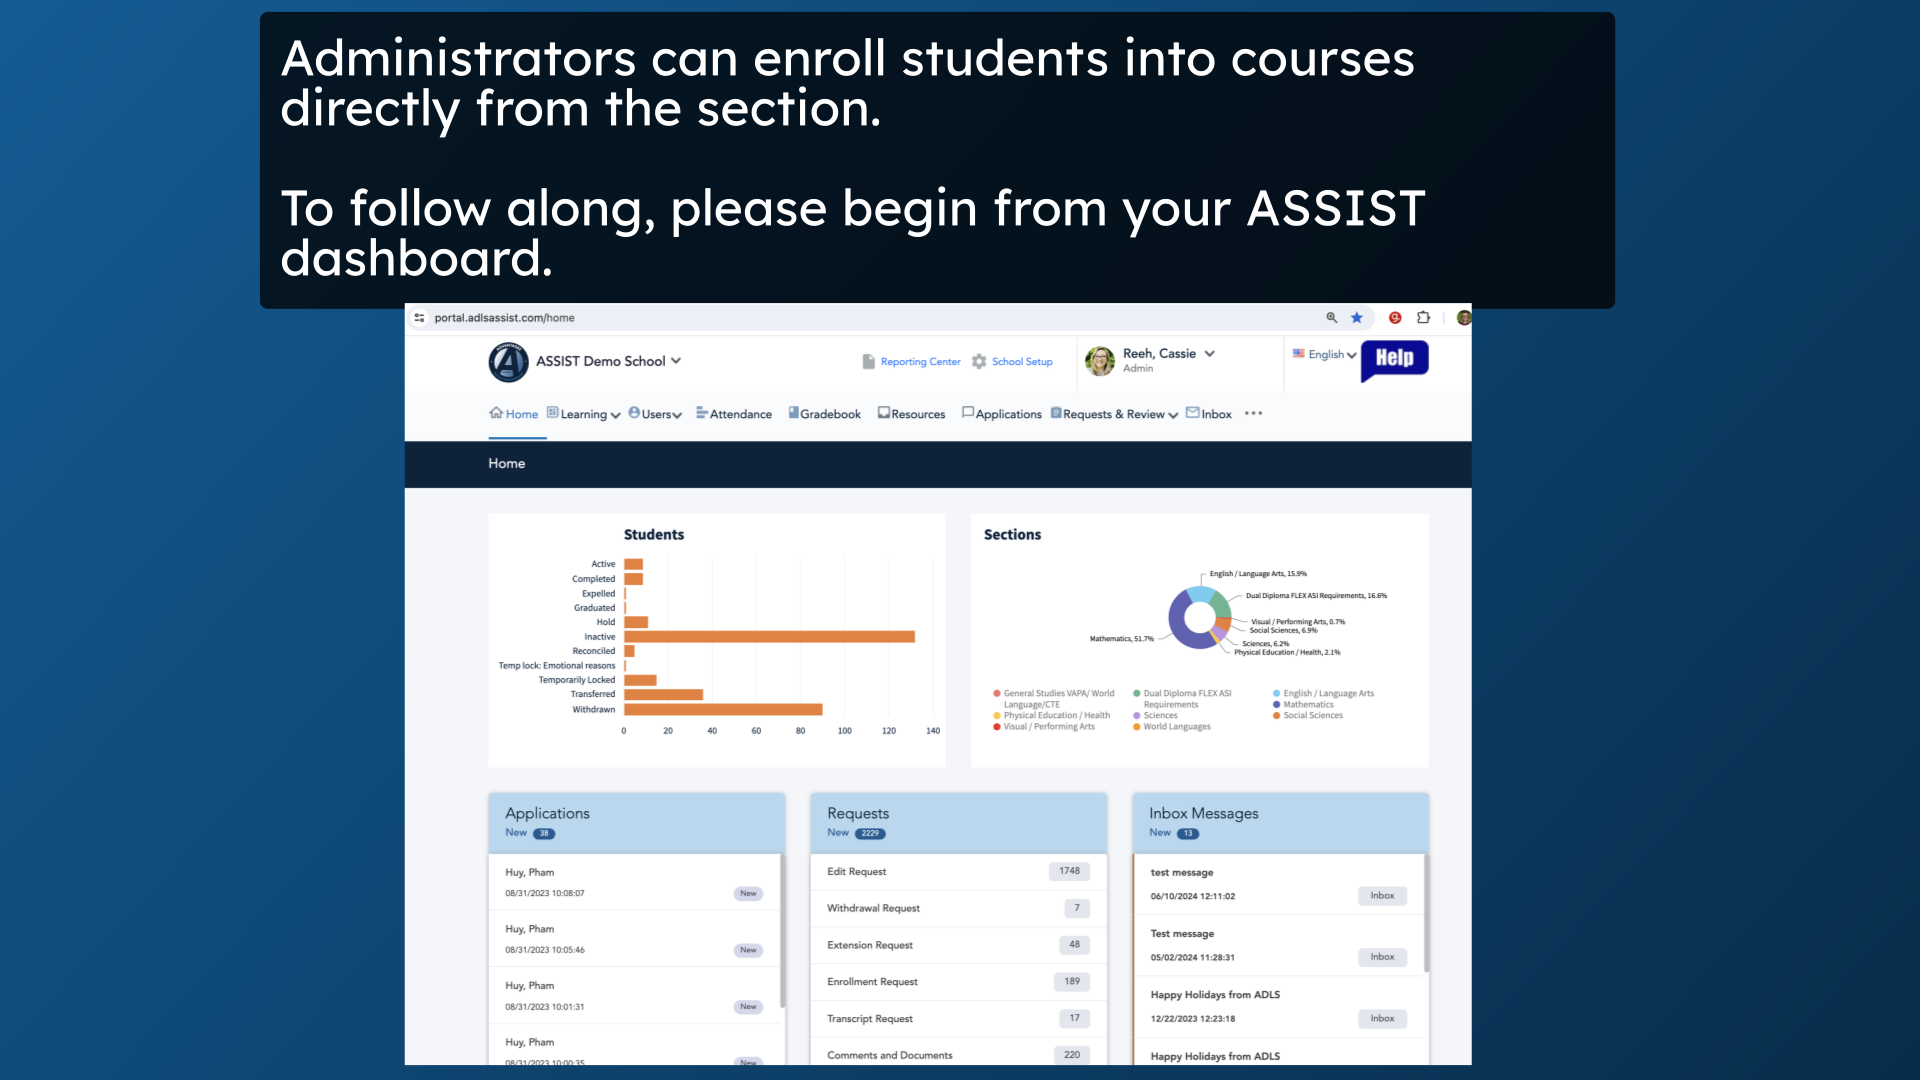
1. Administrators can enroll students into courses directly from the section. To follow along, please begin from your ASSIST dashboard.
Administrators can enroll students in to courses directly from the section page. To follow along, please begin from your ASSIST dashboard.
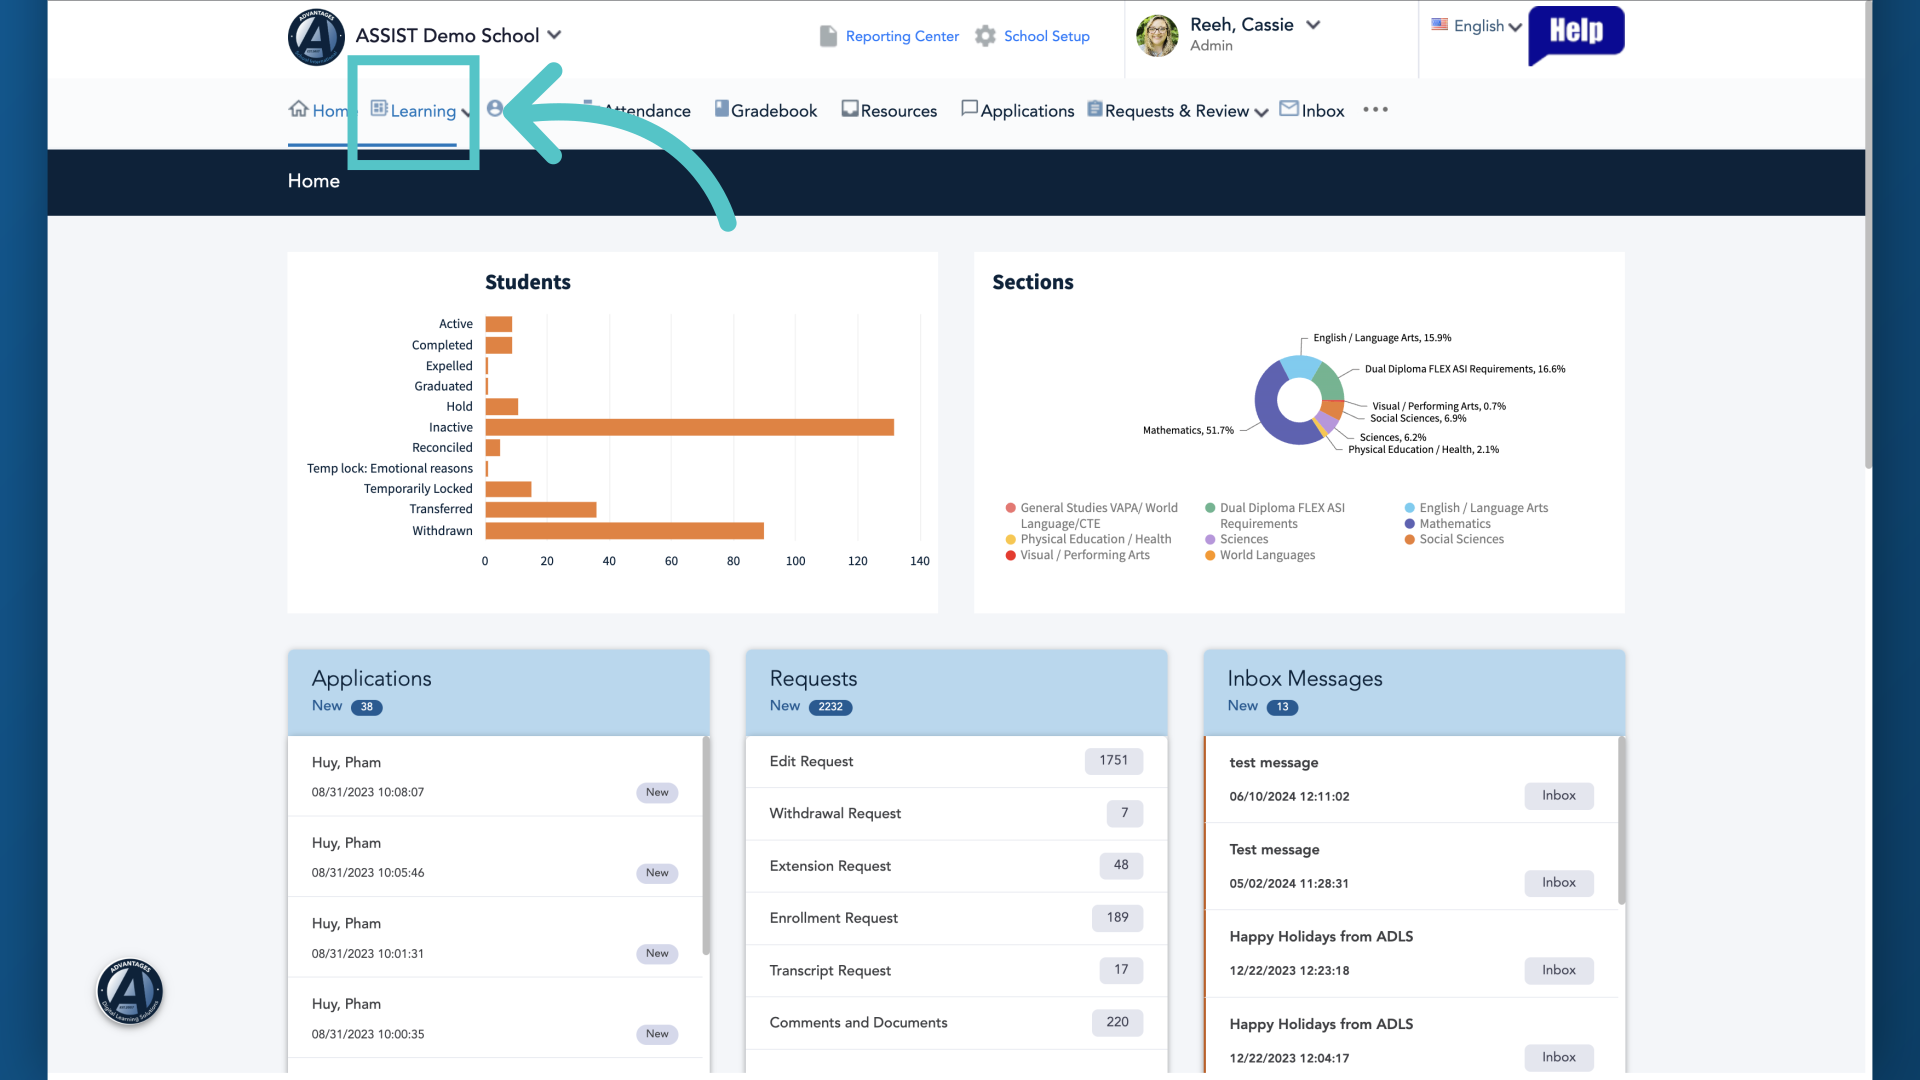
2. Click on the "Learning" tab
To begin, click on the learning tab from the top of your screen.
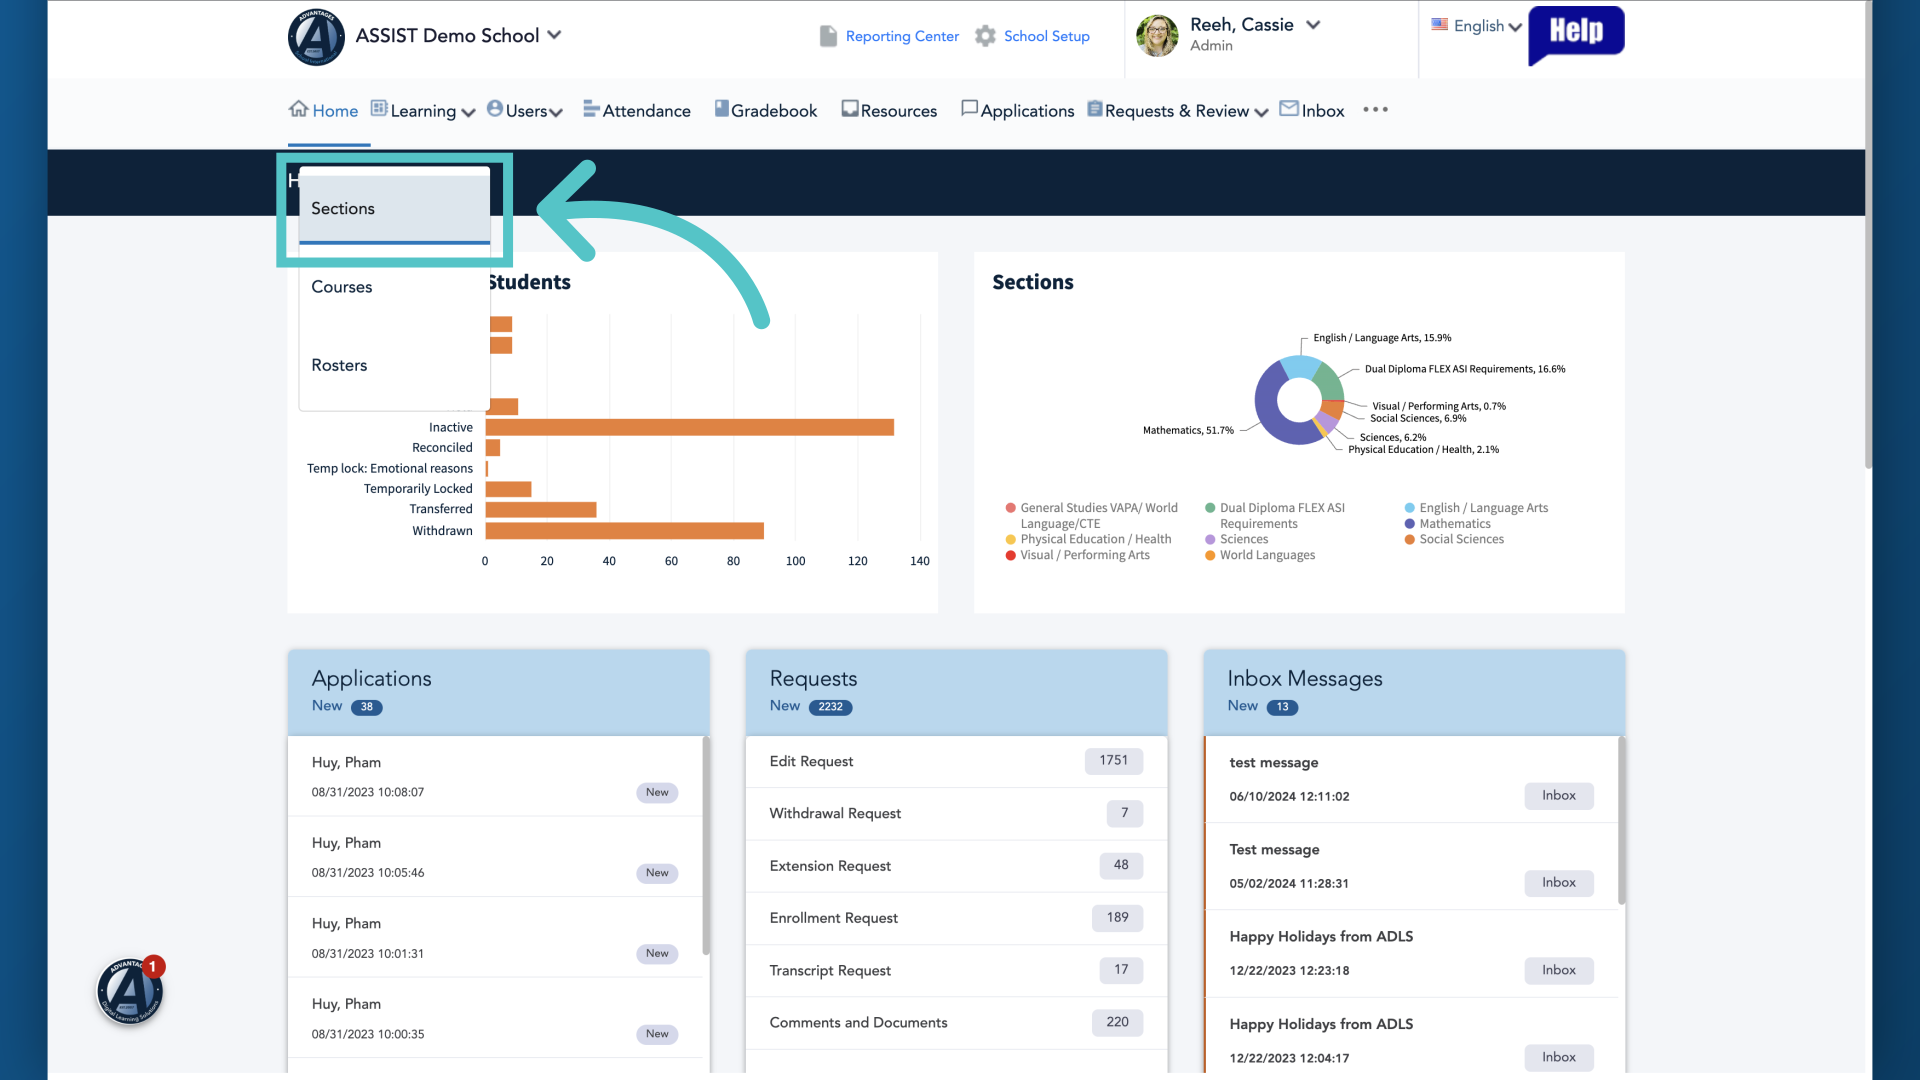
3. Choose "Sections"
Next, select the sections list from the dropdown menu. Sections is our word for "classrooms" in ASSIST.
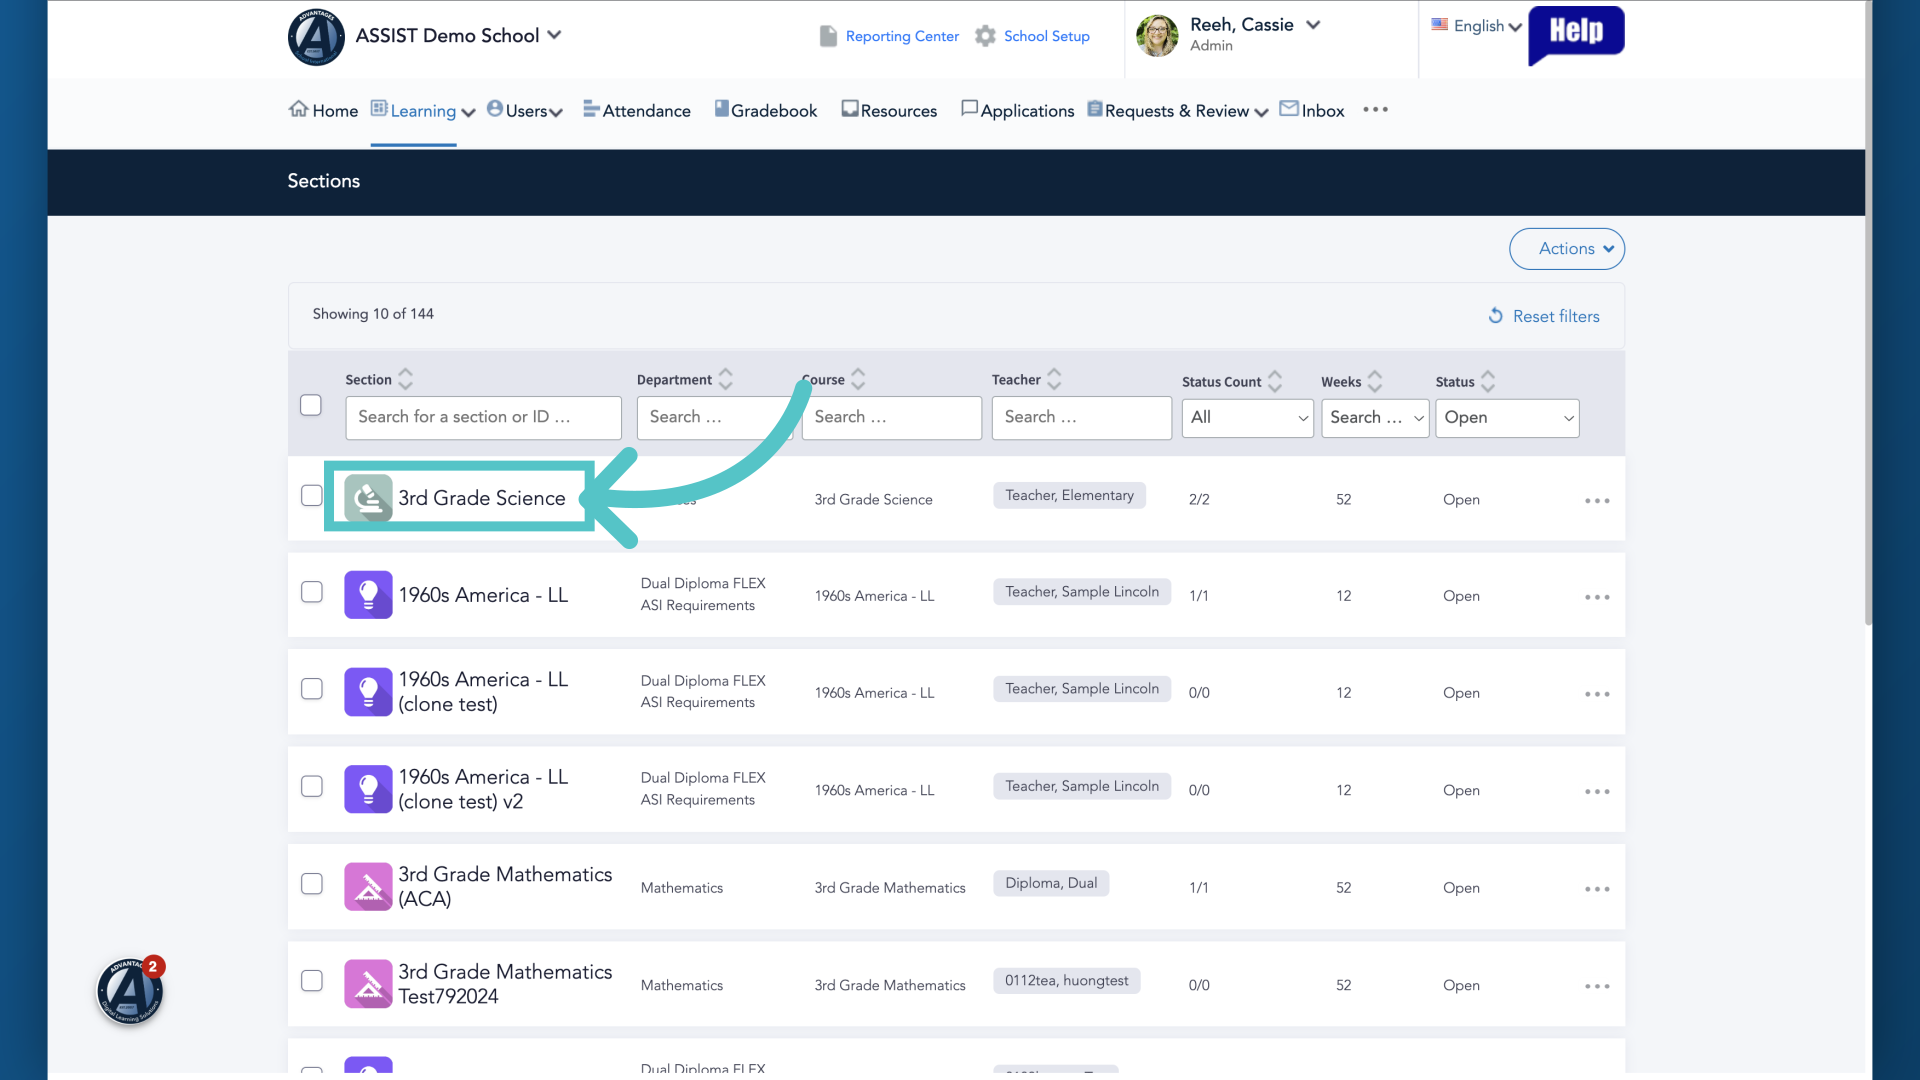
4. Choose the section to enroll into.
Choose the section you would like to enroll students in to. Select the name of the section to open the section's information page.
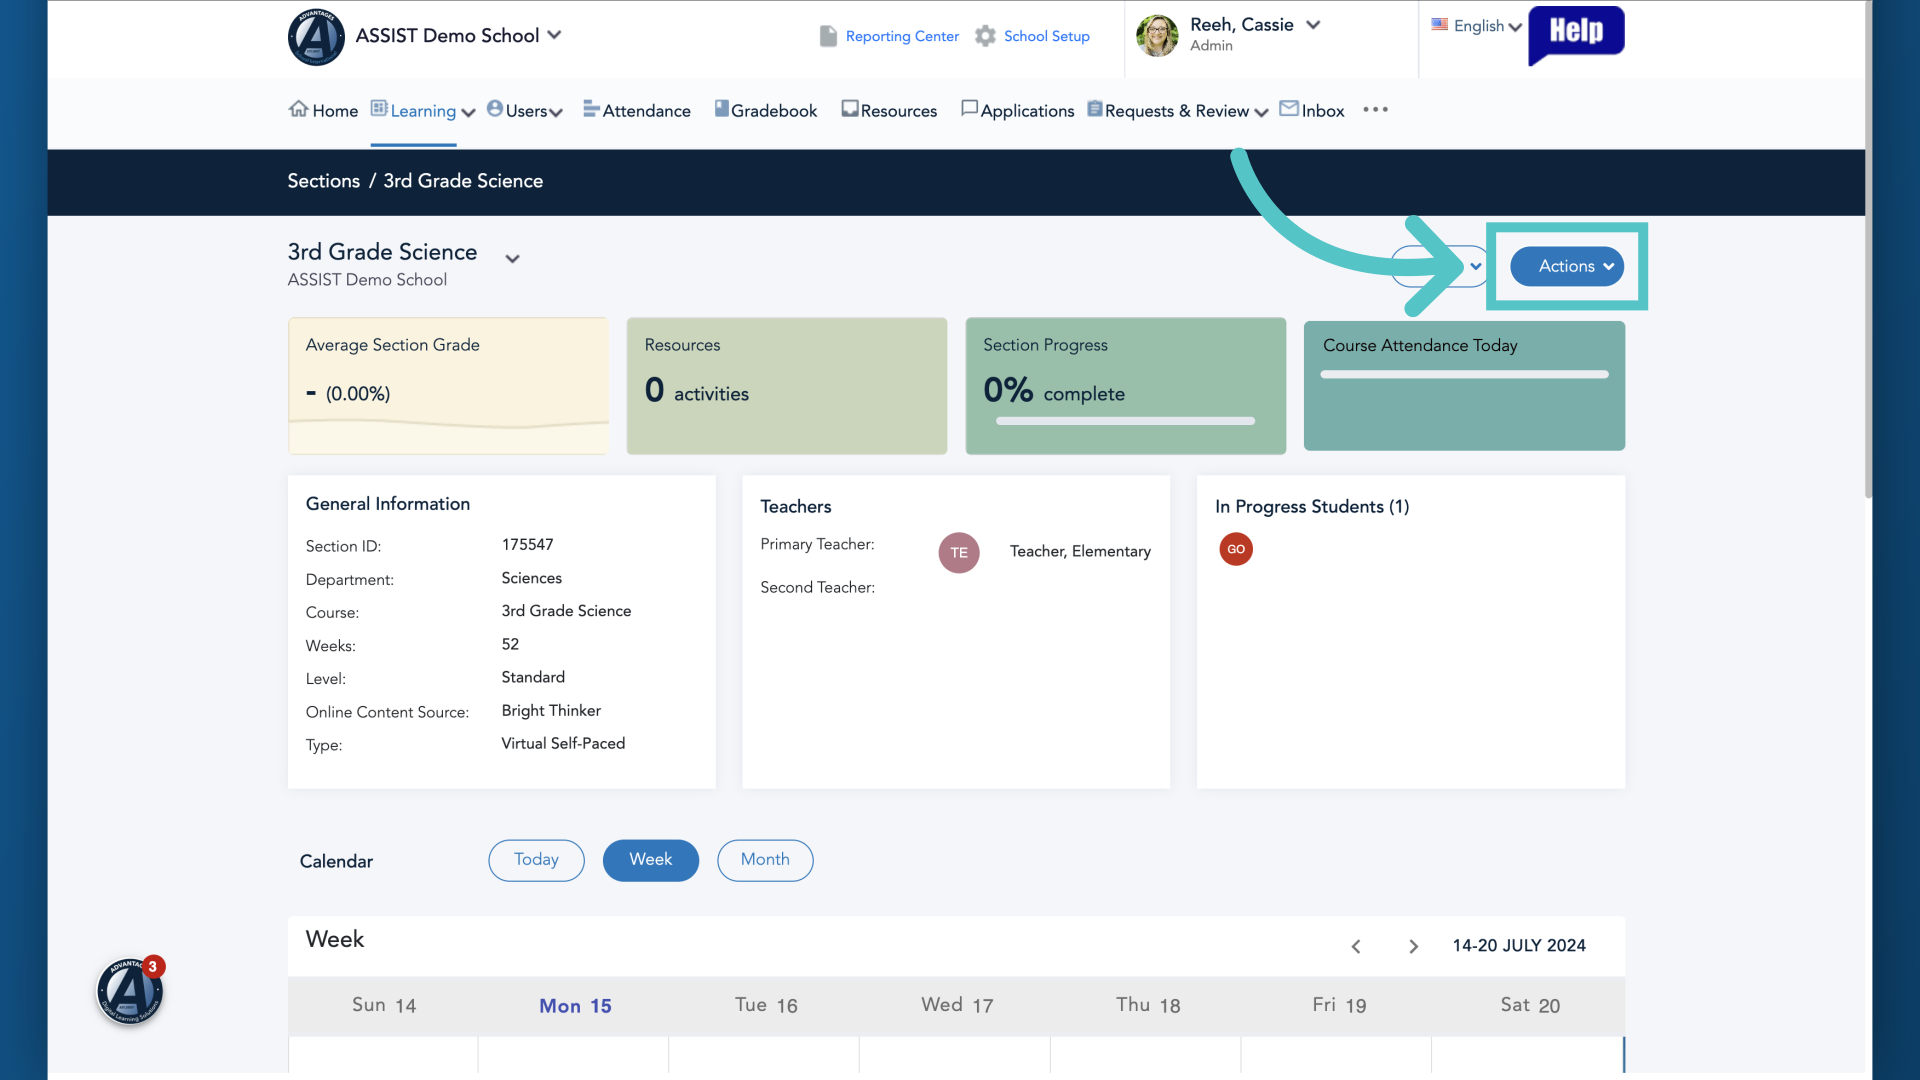
5. Click "Actions"
From the section information page, Select the Actions menu on the top right corner.
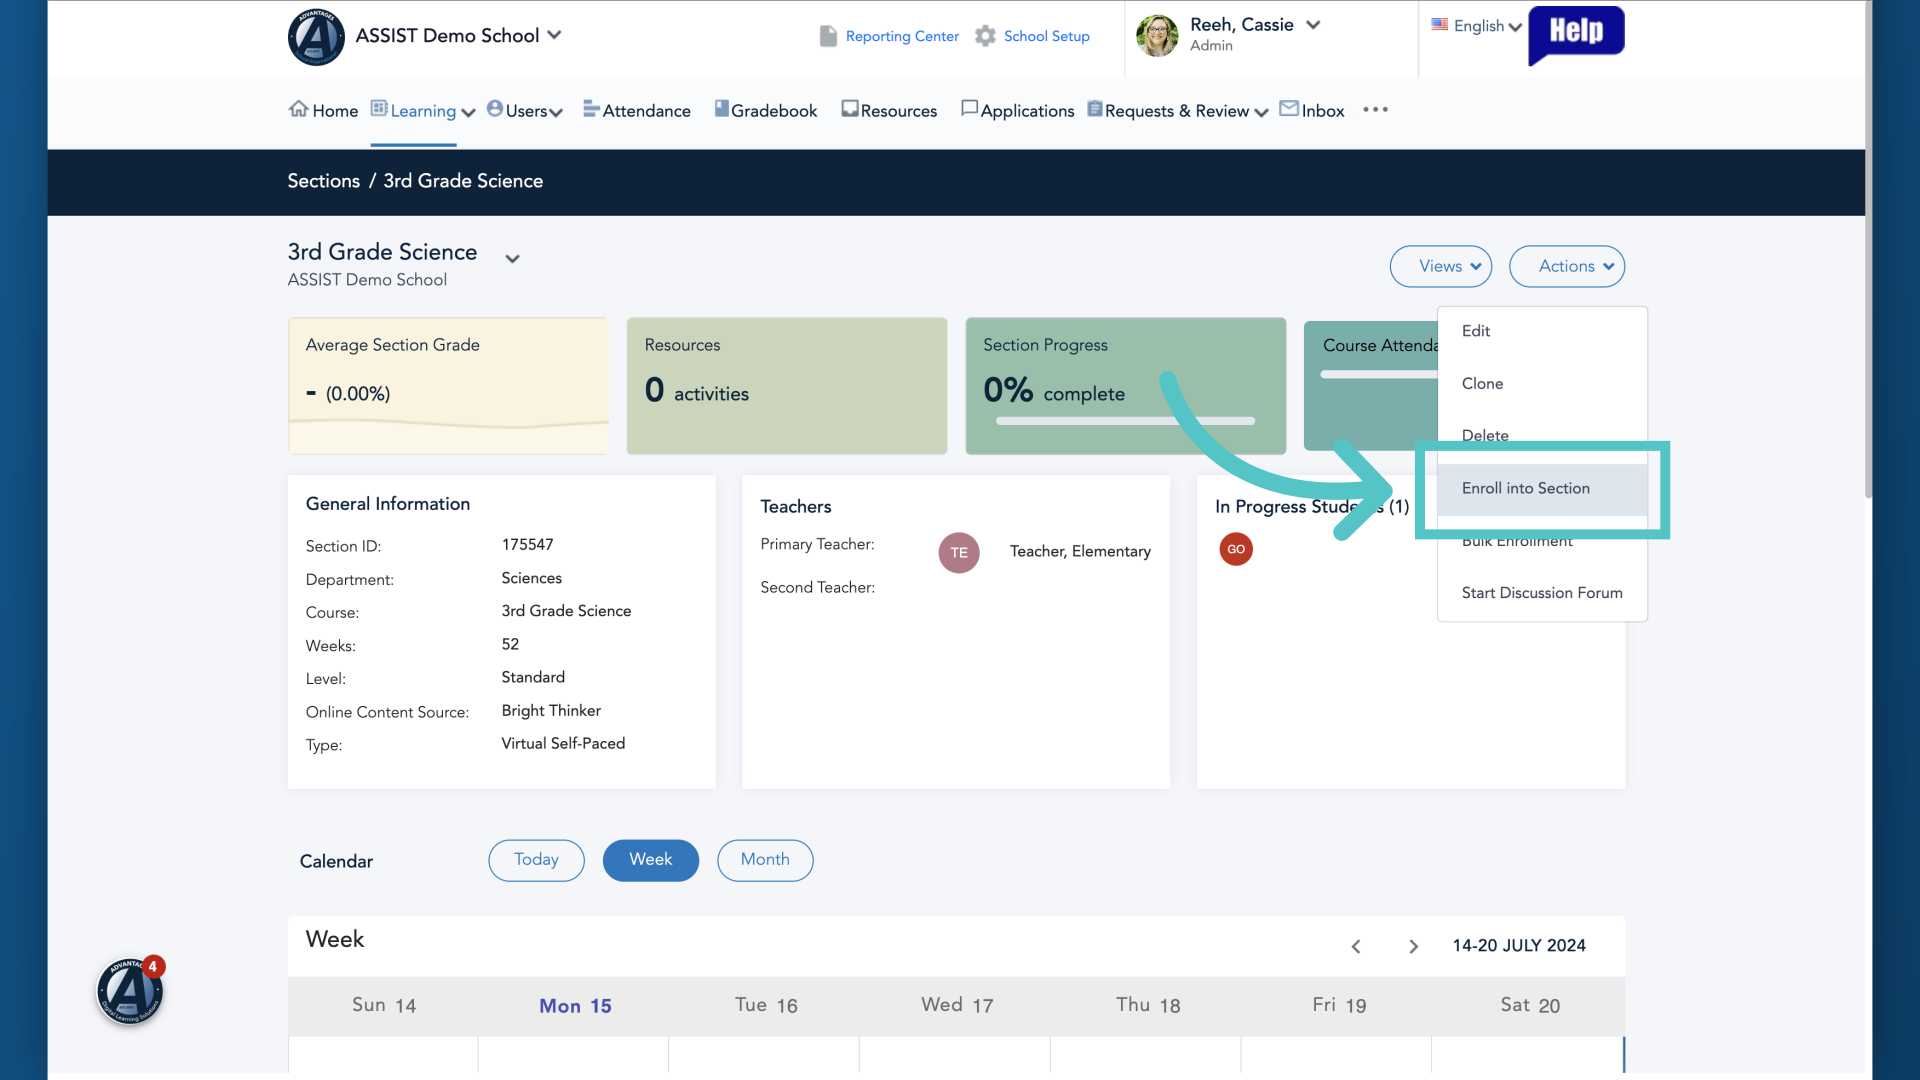
6. Click "Enroll into Section"
Choose "Enroll into section".
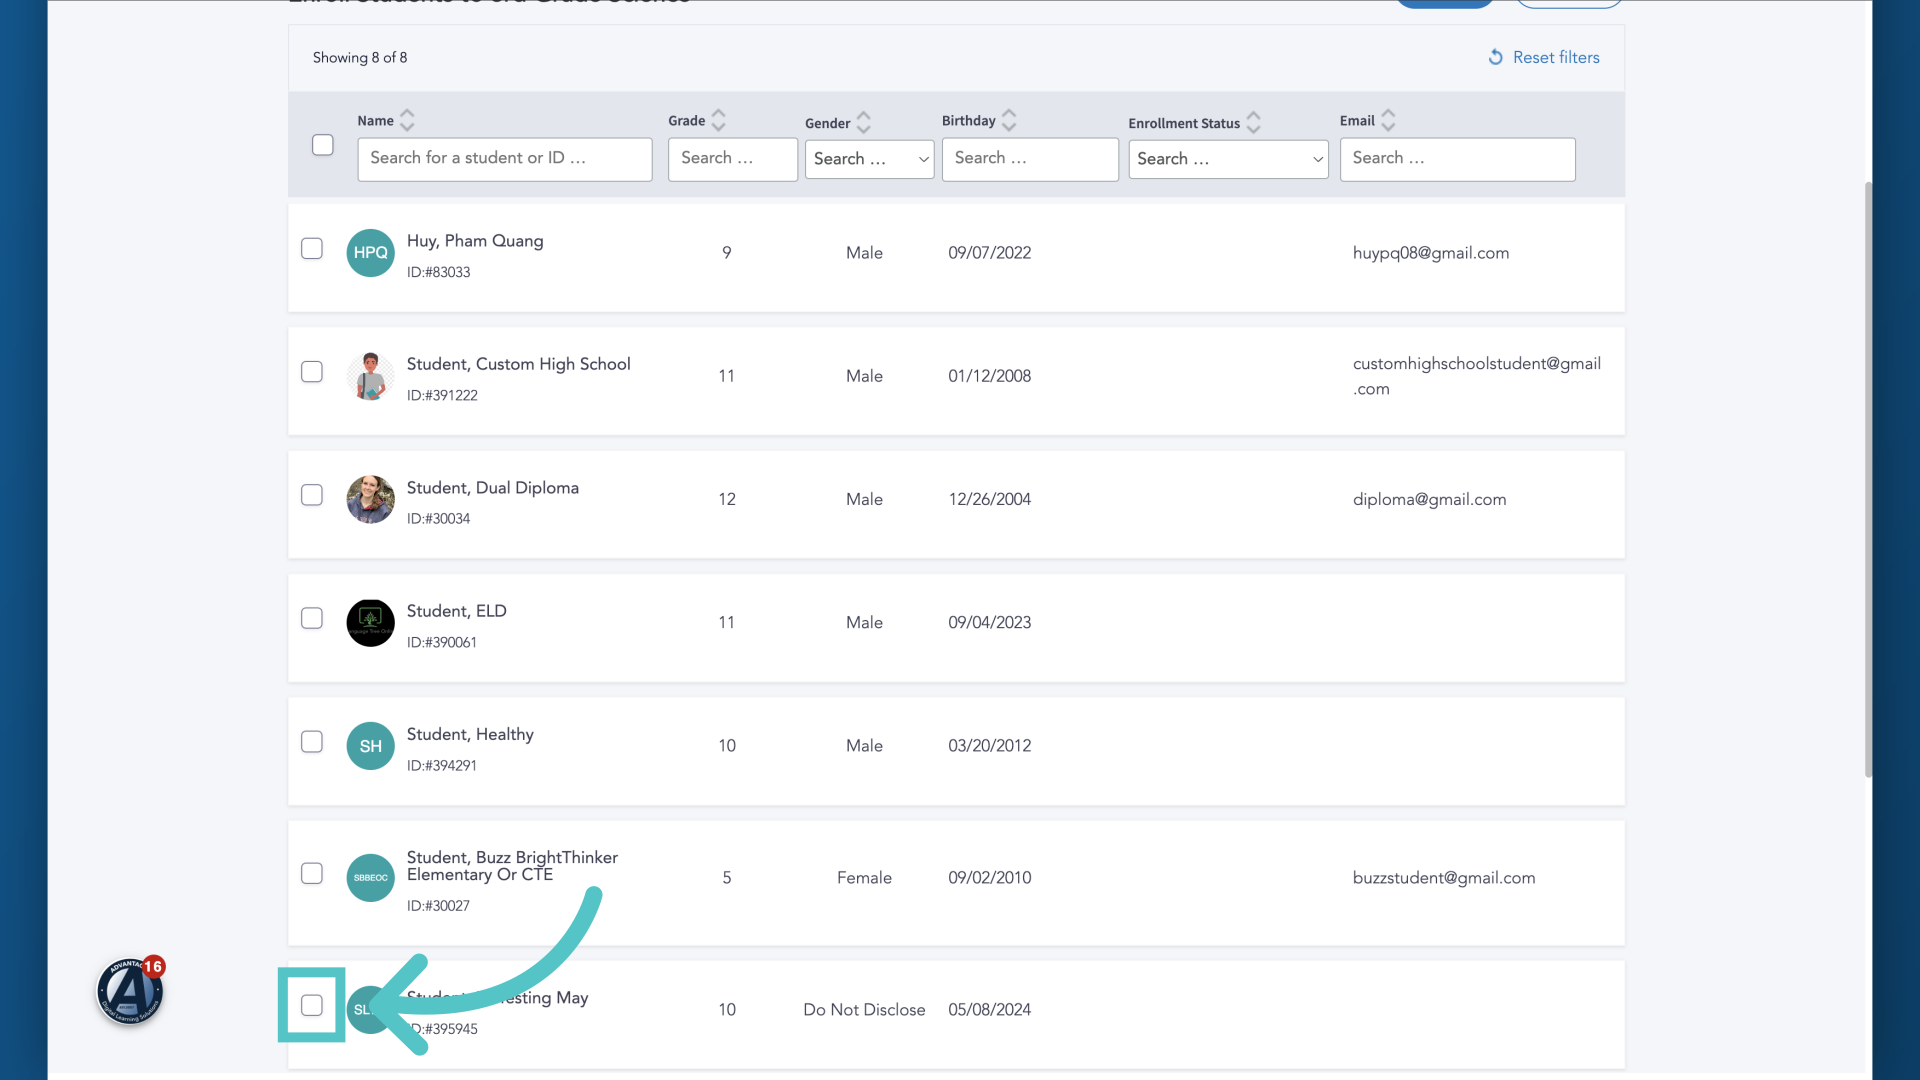
7. Choose the student or students to enroll
Select the student or students you would like to enroll into the section by checking the box next to the student's name.
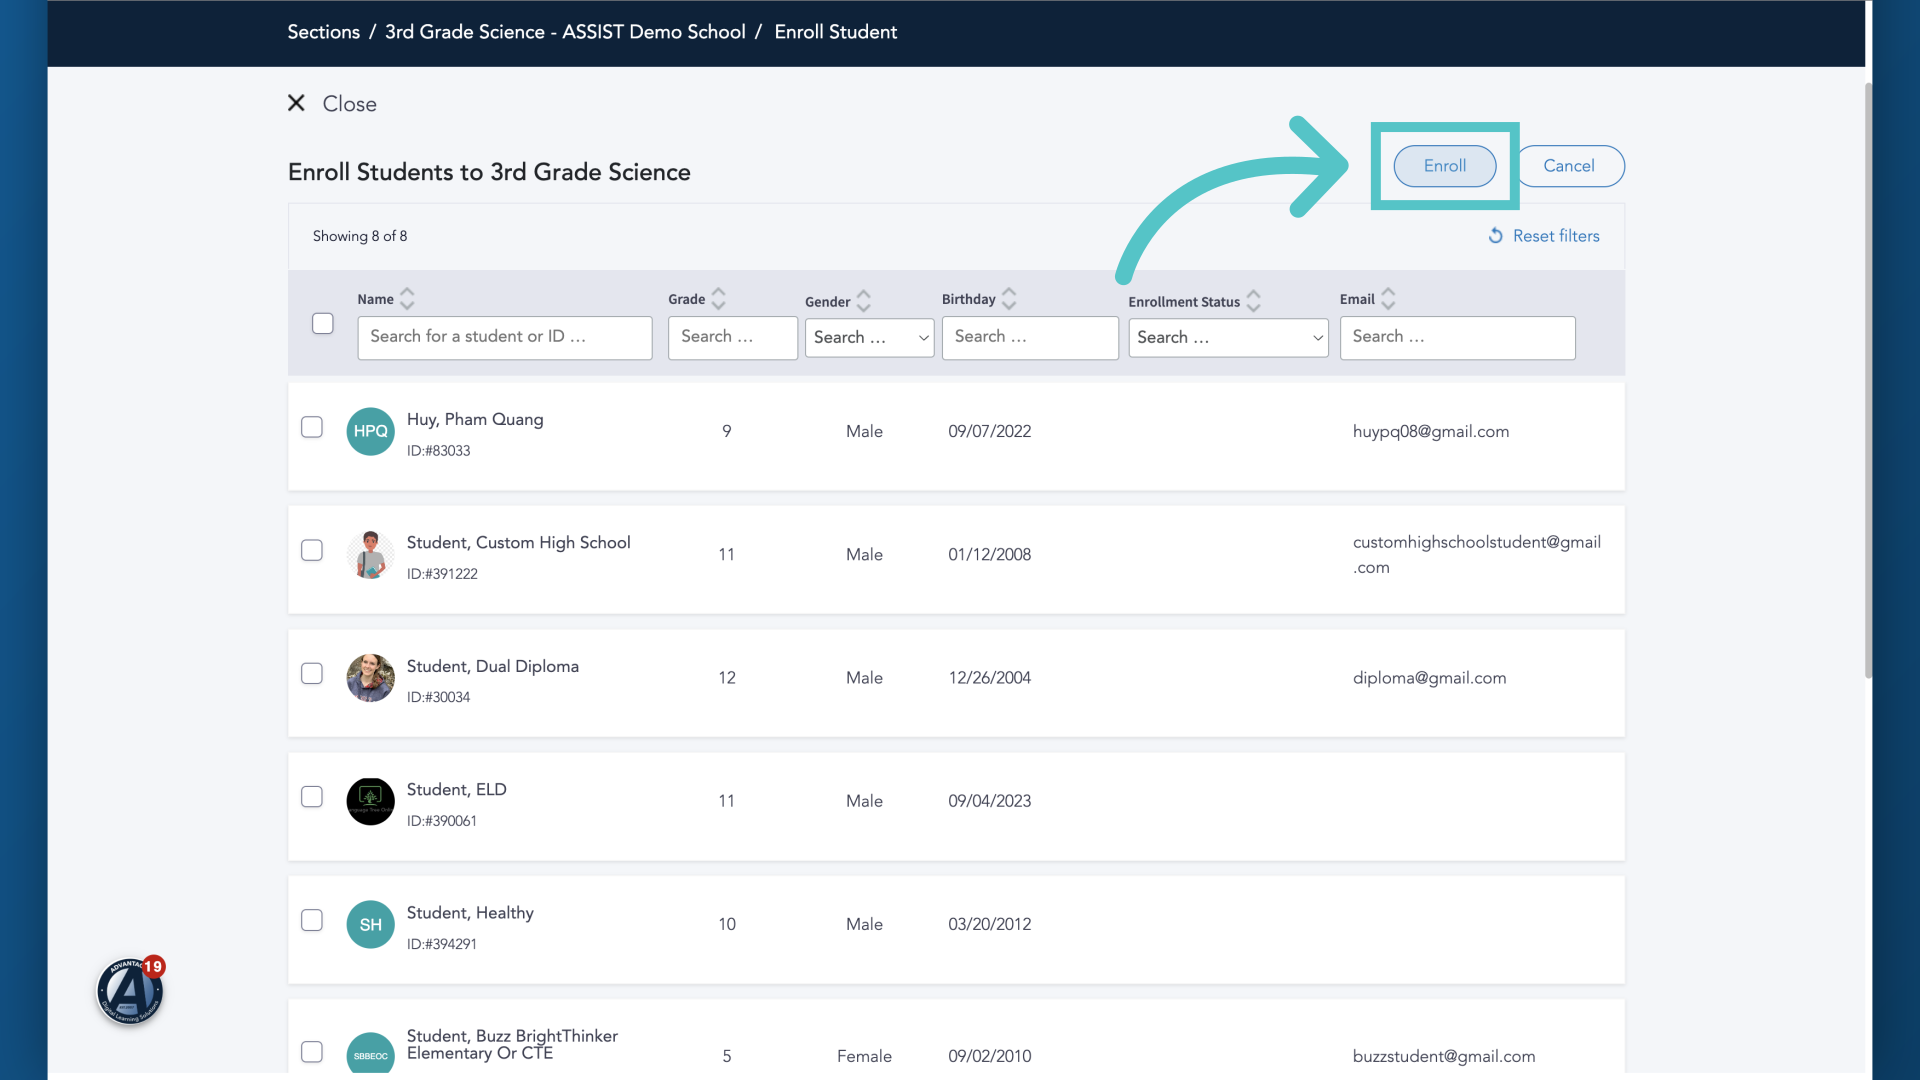
8. Click "Enroll"
Click Enroll
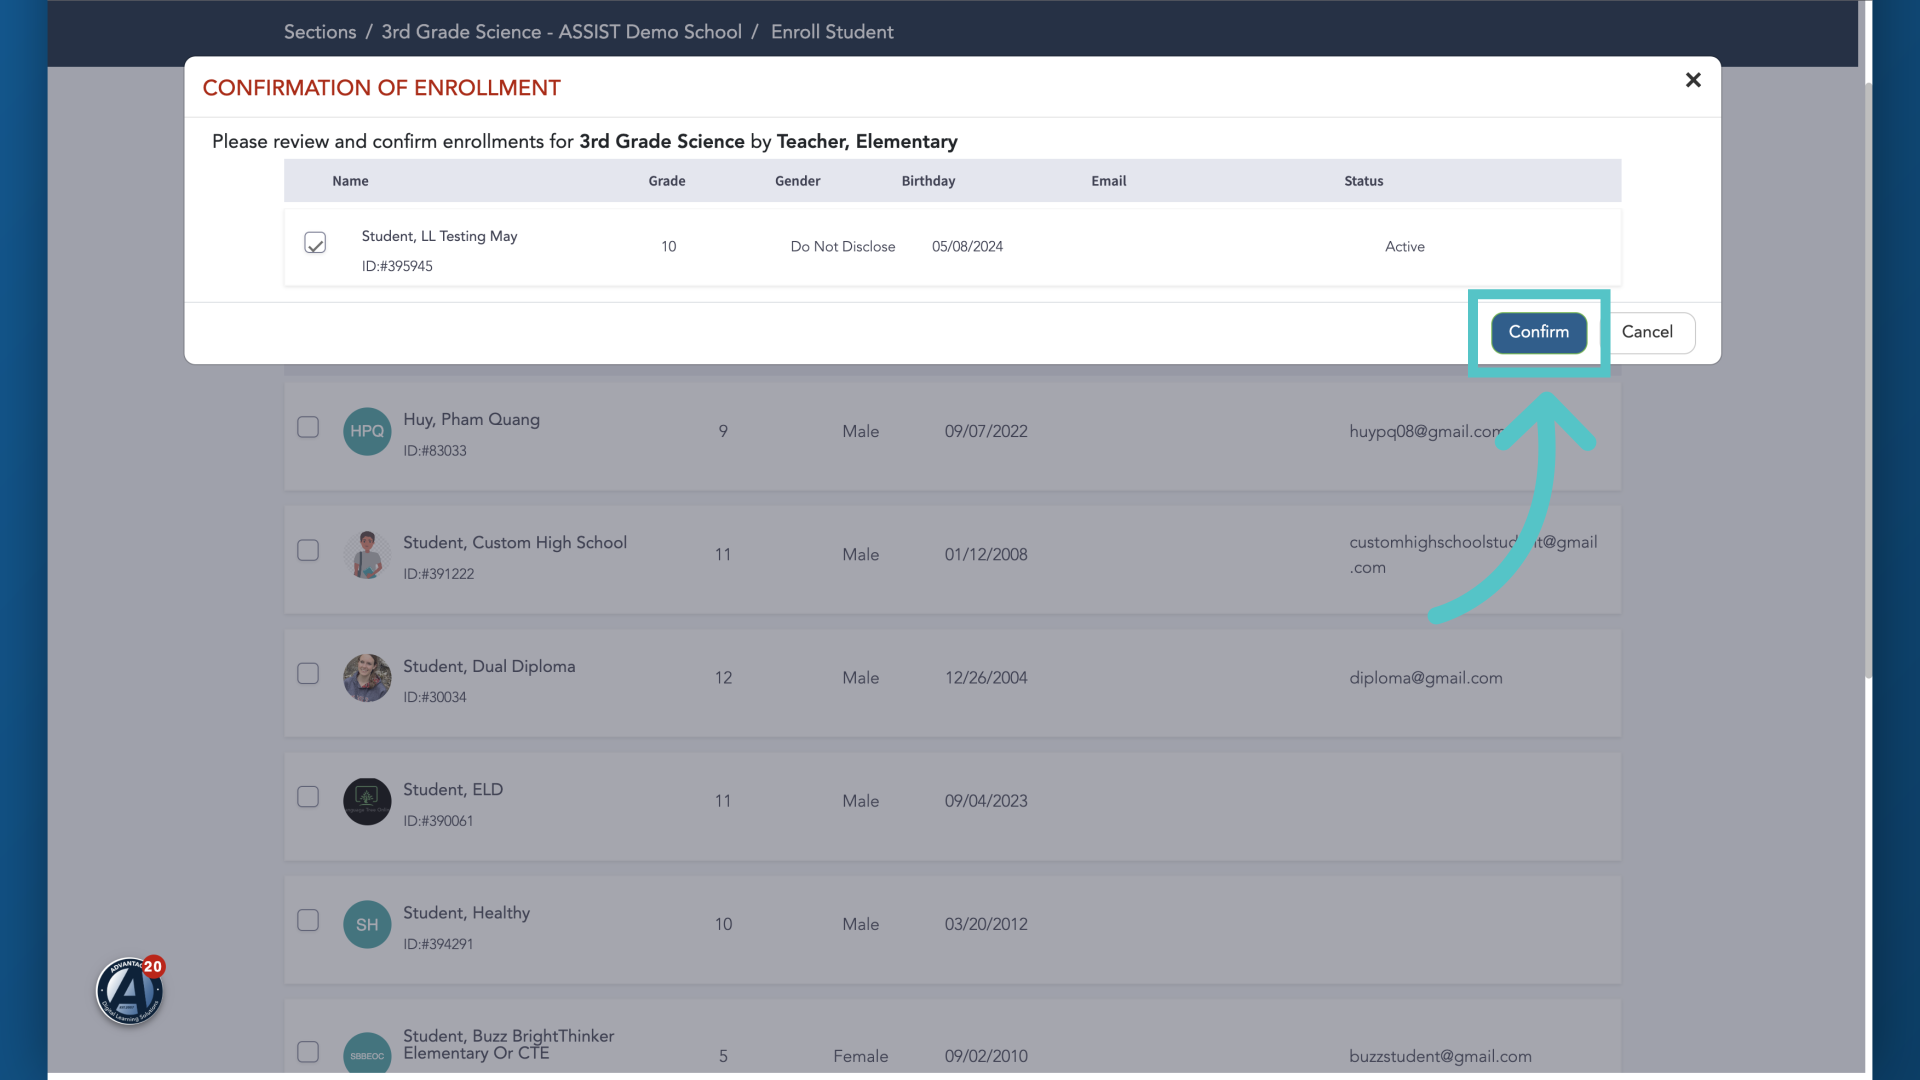
9. Click "Confirm" after verifying the students to be enrolled
Confirm the enrollment by verifying the students you have selected for the section. click "confirm" to continue
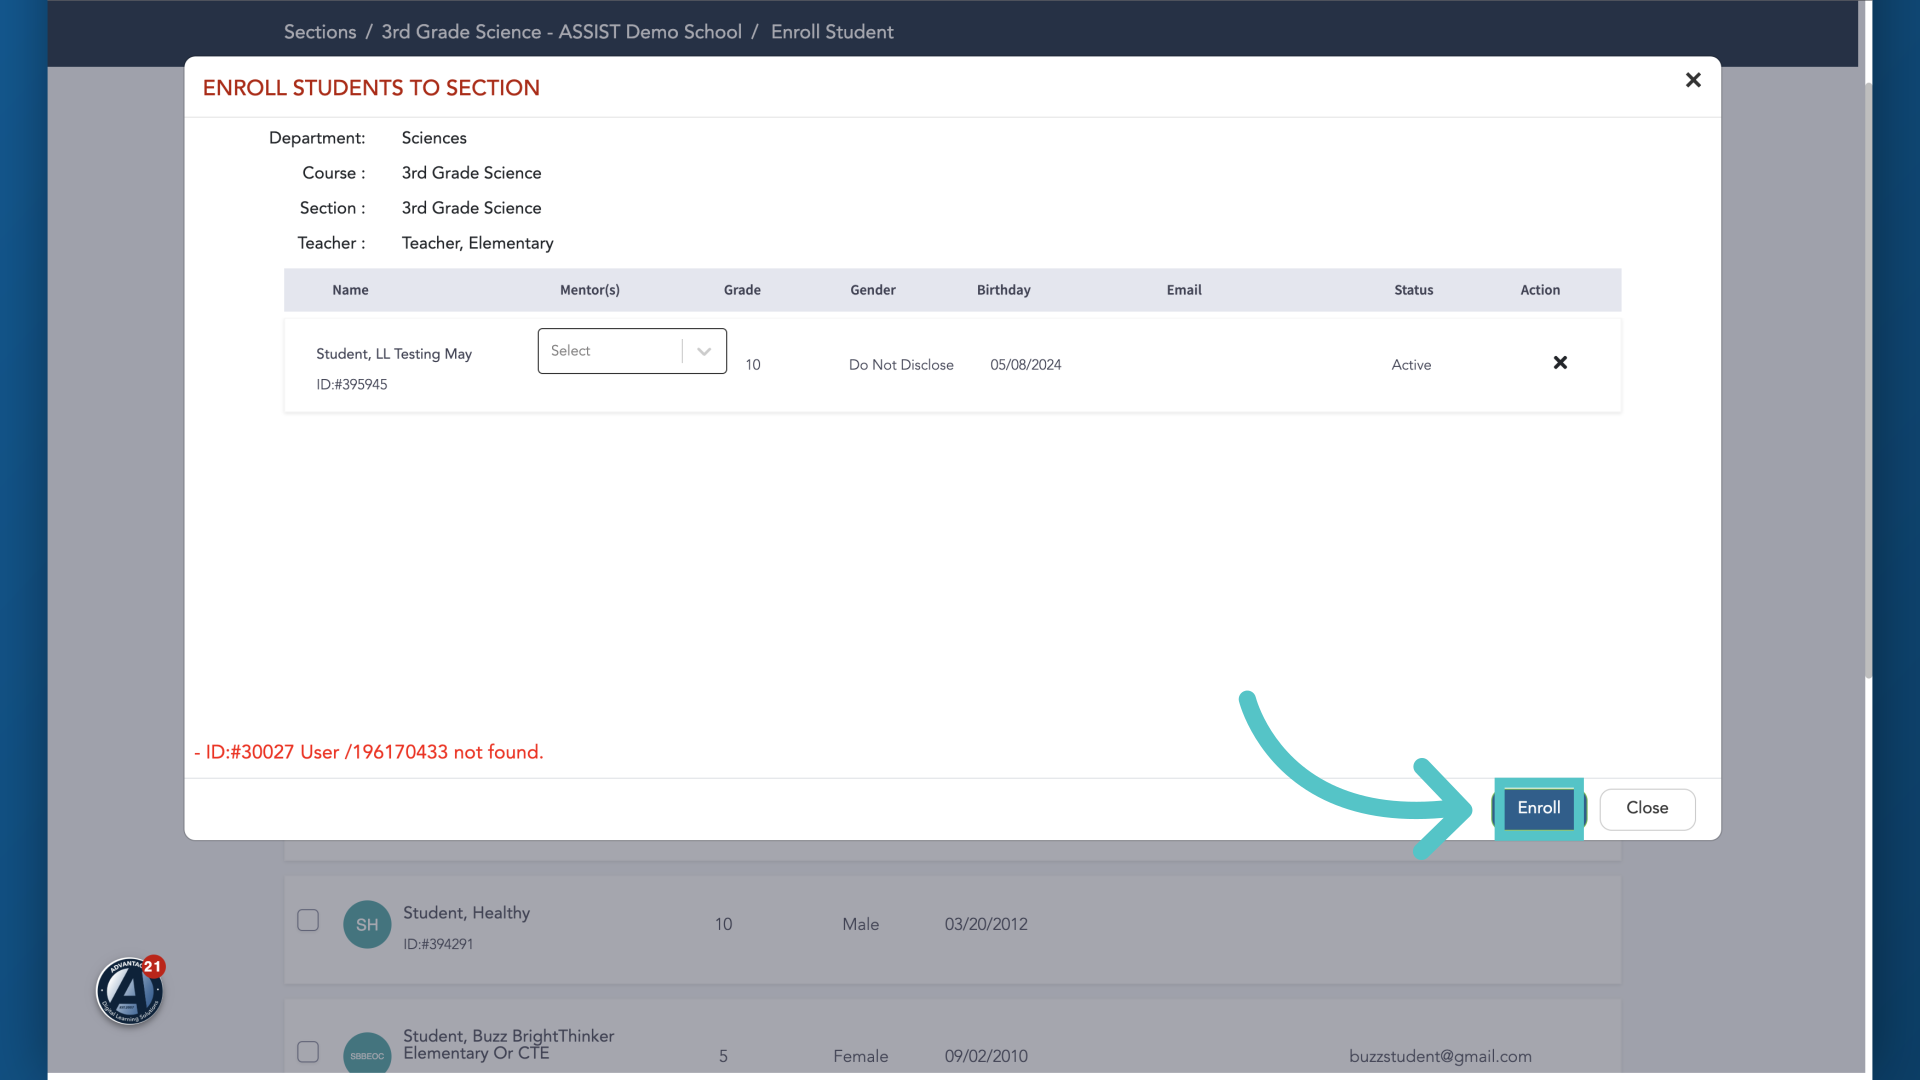
10. Click "Enroll" to complete the enrollment
On this screen, you may choose an academic observer or mentor for the student from the mentor dropdown field. Click "Enroll" to complete the enrollment.
This guide covered the step-by-step process of enrolling students into a section within ASSIST, including accessing the desired section, filling in necessary details, confirming the enrollment, and closing the process efficiently.