Expand to Full Screen for better viewing
Make activities gradable, or extra credit, in Lincoln Learning.
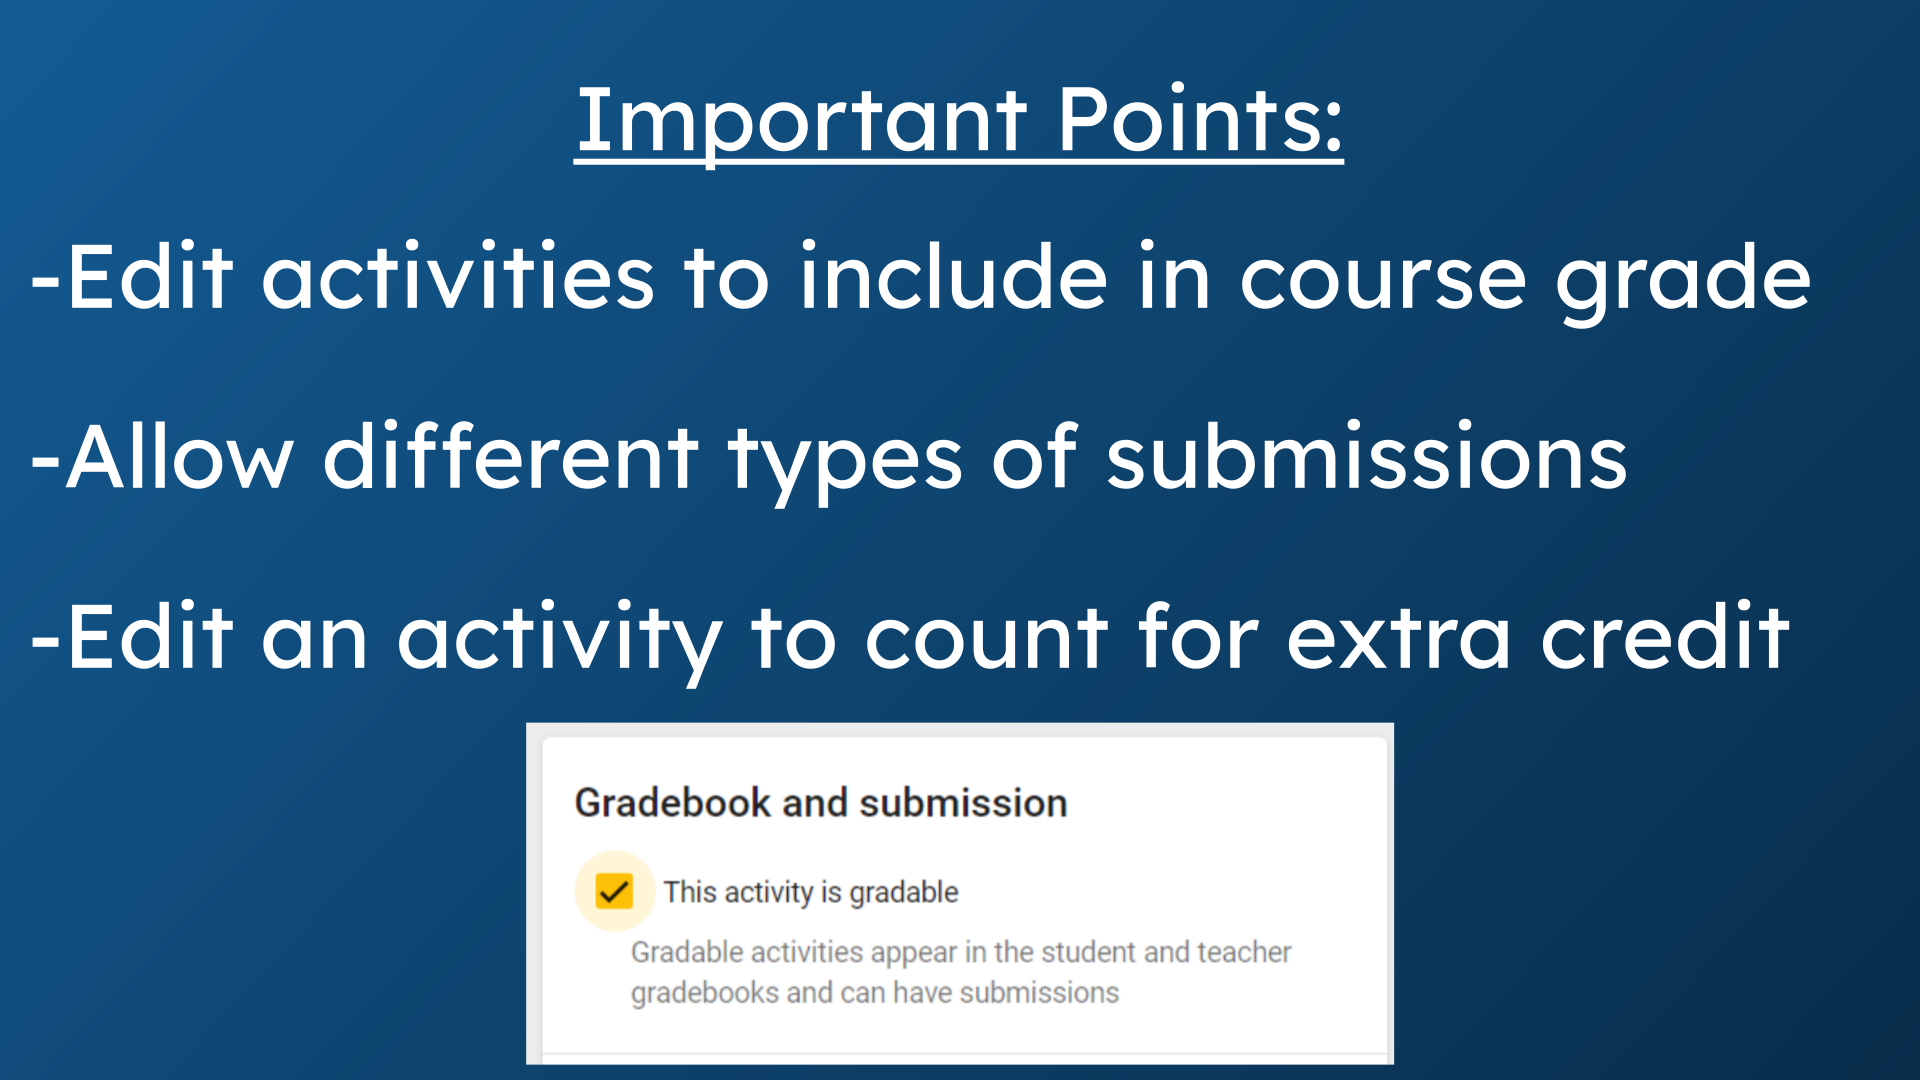
1. Important Points:
This guide will walk you through the process of editing learning objects to make them gradable activities in your Lincoln Learning course. Teachers can allow for a variety of submission formats. Teachers can also choose to make activities count for extra credit.
2. Select Learning Object
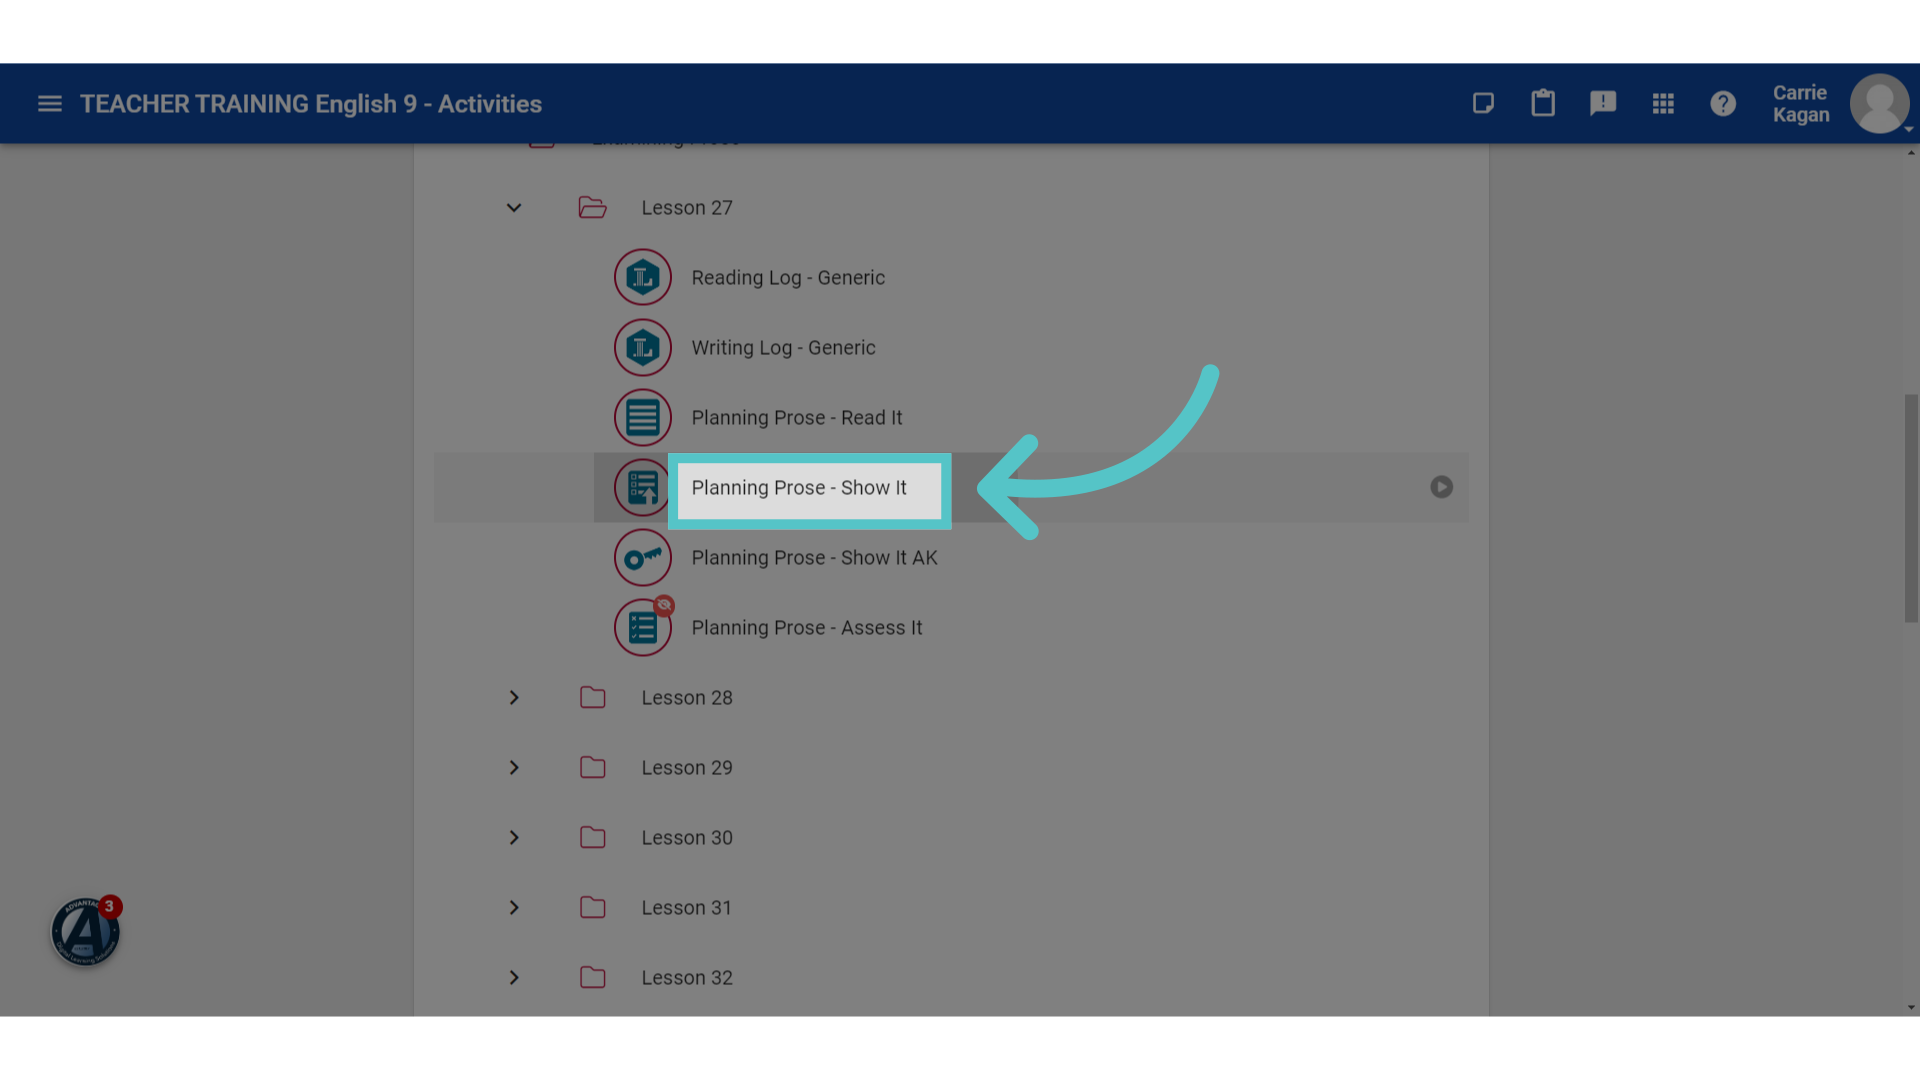
All Show its are ungraded practice activities, but you can edit them to allow for submissions, scoring, and feedback. Click to open the learning object that you would like to make gradable.
3. Click "Edit Activity"
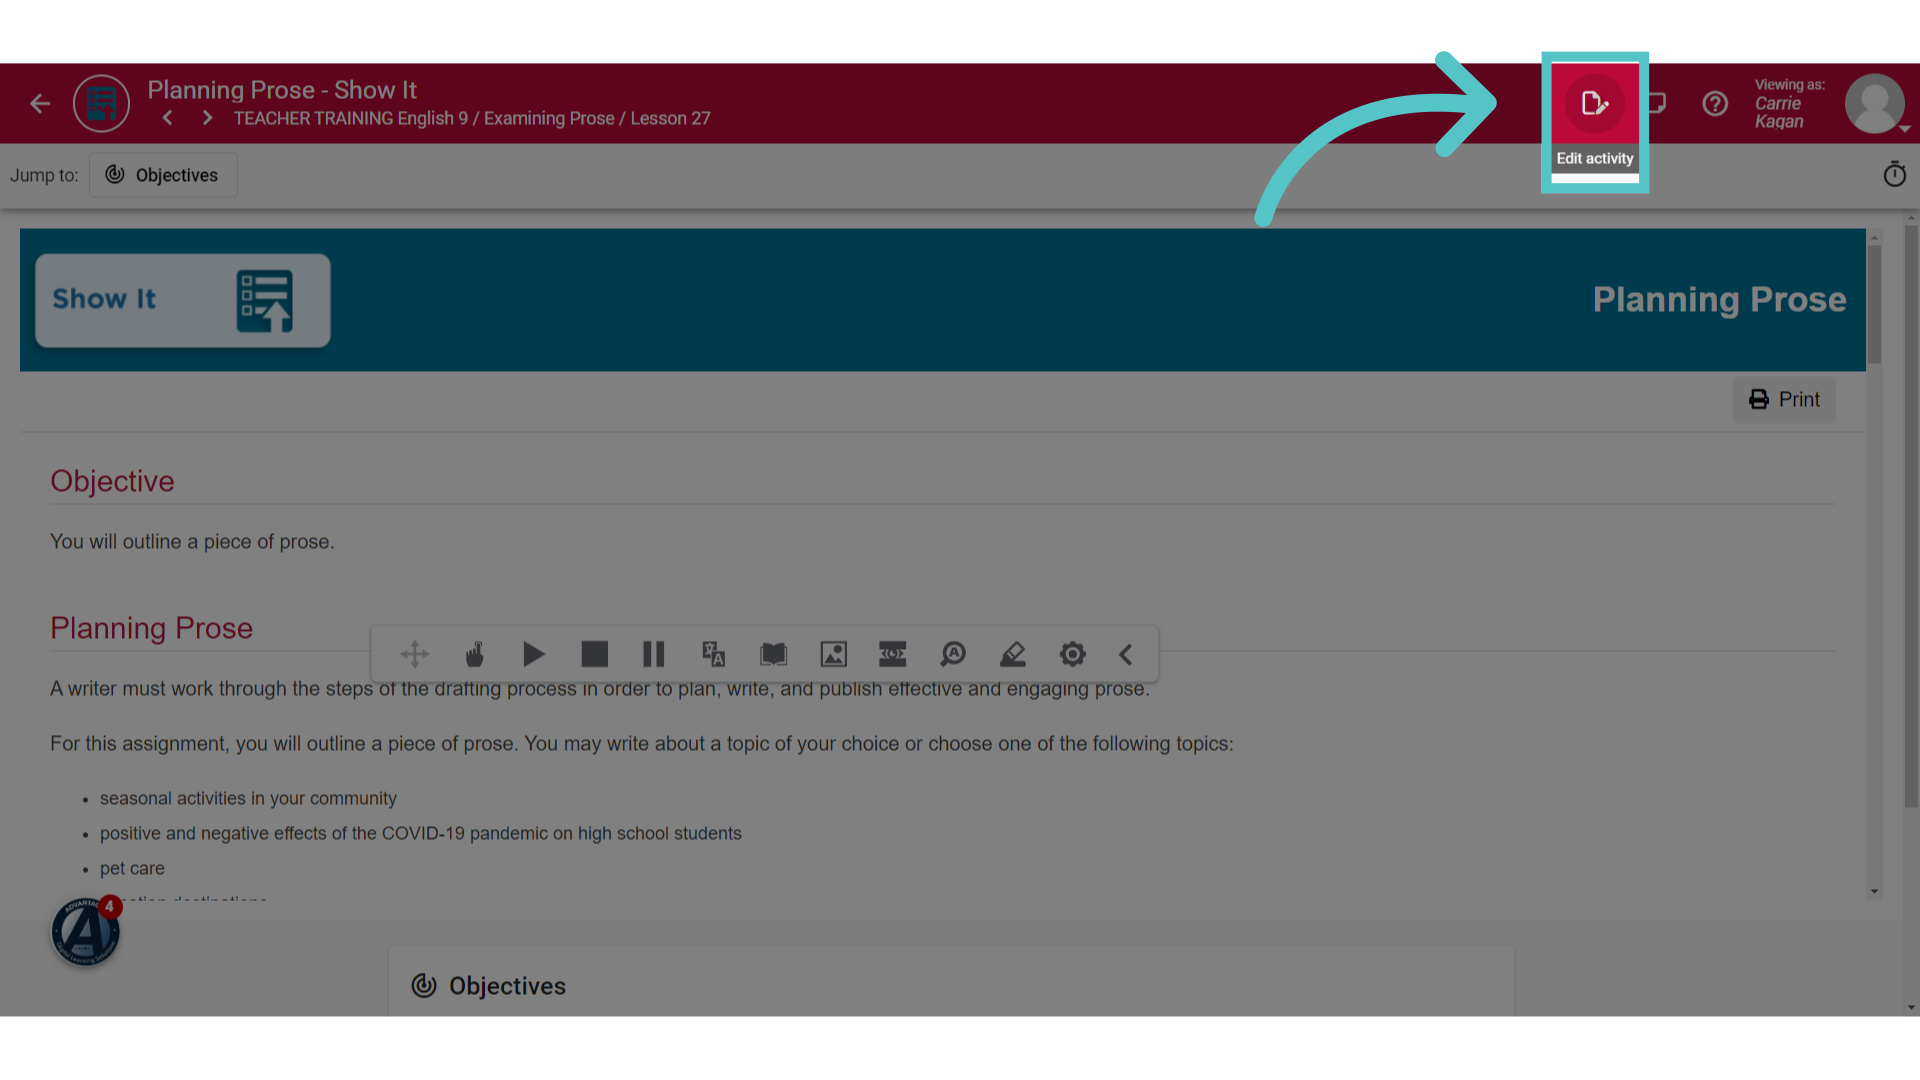
Click the Edit Icon found in the top right corner of the learning object page.
4. Click "Settings"
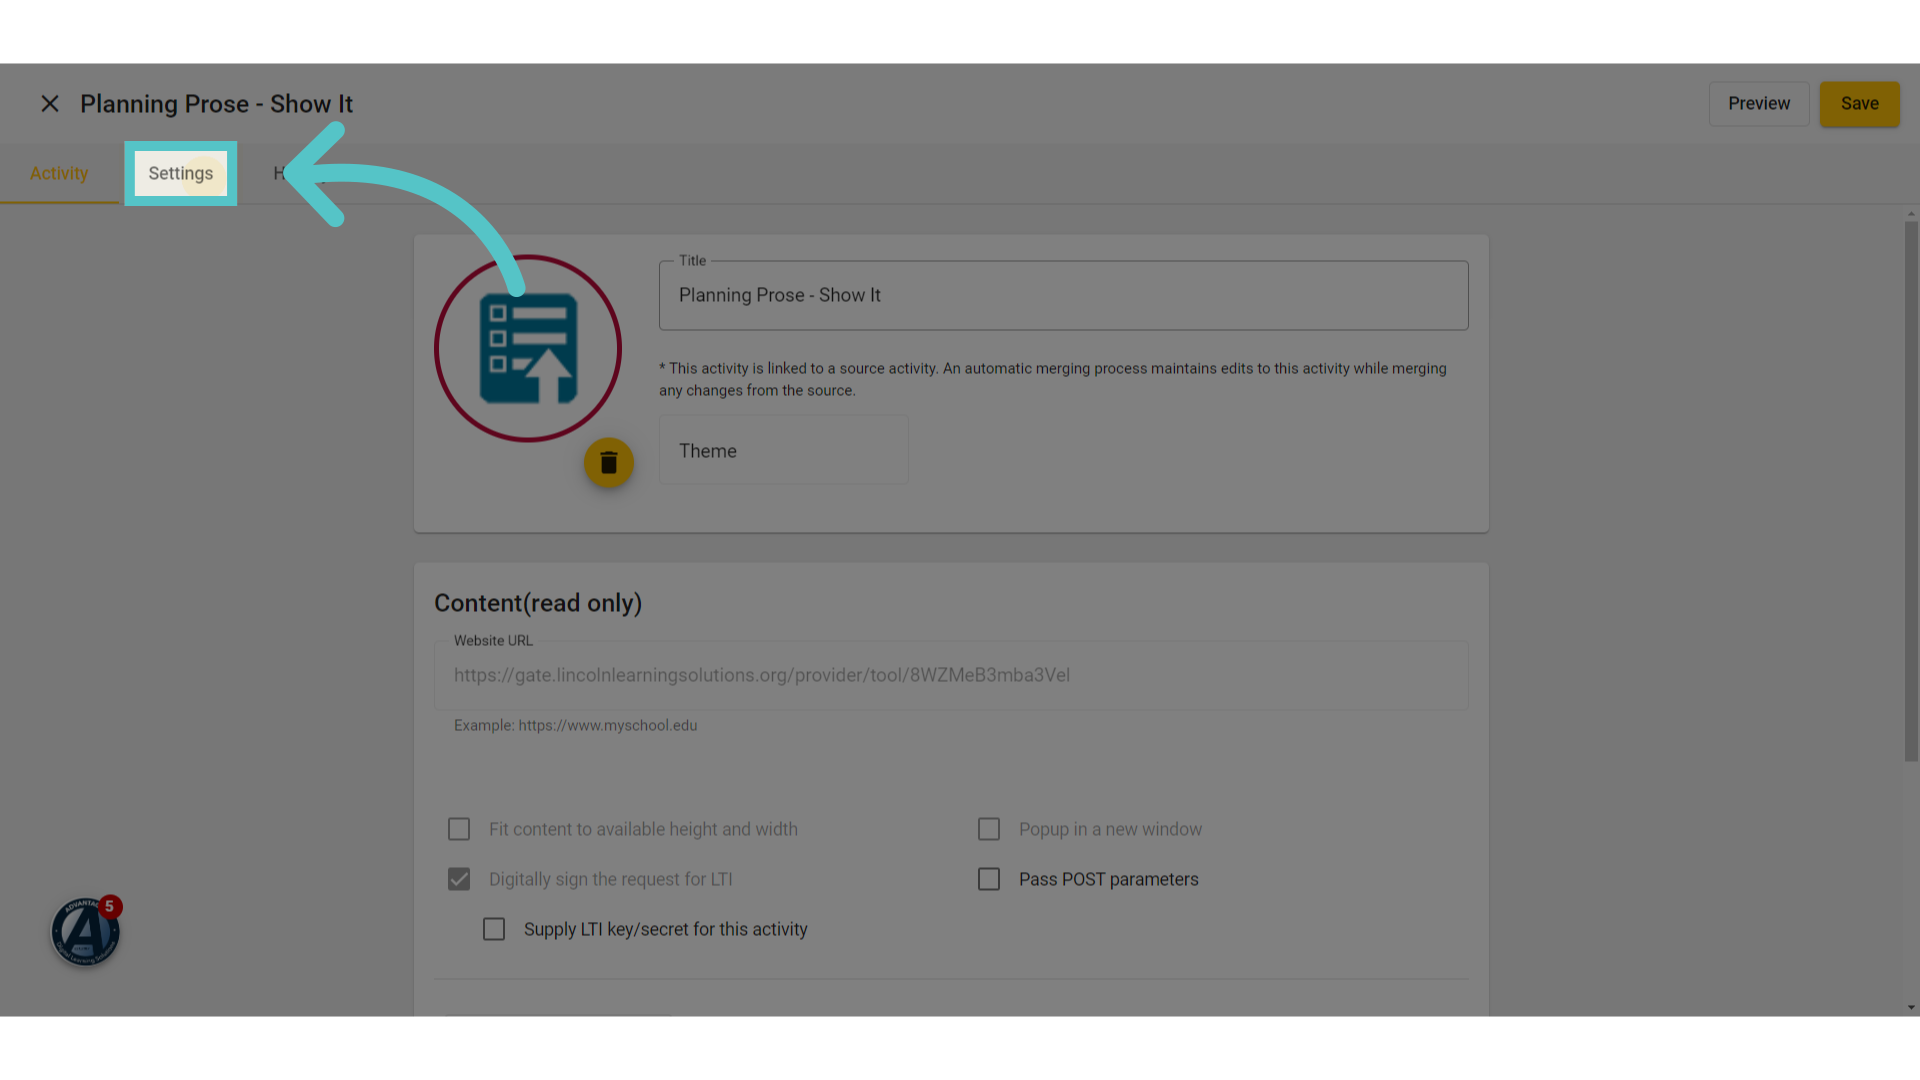
These are the activity details. Select the Settings option in the top left corner to edit the activity settings.
5. Check Box
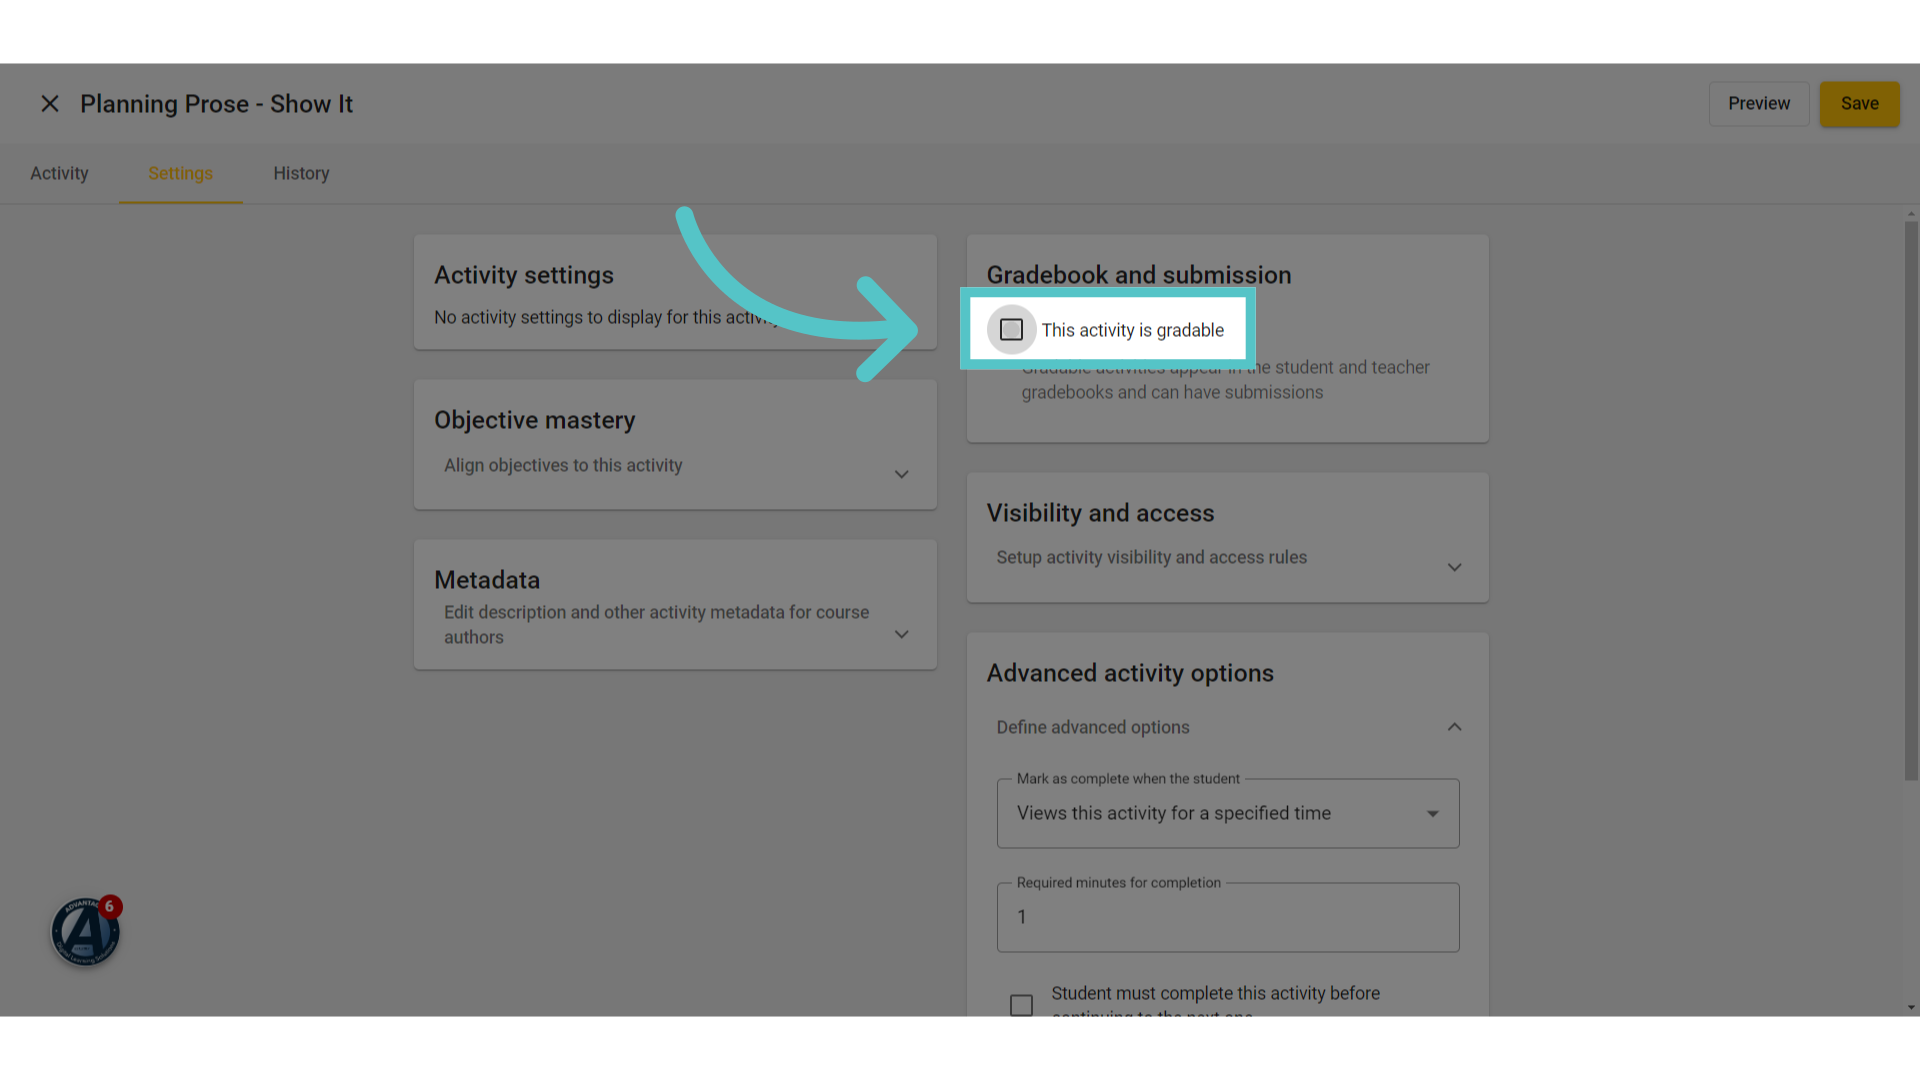
In the Gradebook and Submission Section, there will be a check box to indicate if "This activity is gradable."
6. Gradable
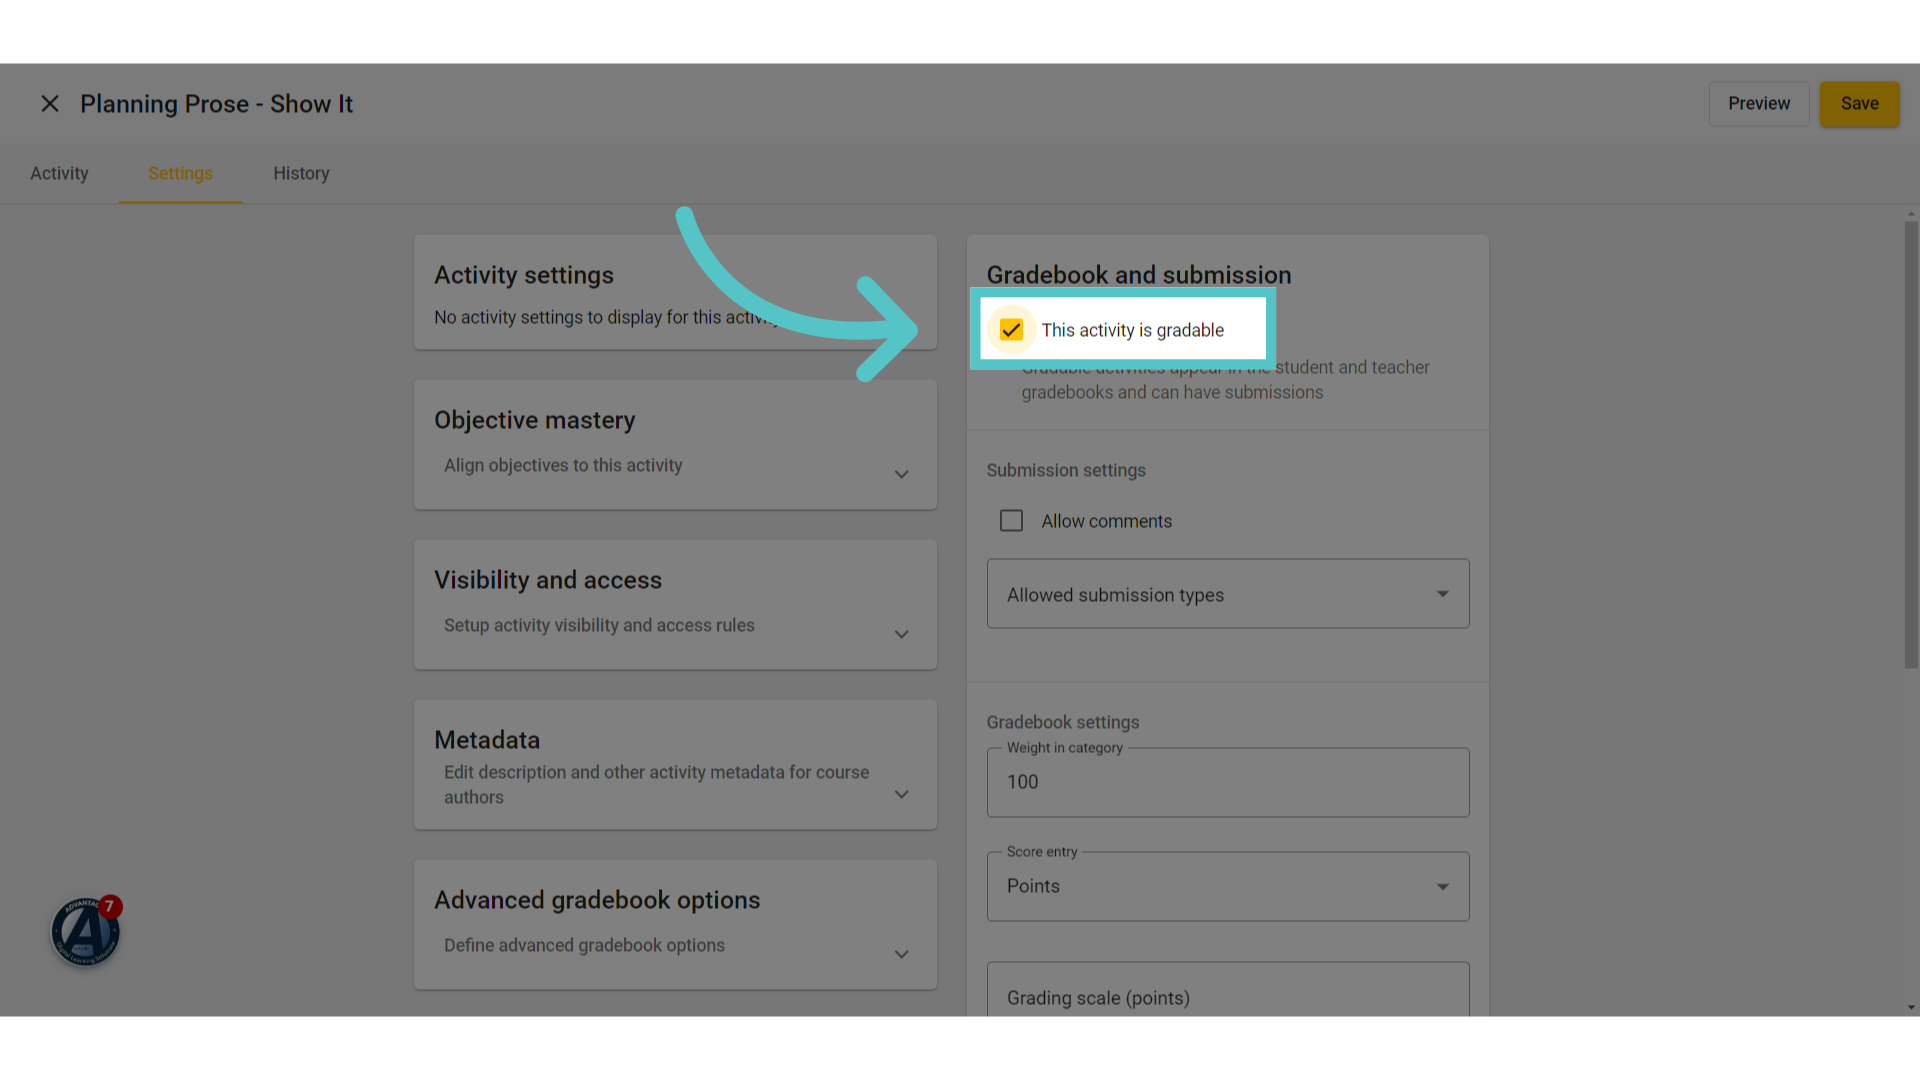
Check the box to make this a gradable activity. It will now appear in the course gradebook.
7. Submission Settings
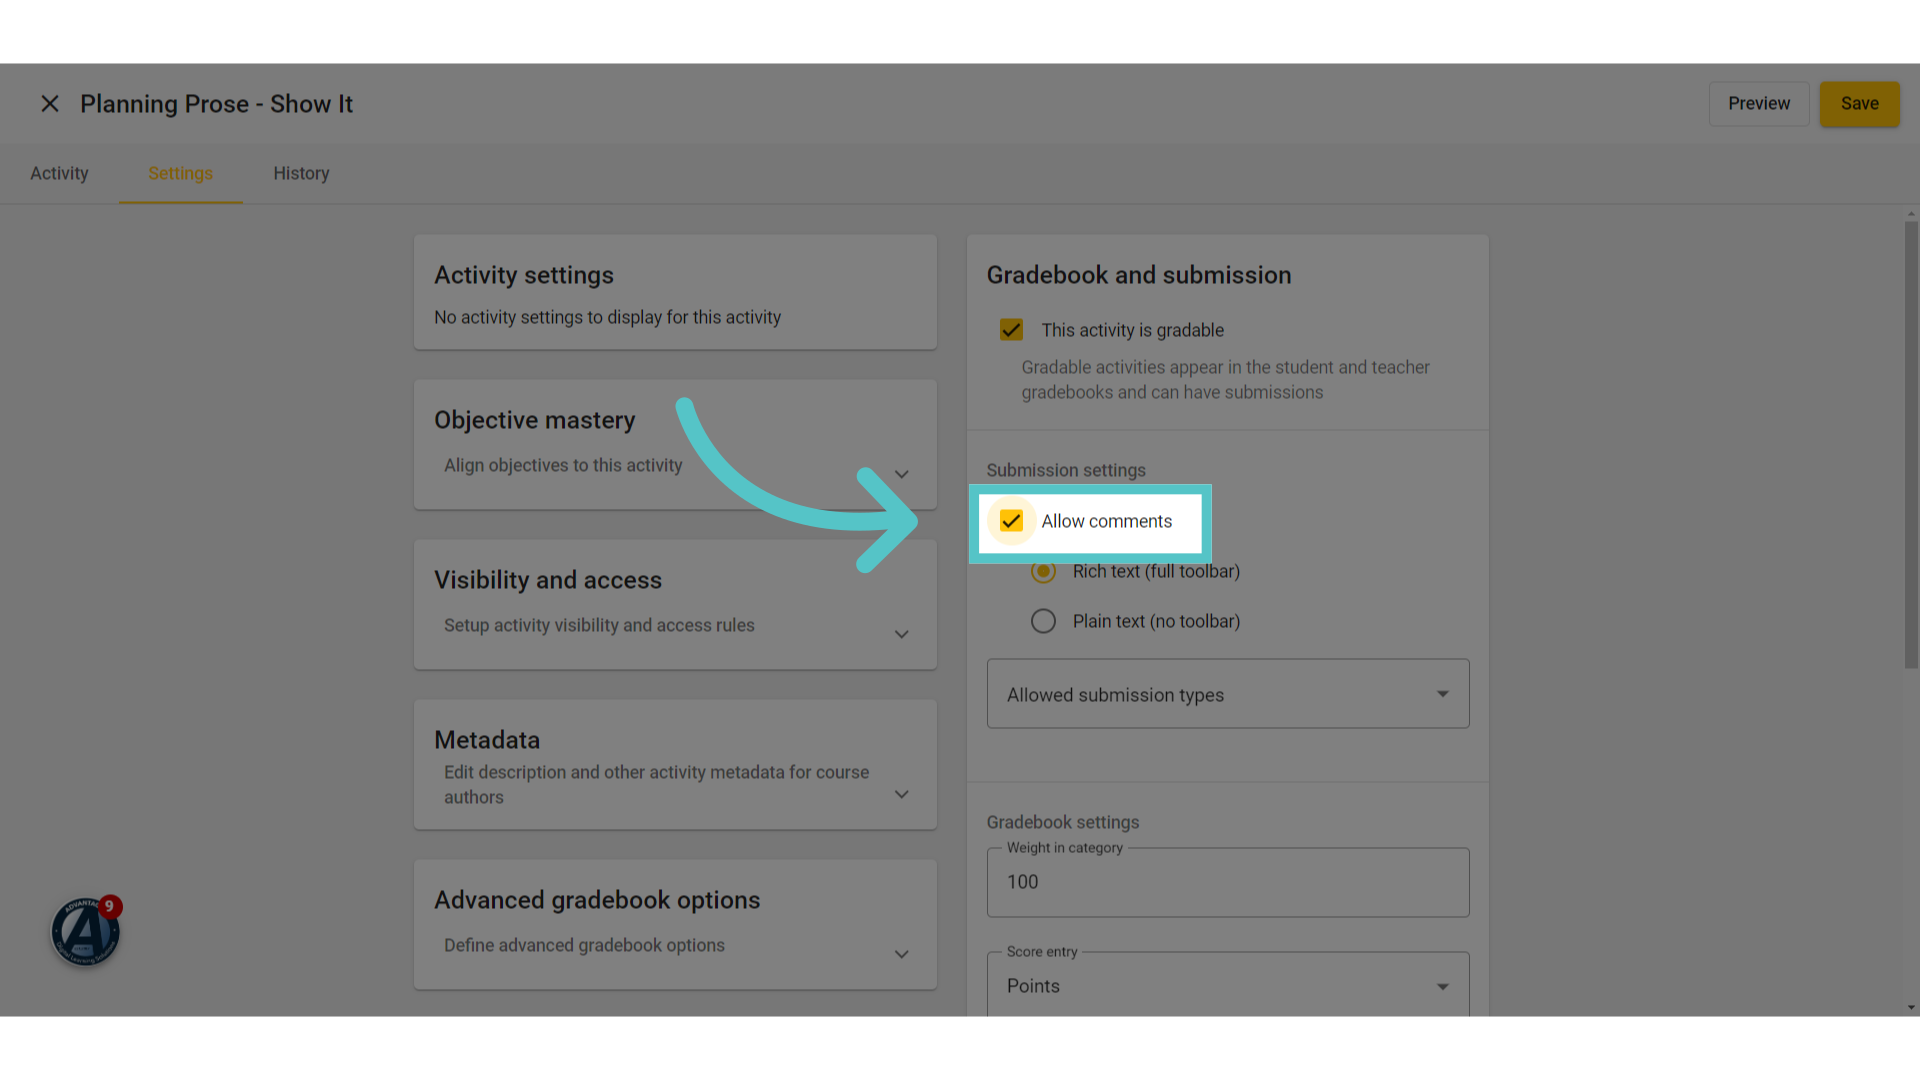
Teachers must decide the submission format for each activity. Checking the "Allow Comments" box will allow students to type a response right at the bottom of the learning object page and submit.
8. Submission Options
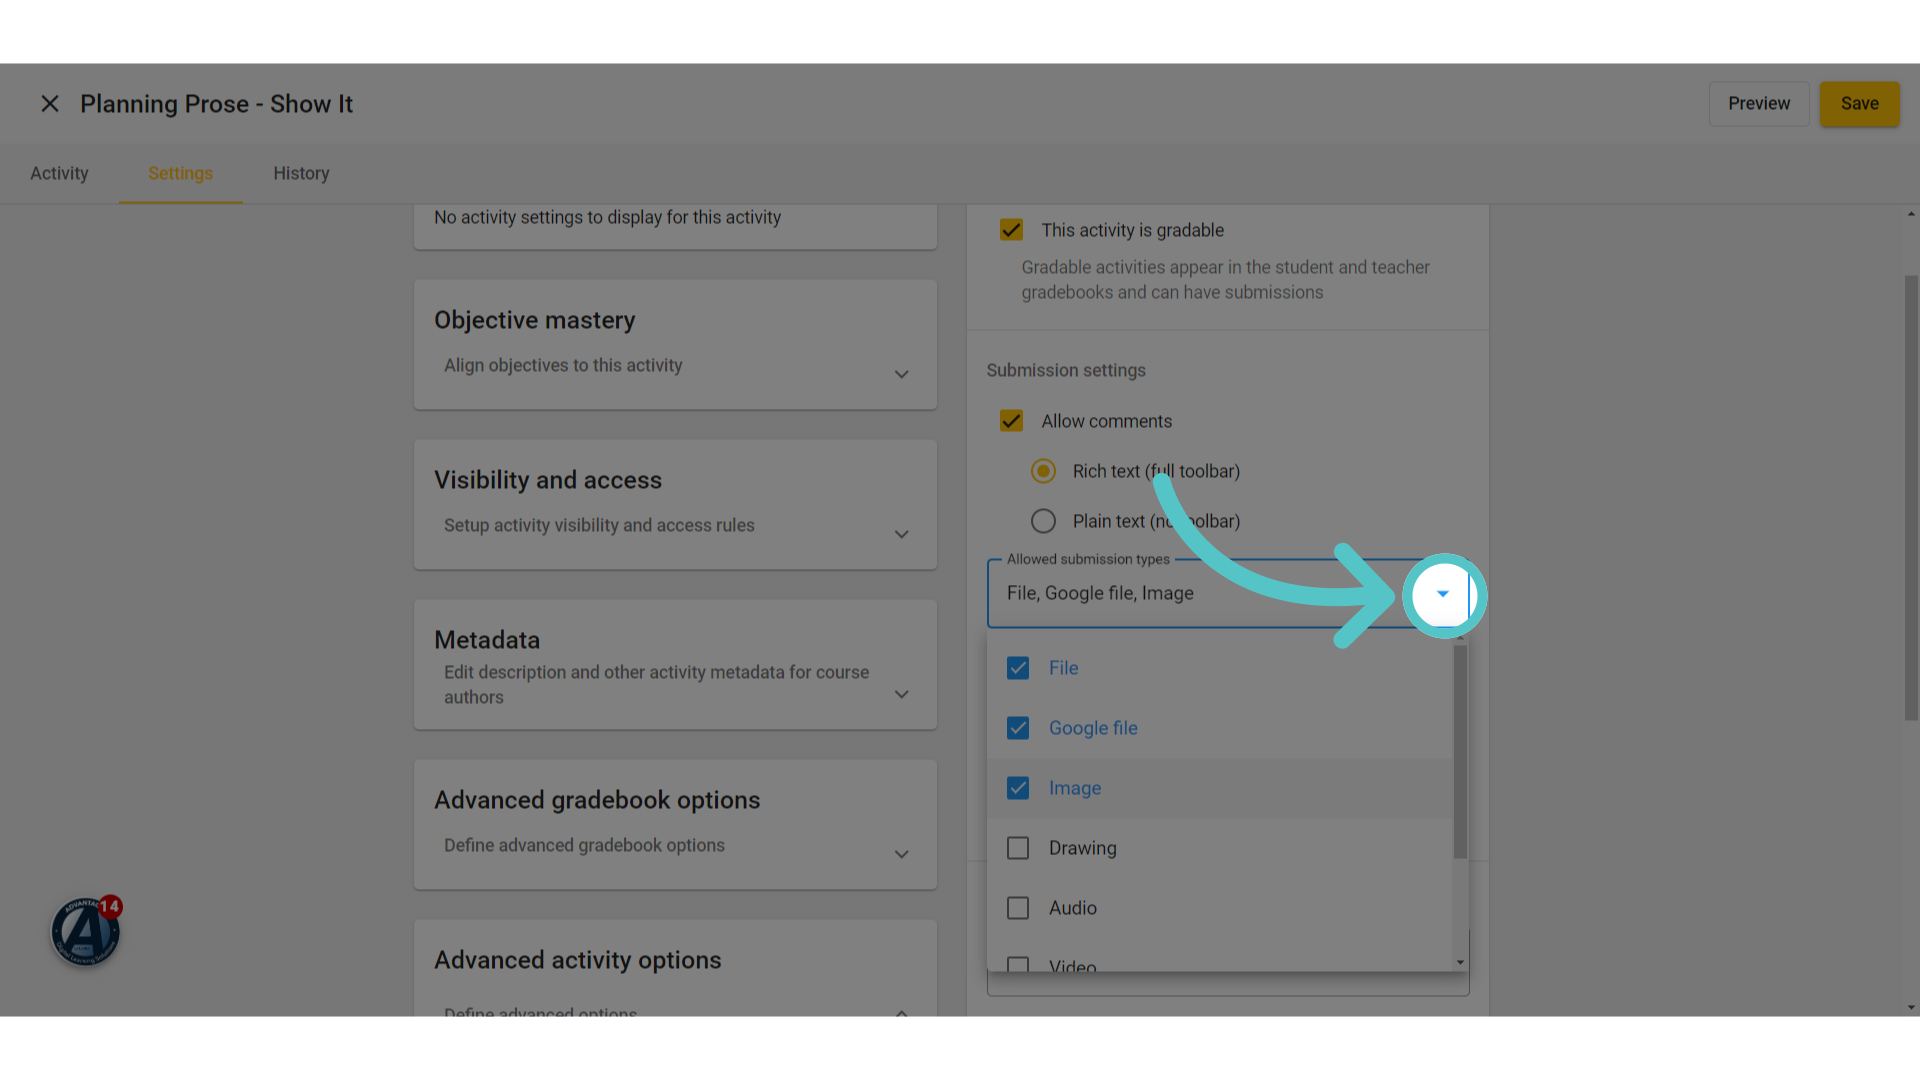
For more submission options, review the menu for "Allowed Submission Types" and select accordingly. Teachers can select the options to upload files, images, audio, or video. Multiple options for submission can be selected.
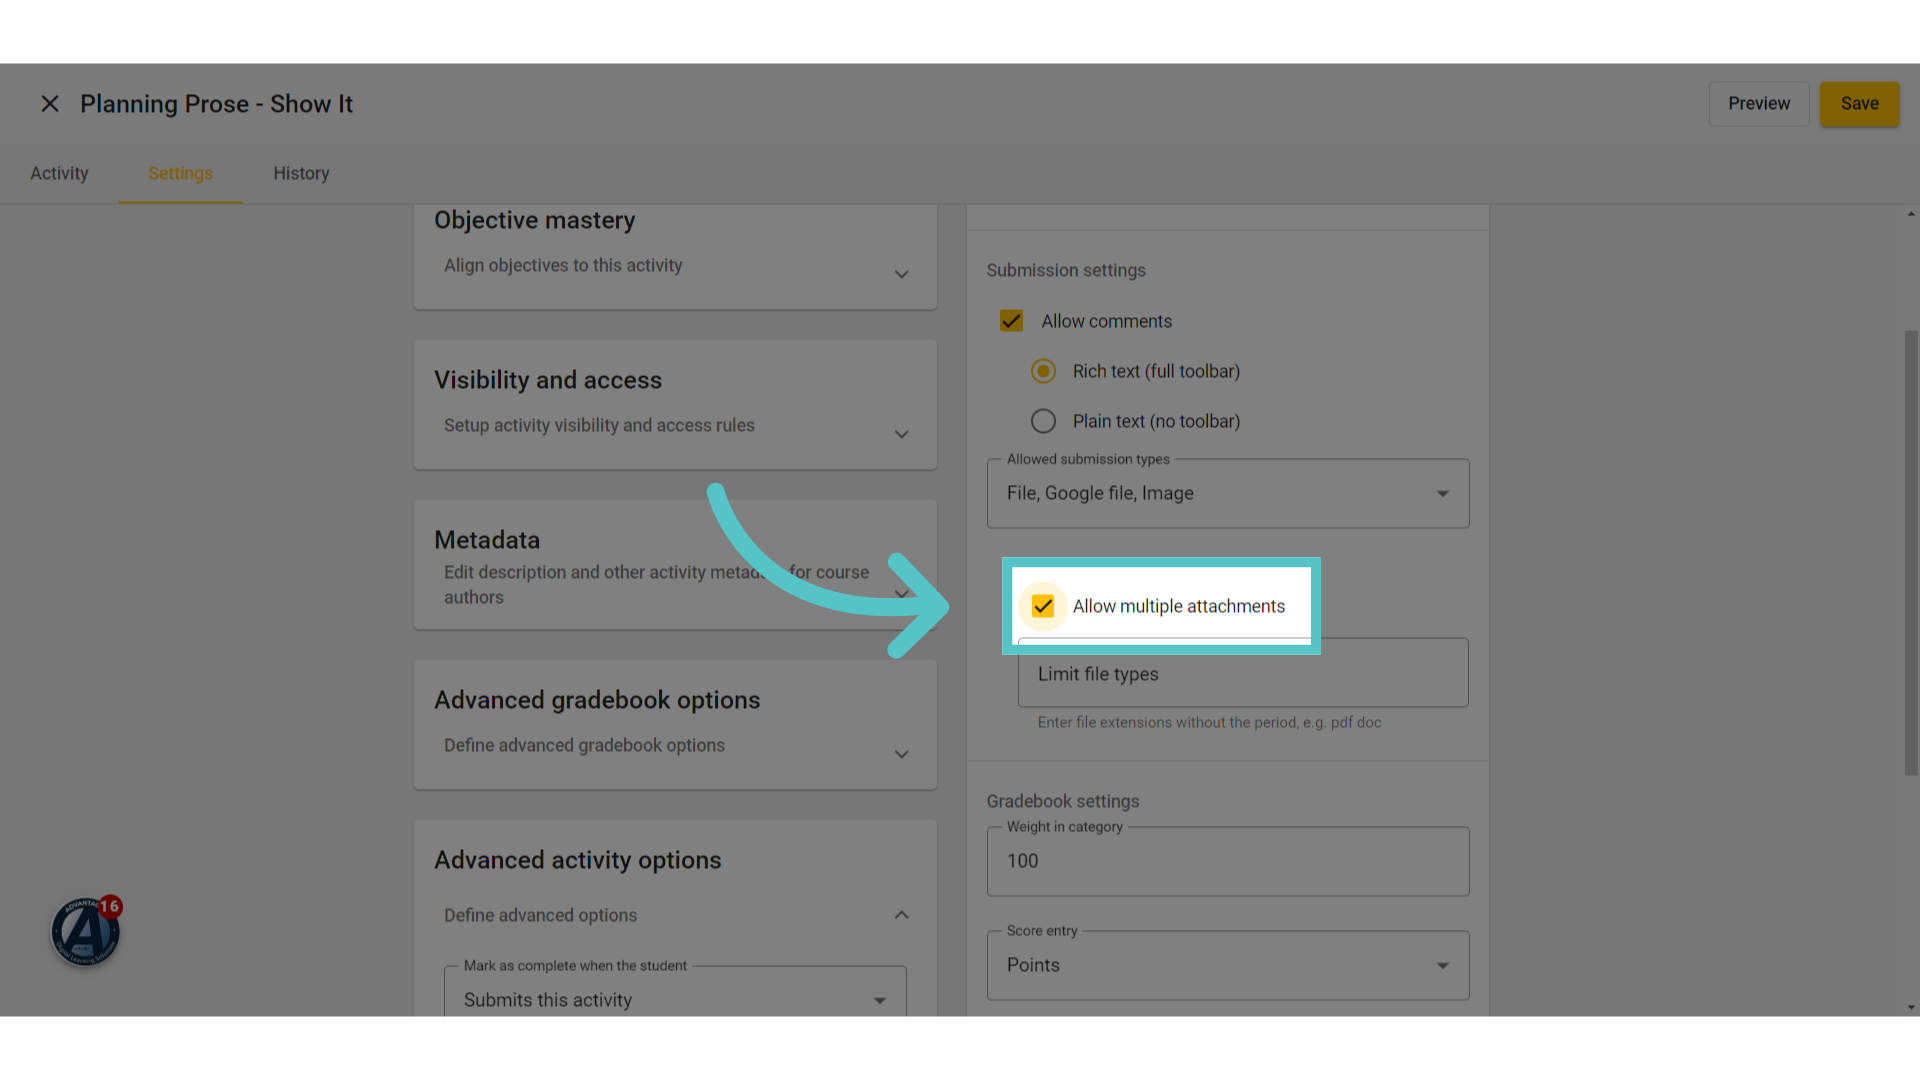
9. Multiple Attachments
We recommend checking the box to allow multiple attachments, just in case a student submits more than one file.
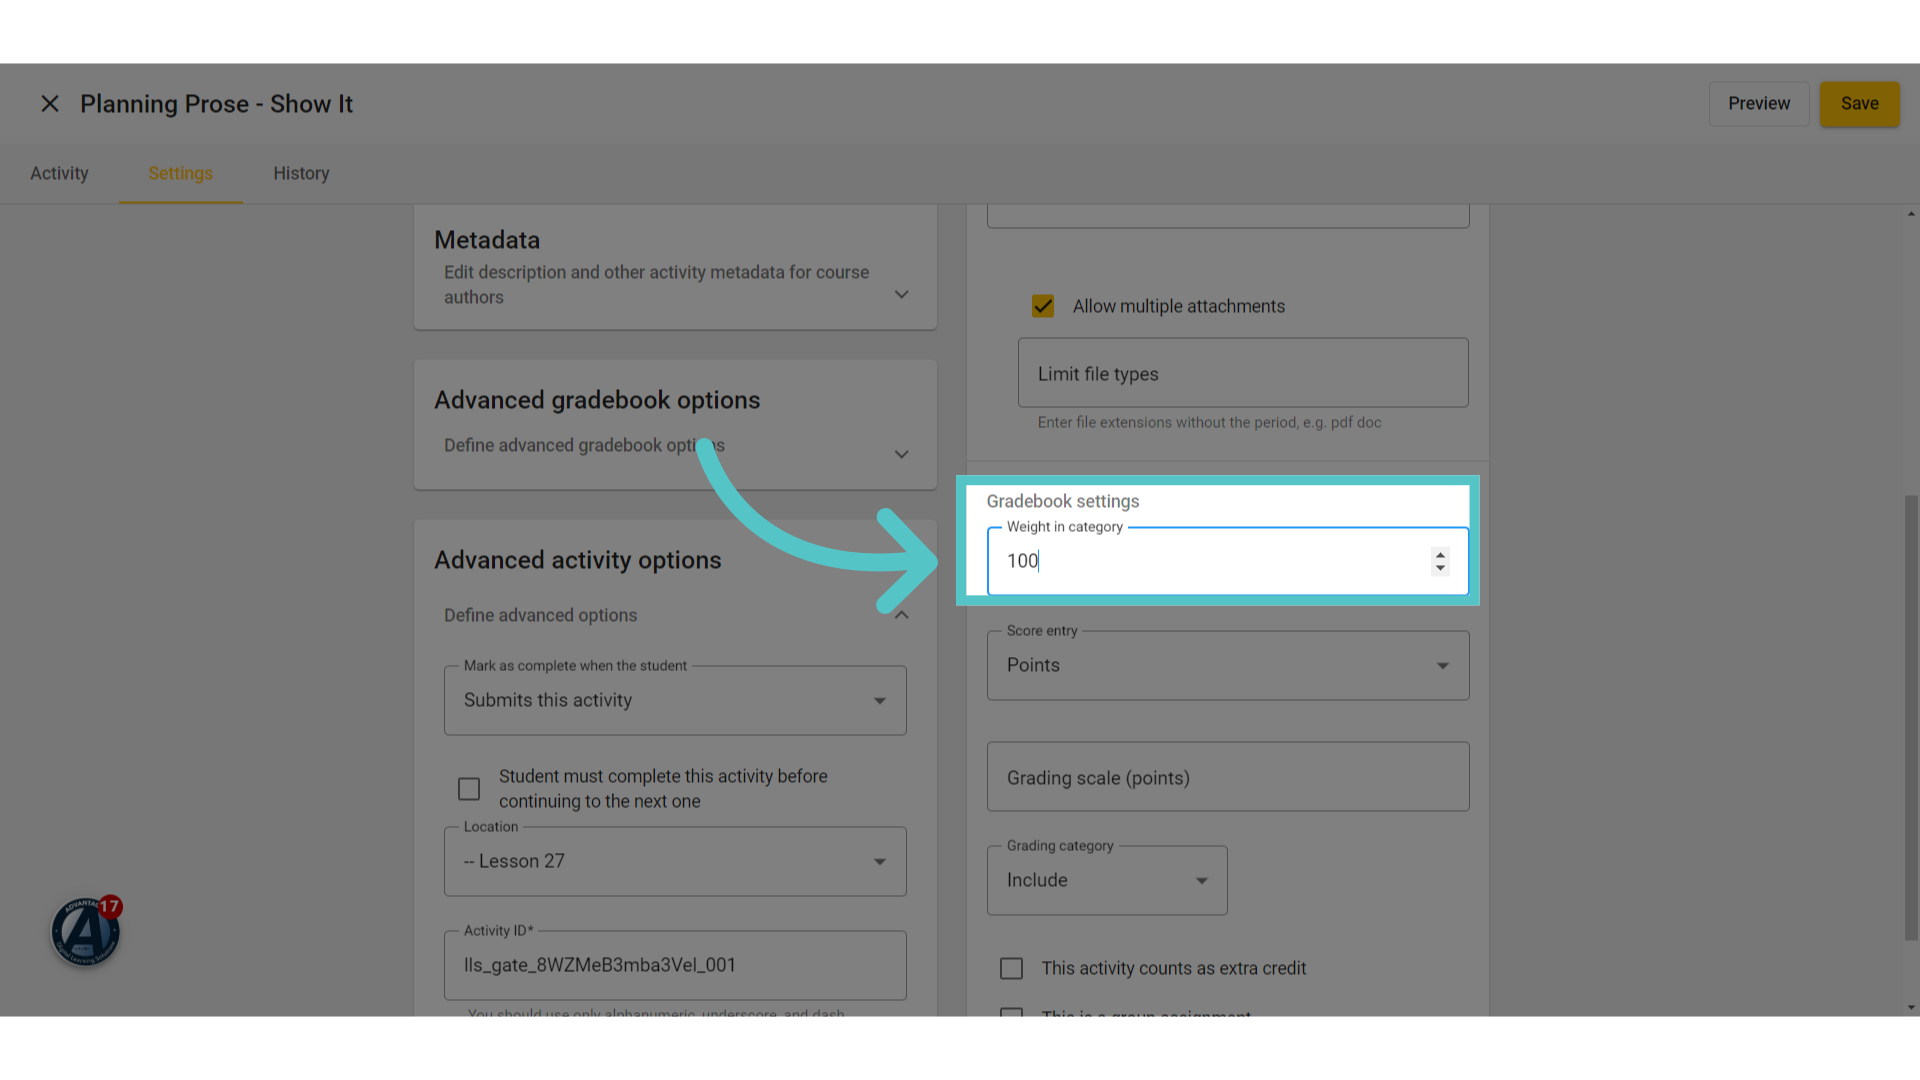
10. Weight
Teachers can choose to add weight to the graded activity.
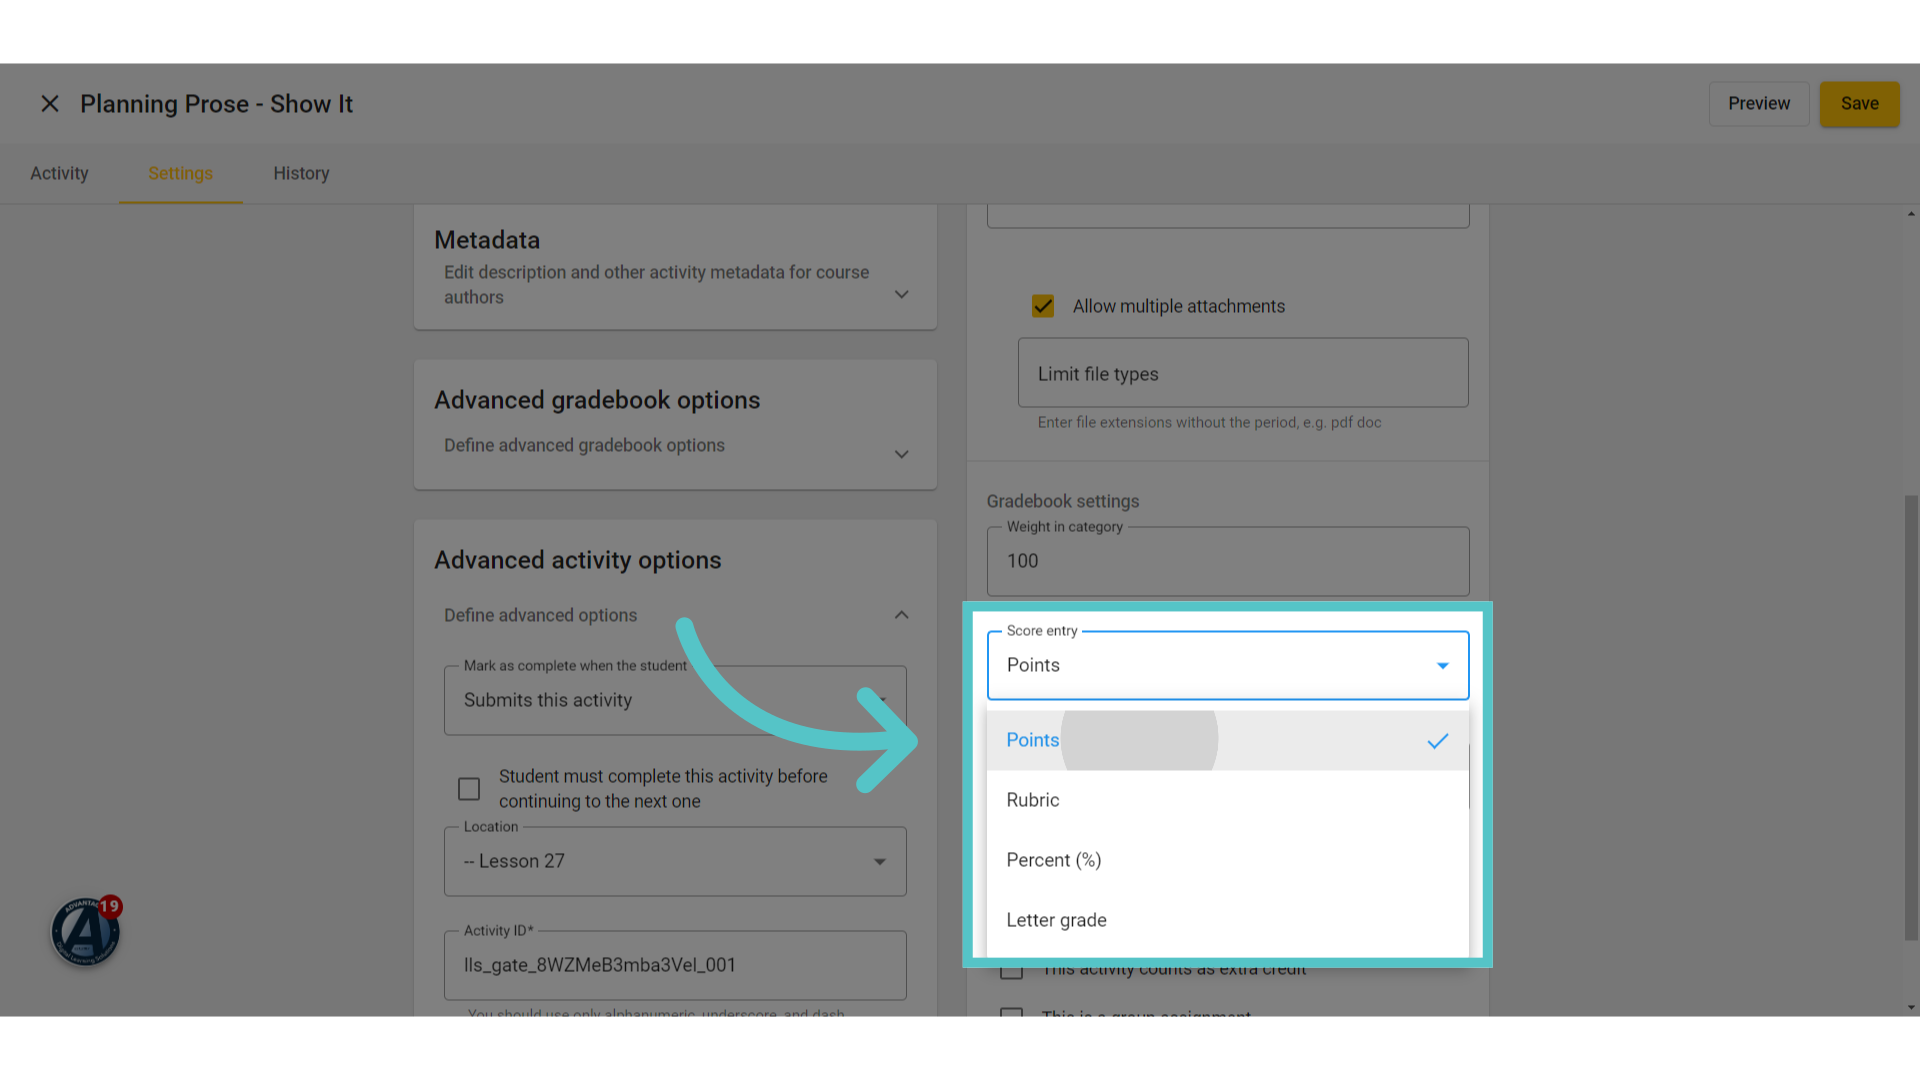
11. Score Entry
Teachers can choose to enter the score as points, percentages, or letter grades. There is also an option to upload a rubric.
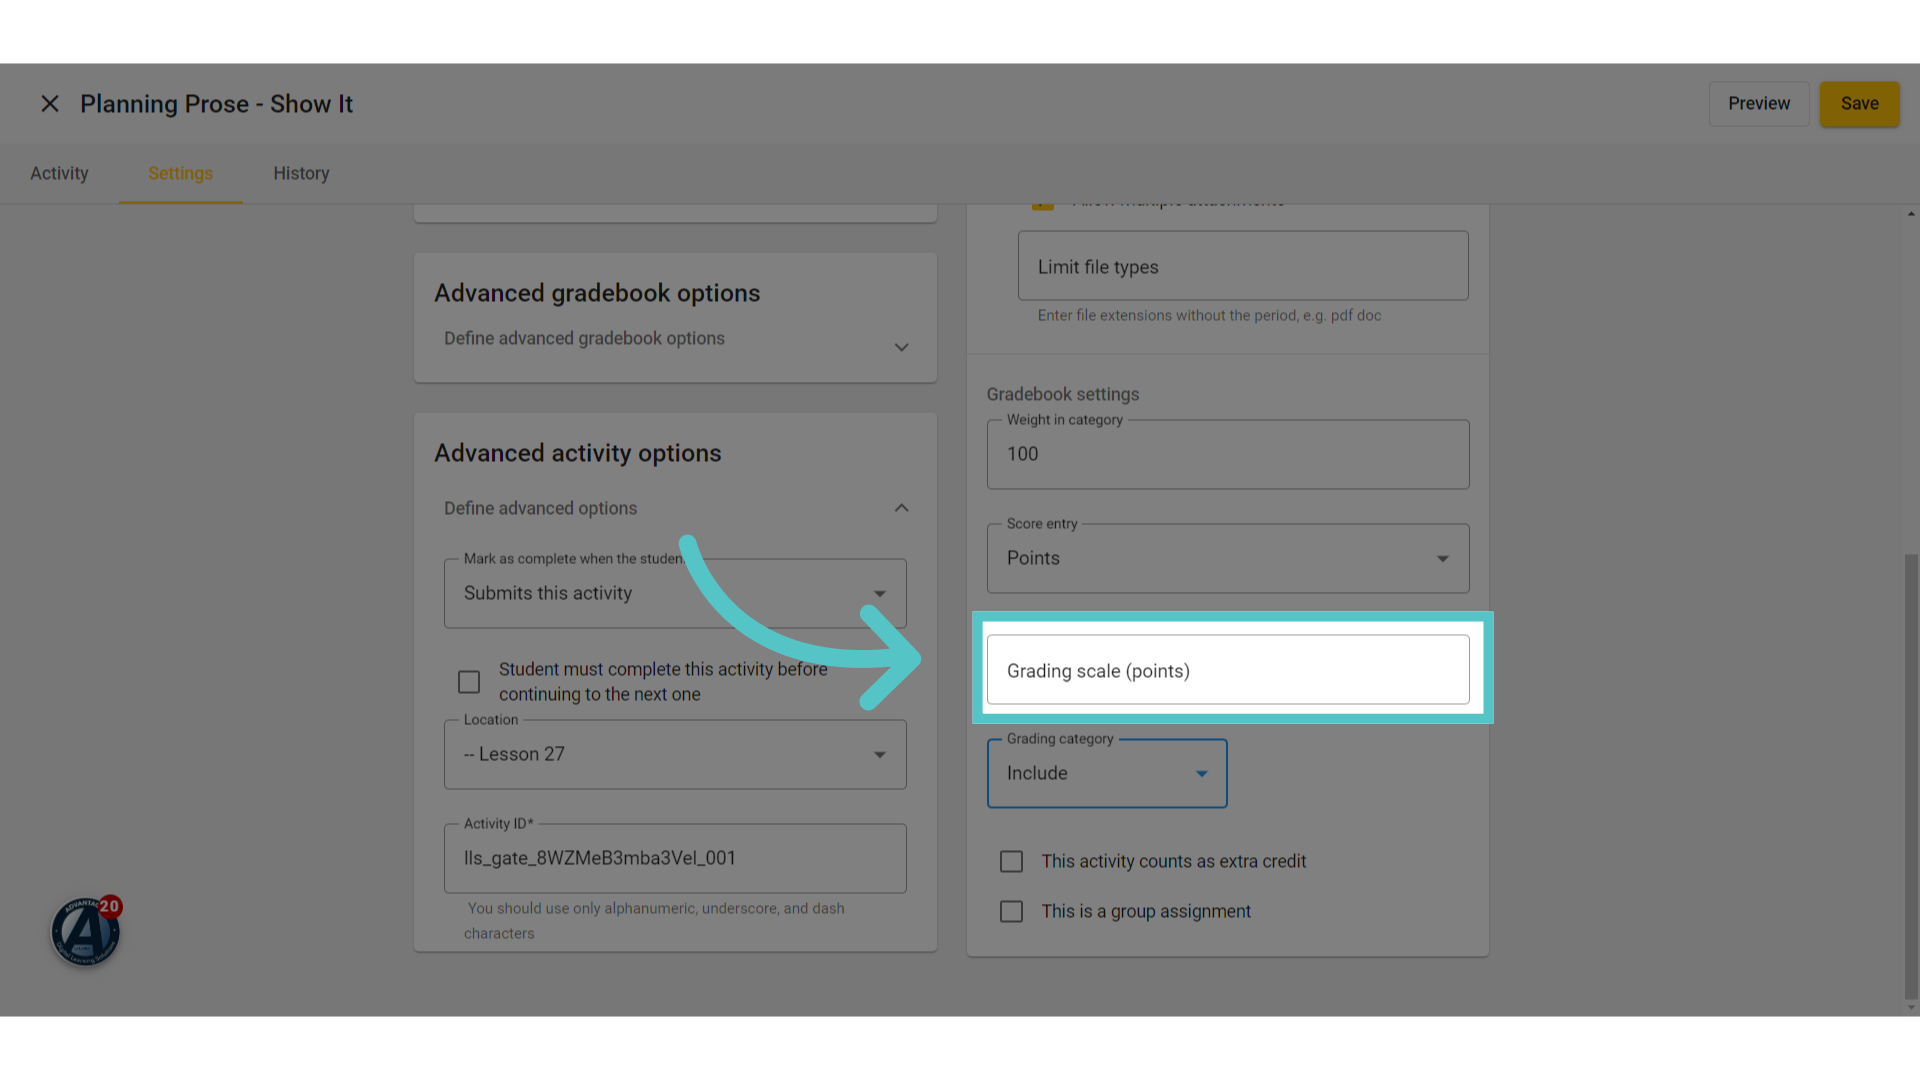
12. Point Value
If using points, enter the total point value for the activity in the Grading Scale field.
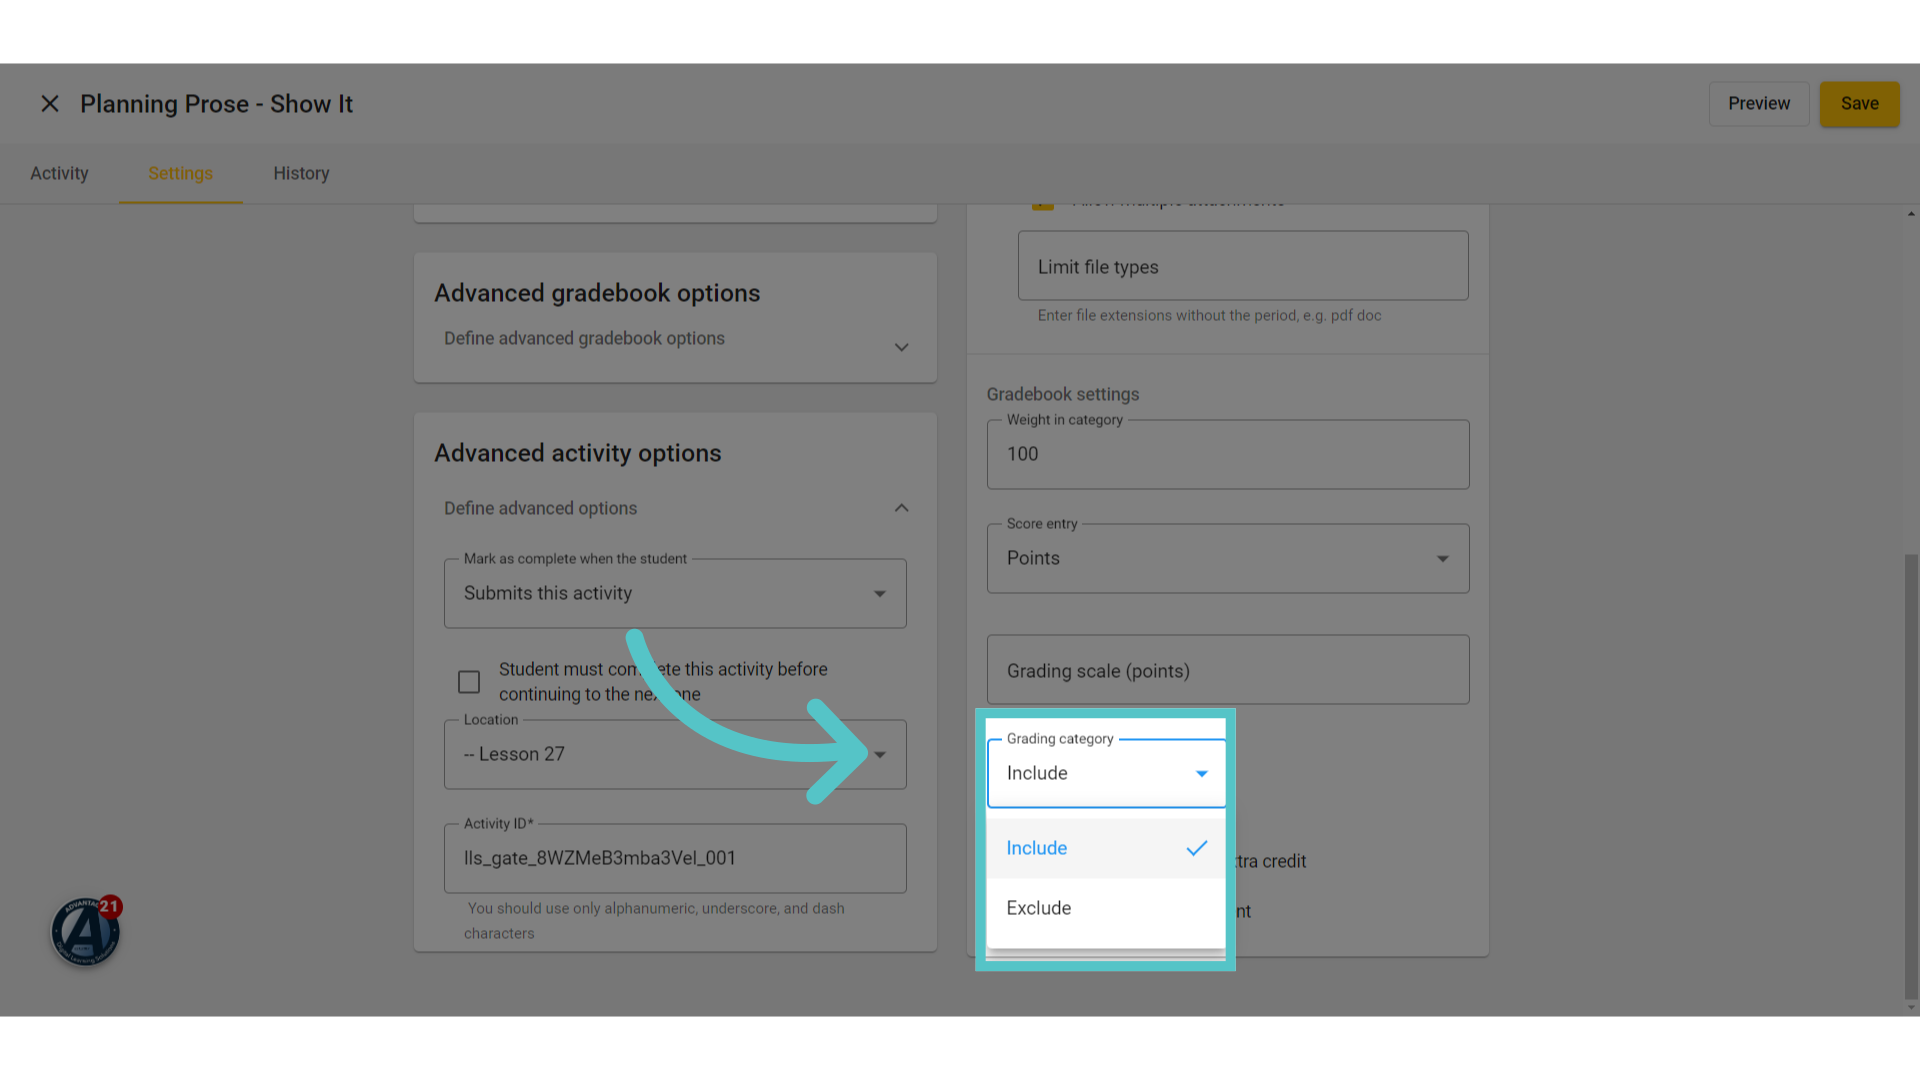
13. Include/Exclude
Teachers can choose to include this activity in the final course grade or to exclude it from the course average.
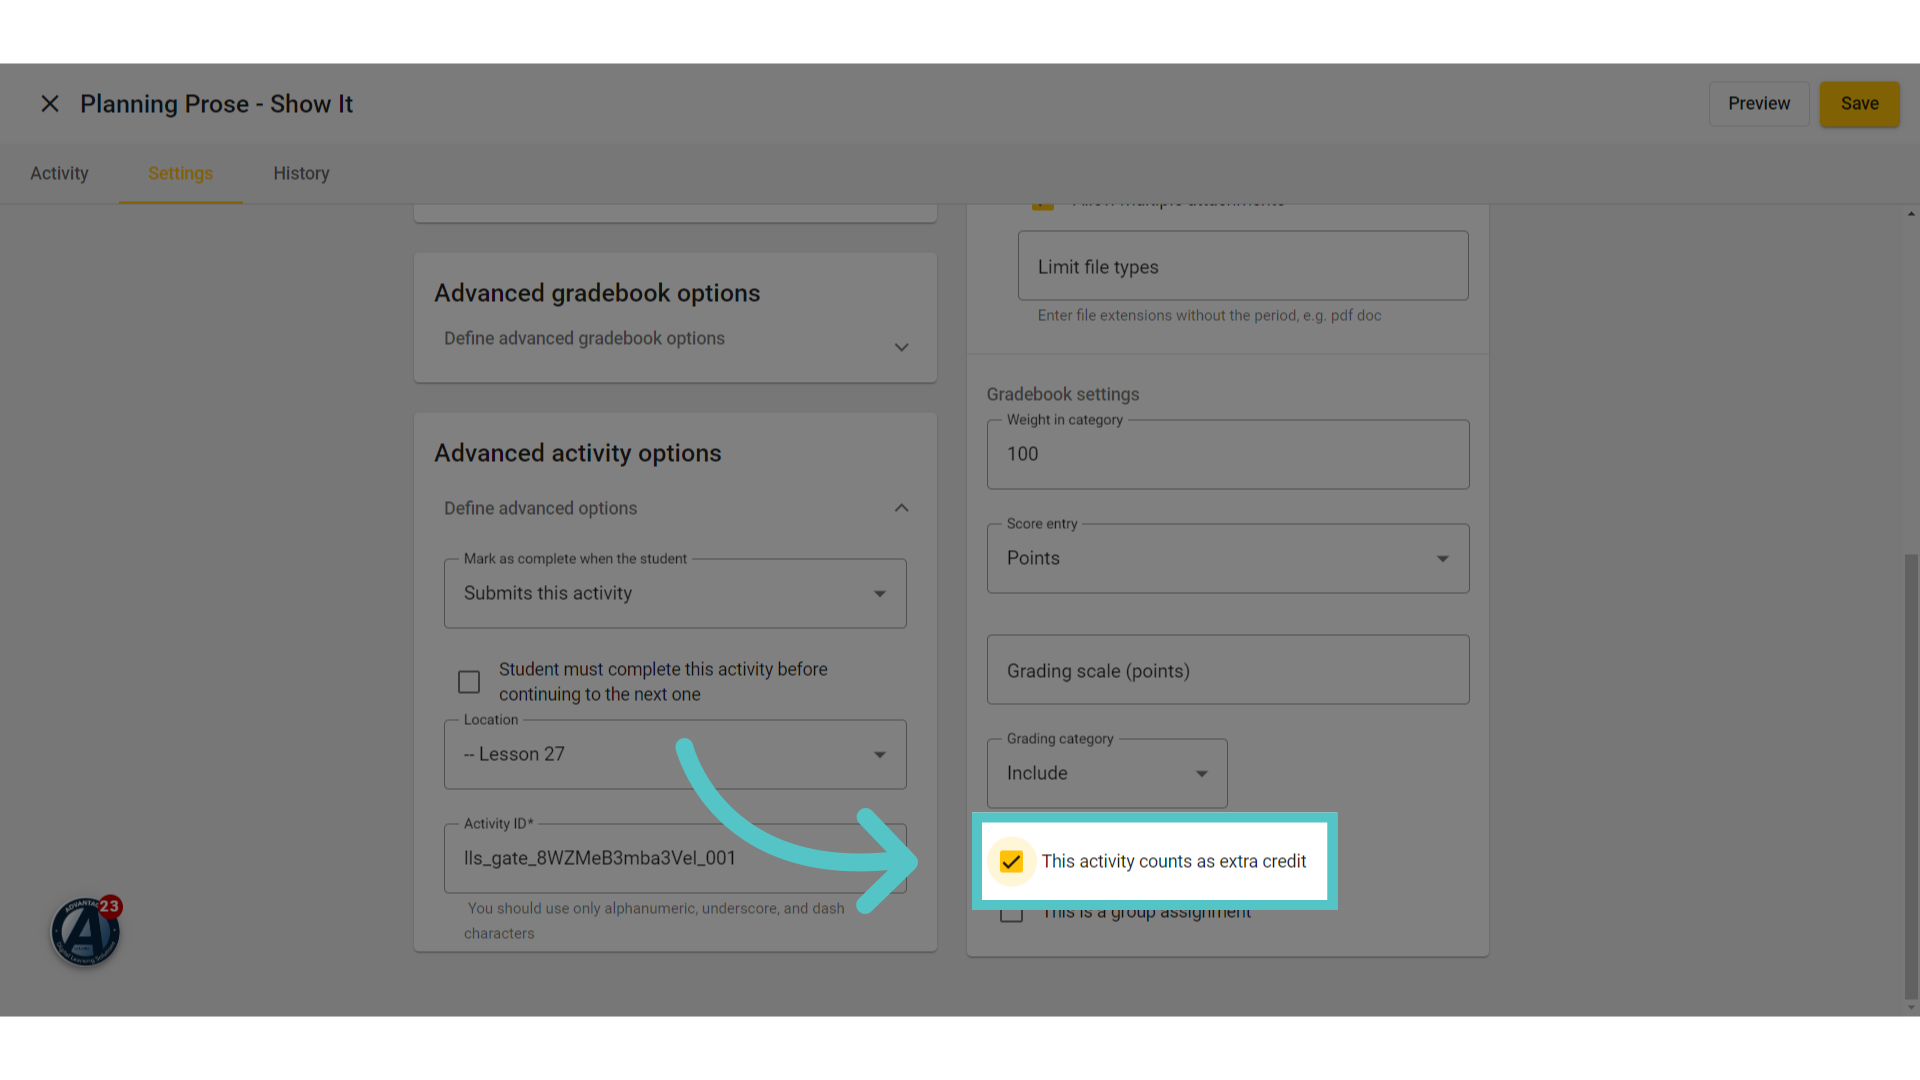
14. Extra Credit
Finally, there is an option to count the activity as extra credit. Checking this box will mean the activity is not required to be submitted. There will be a star next to it in the gradebook to indicate that it is extra credit.
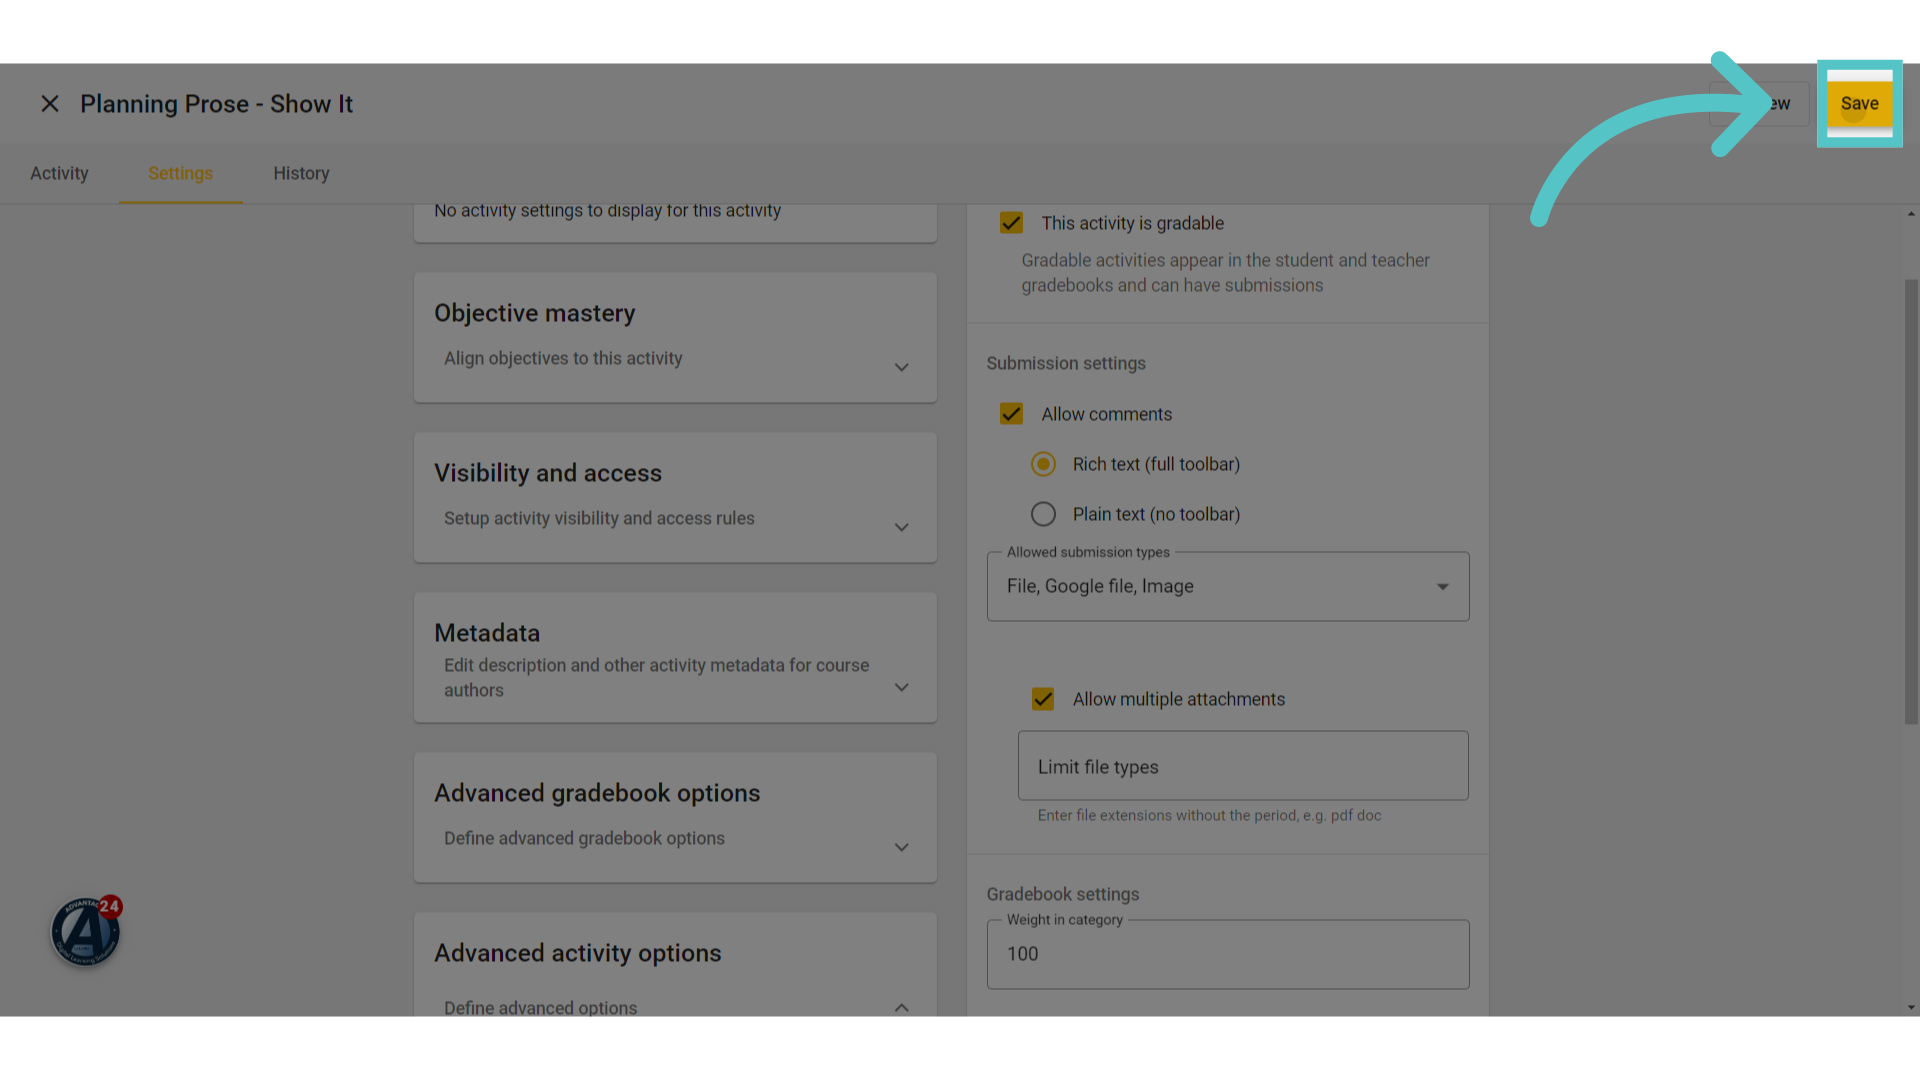
15. Click "Save"
Be sure to save settings that have been changed.
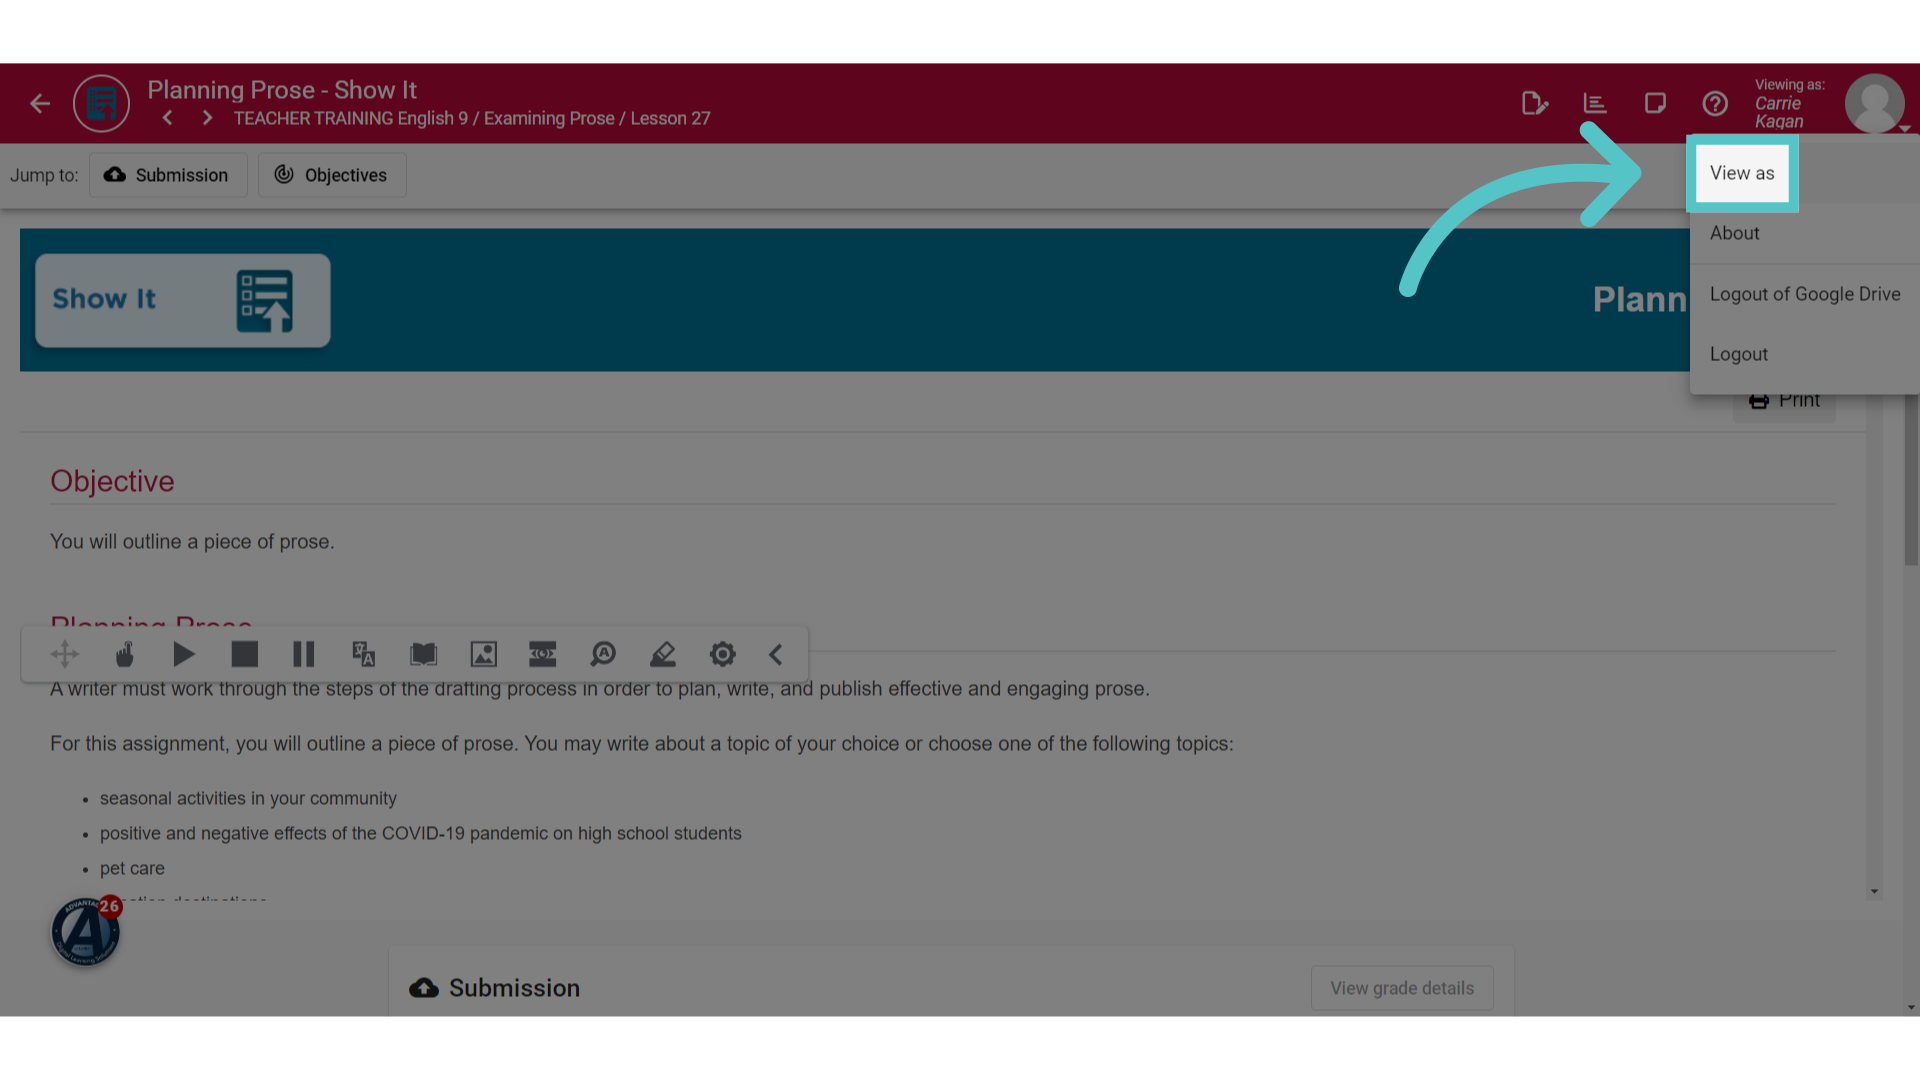
16. Click "View as"
If you would like to see how this activity appears to the students, select the "View, As," option from the profile menu.
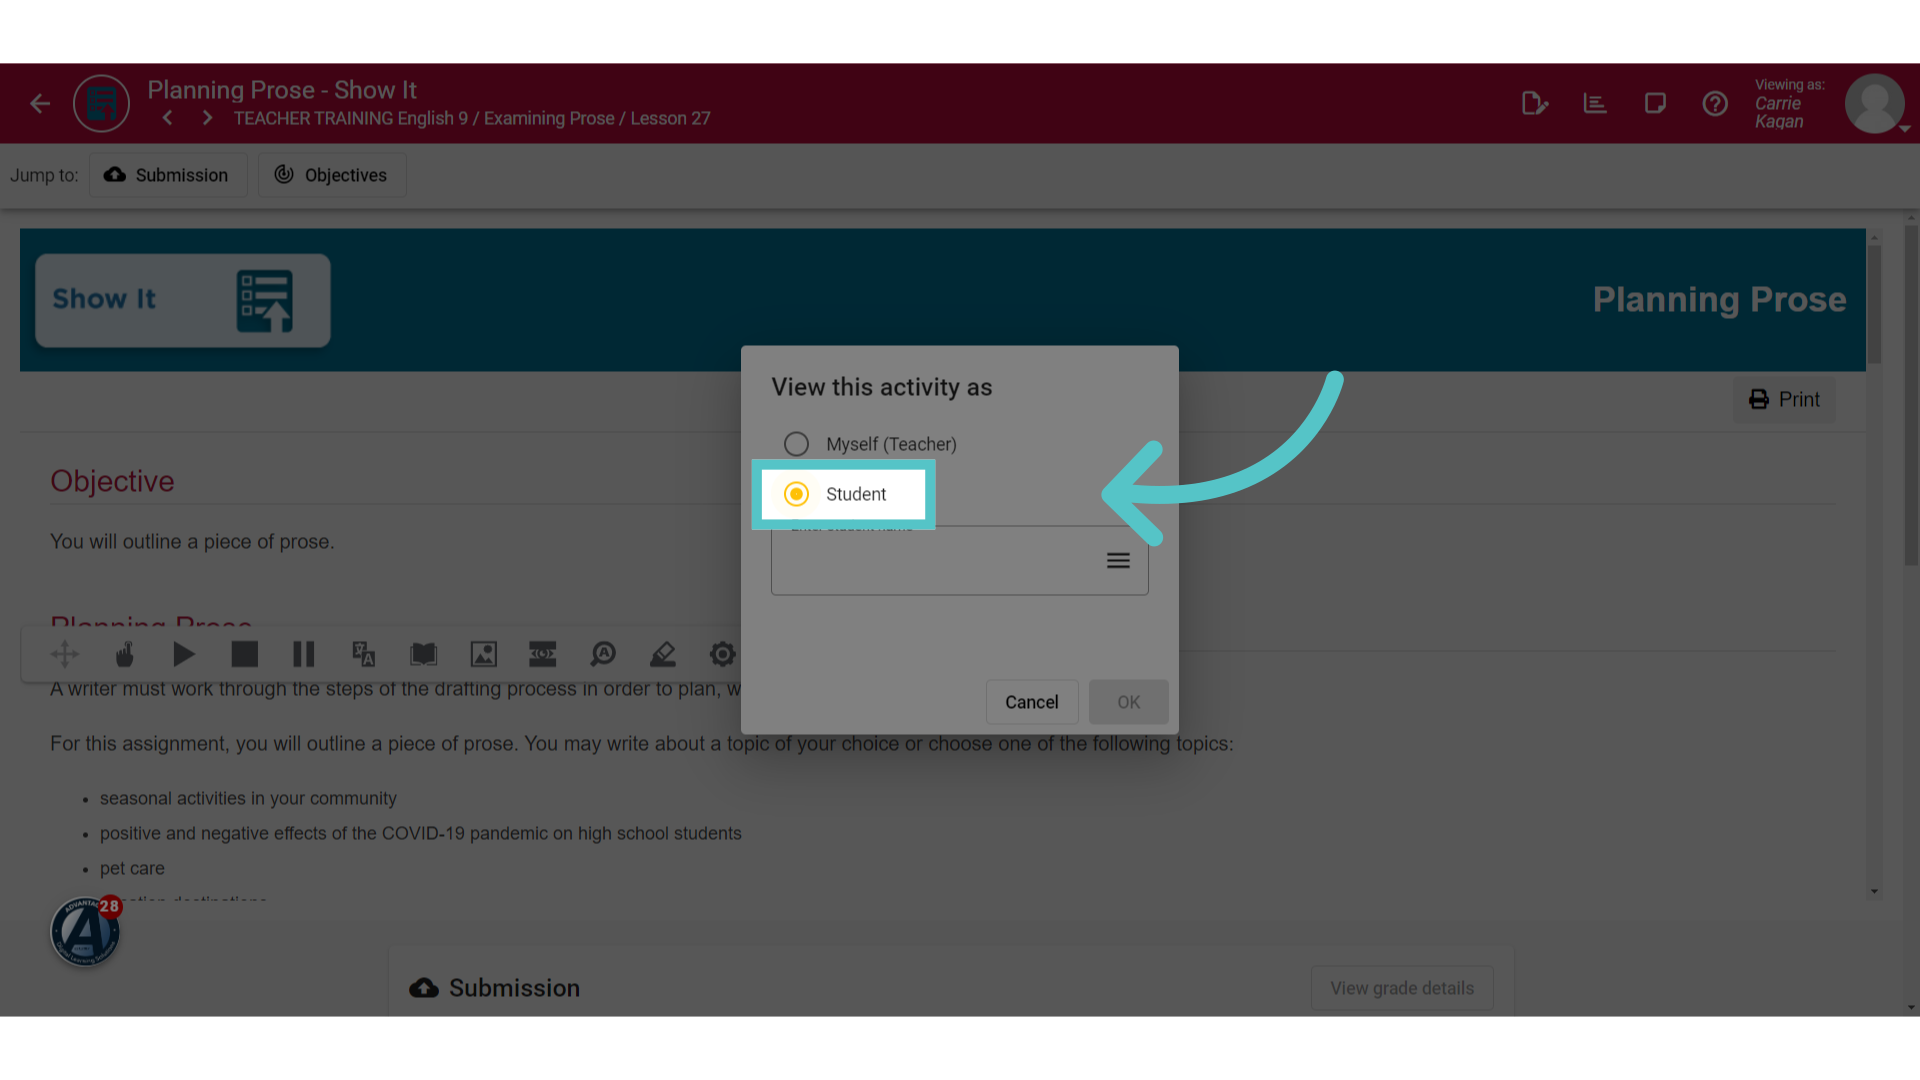
17. Select "student"
Choose to view this activity as a student.
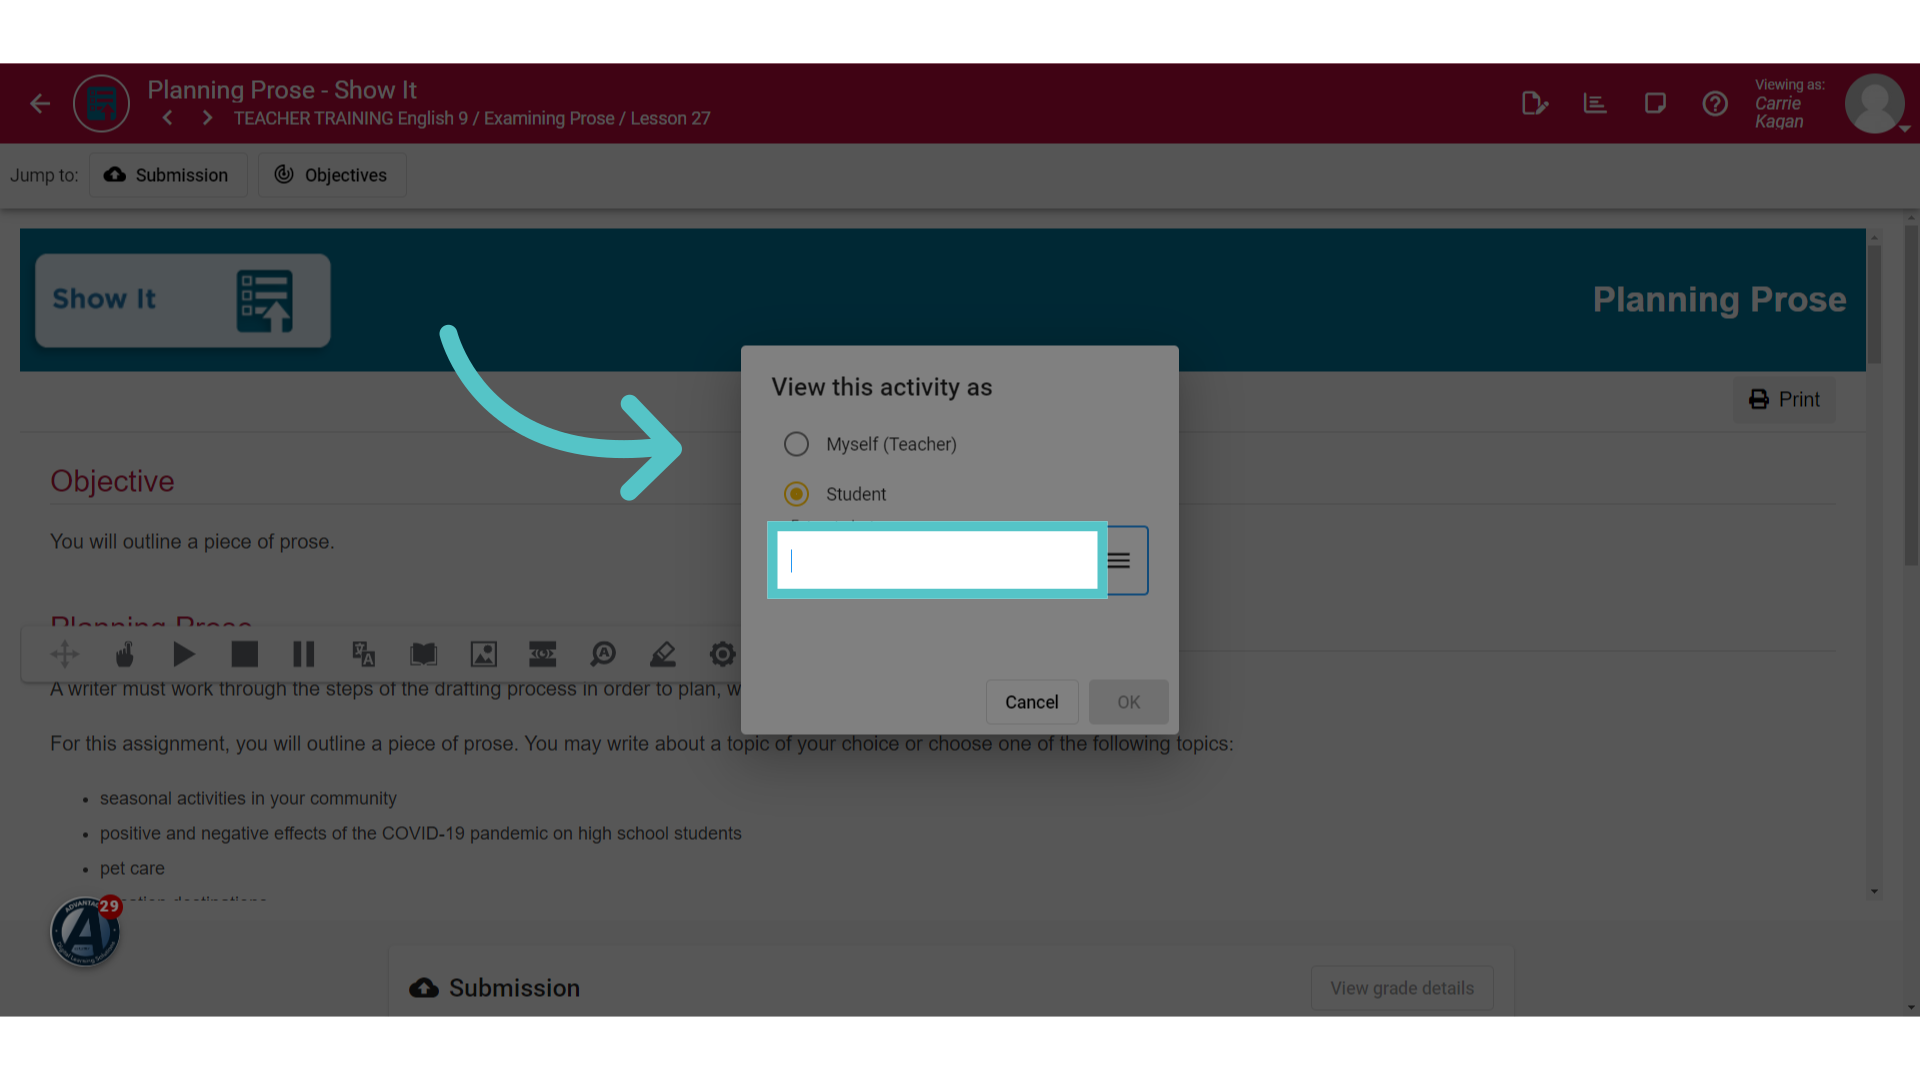
18. Enter student name
Enter any enrolled student's name.
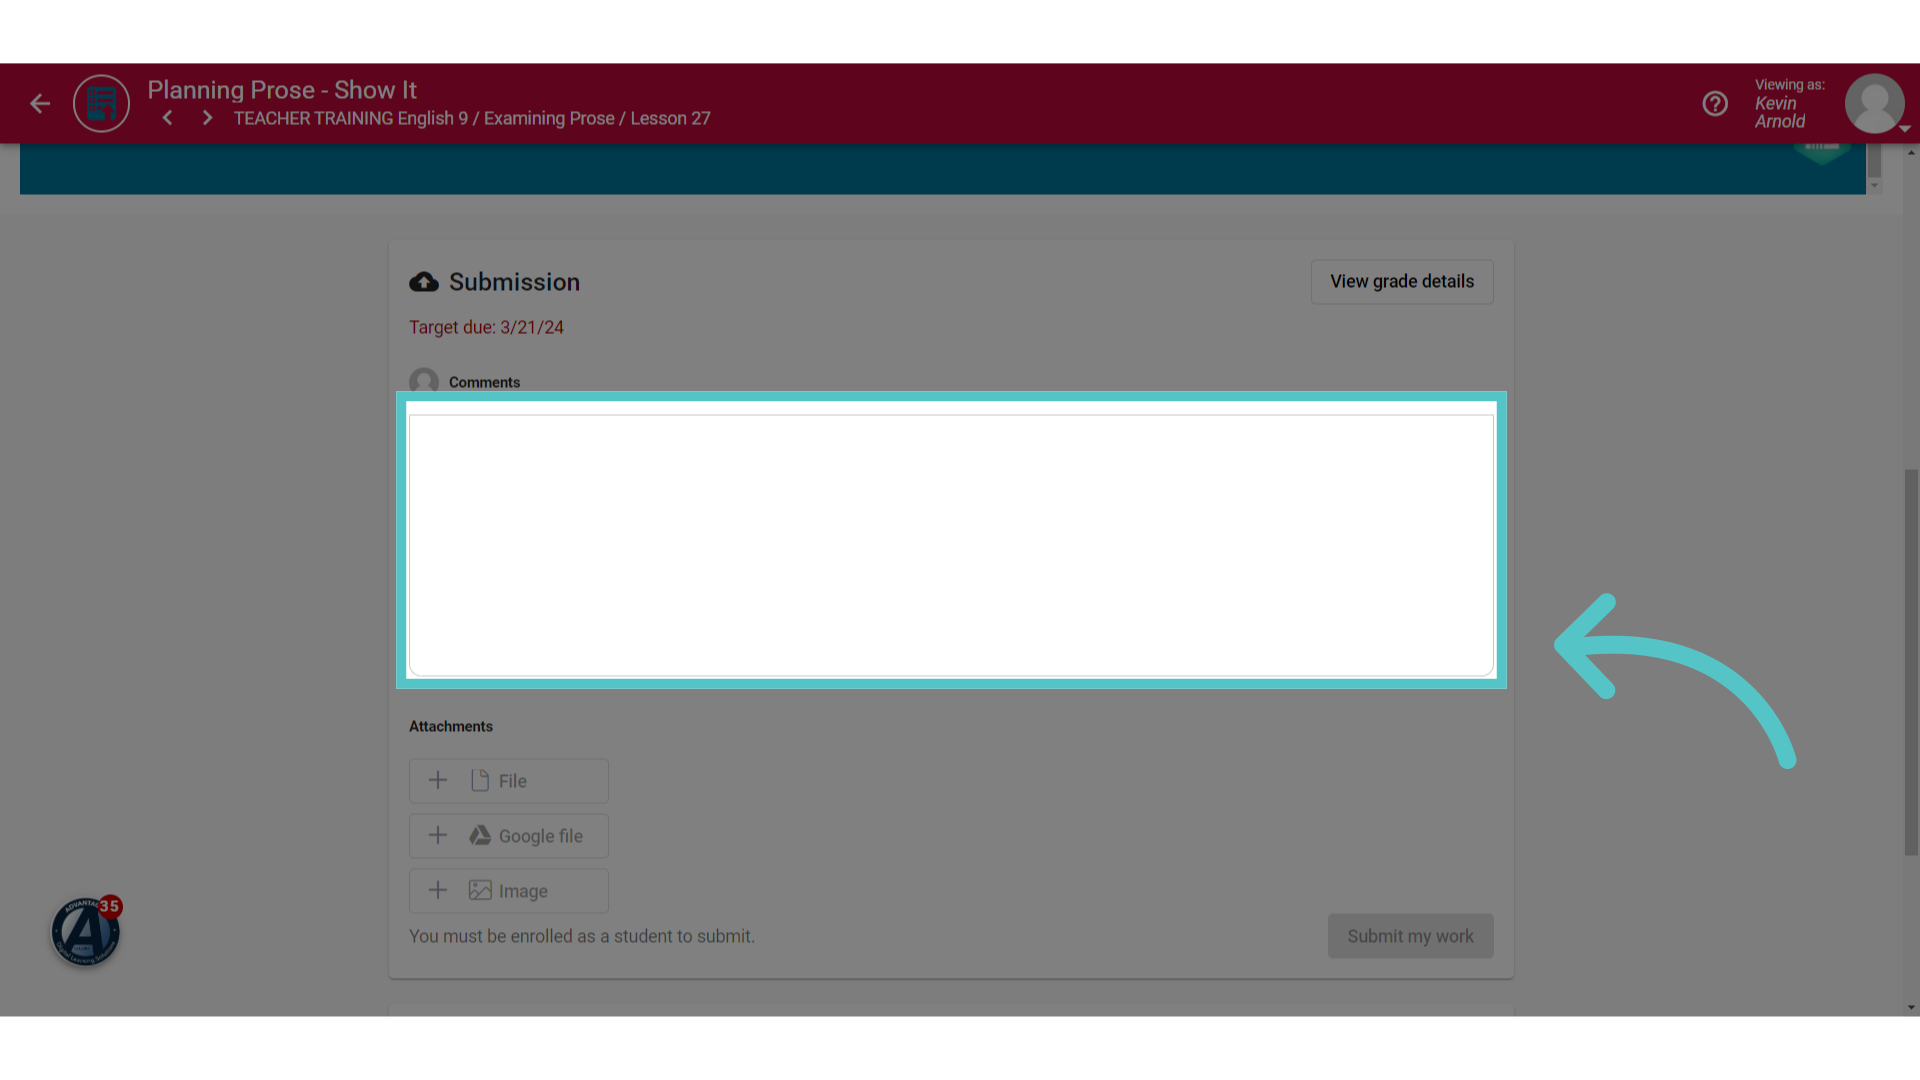
19. Comments Box
Scroll to the bottom of the activity page to see the submission options for students. If you checked the "Allow Comments" box, then you will see a text field for students to enter responses.
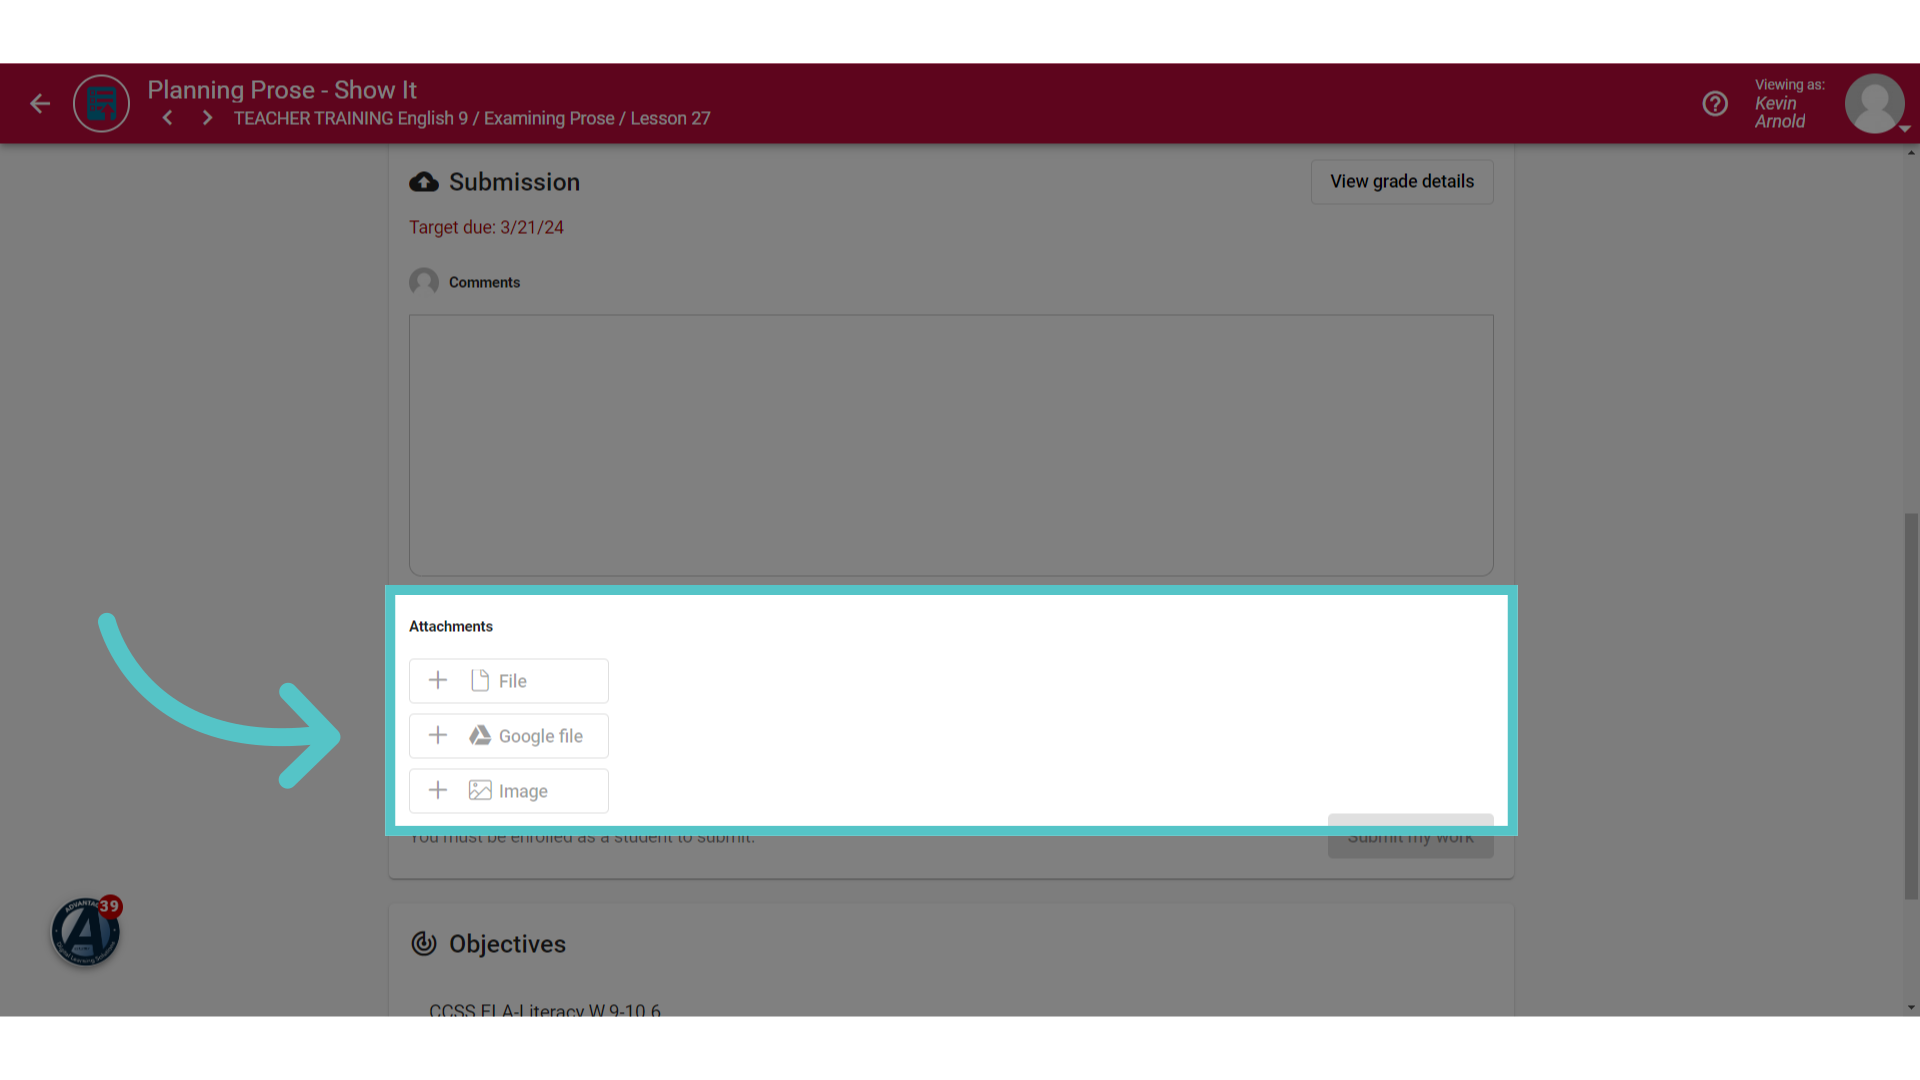
20. Attachment Options
Other submission types that were selected will appear as options for attachments. Students can choose their method of submission.
If you have any questions about the information in this tutorial, please click "Contact Support" to submit a help request.
Contact Support