Expand to Full Screen for Best Viewing
Learn how to efficiently batch upload students to ASSIST with these straightforward instructions
1. 1. Access the Batch Upload Template
First, Let's access the Batch Upload Template.

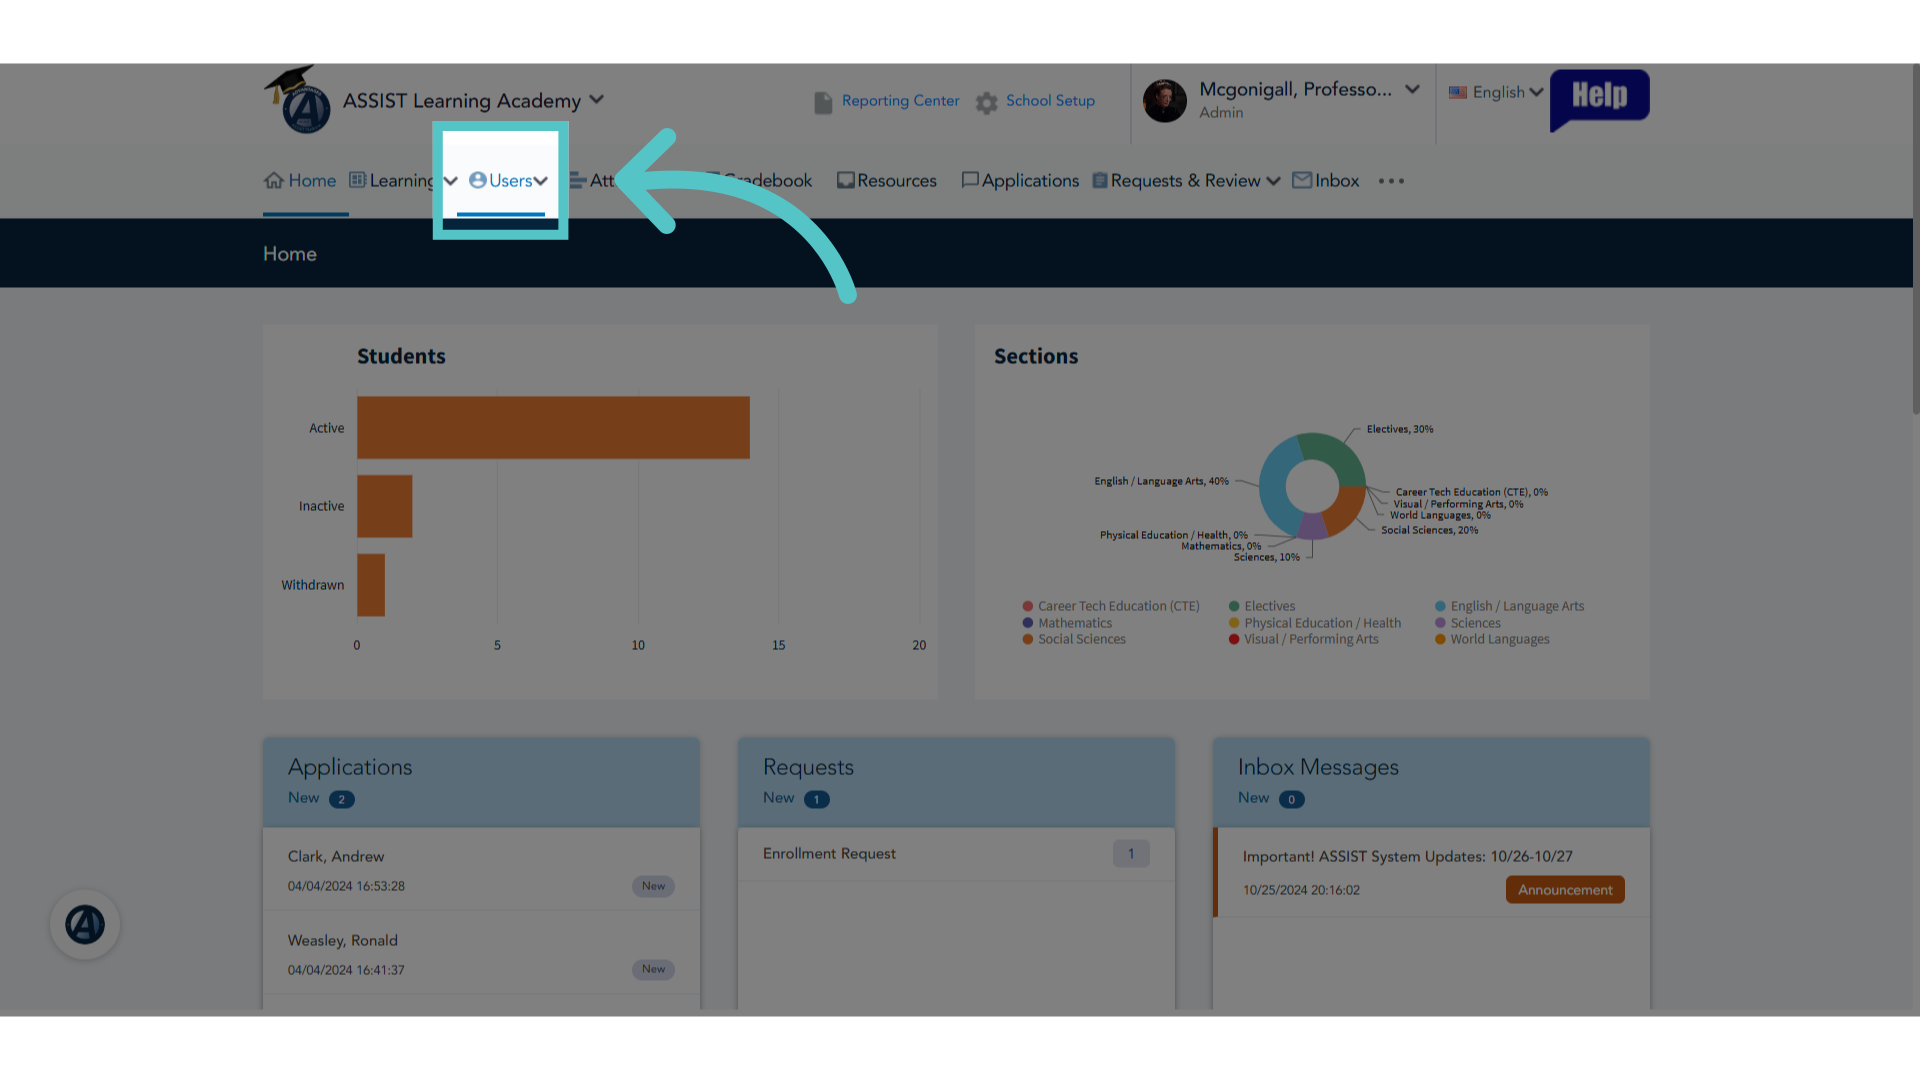
2. Click "Users"
From the Administrator portal, click the "Users" Tab.
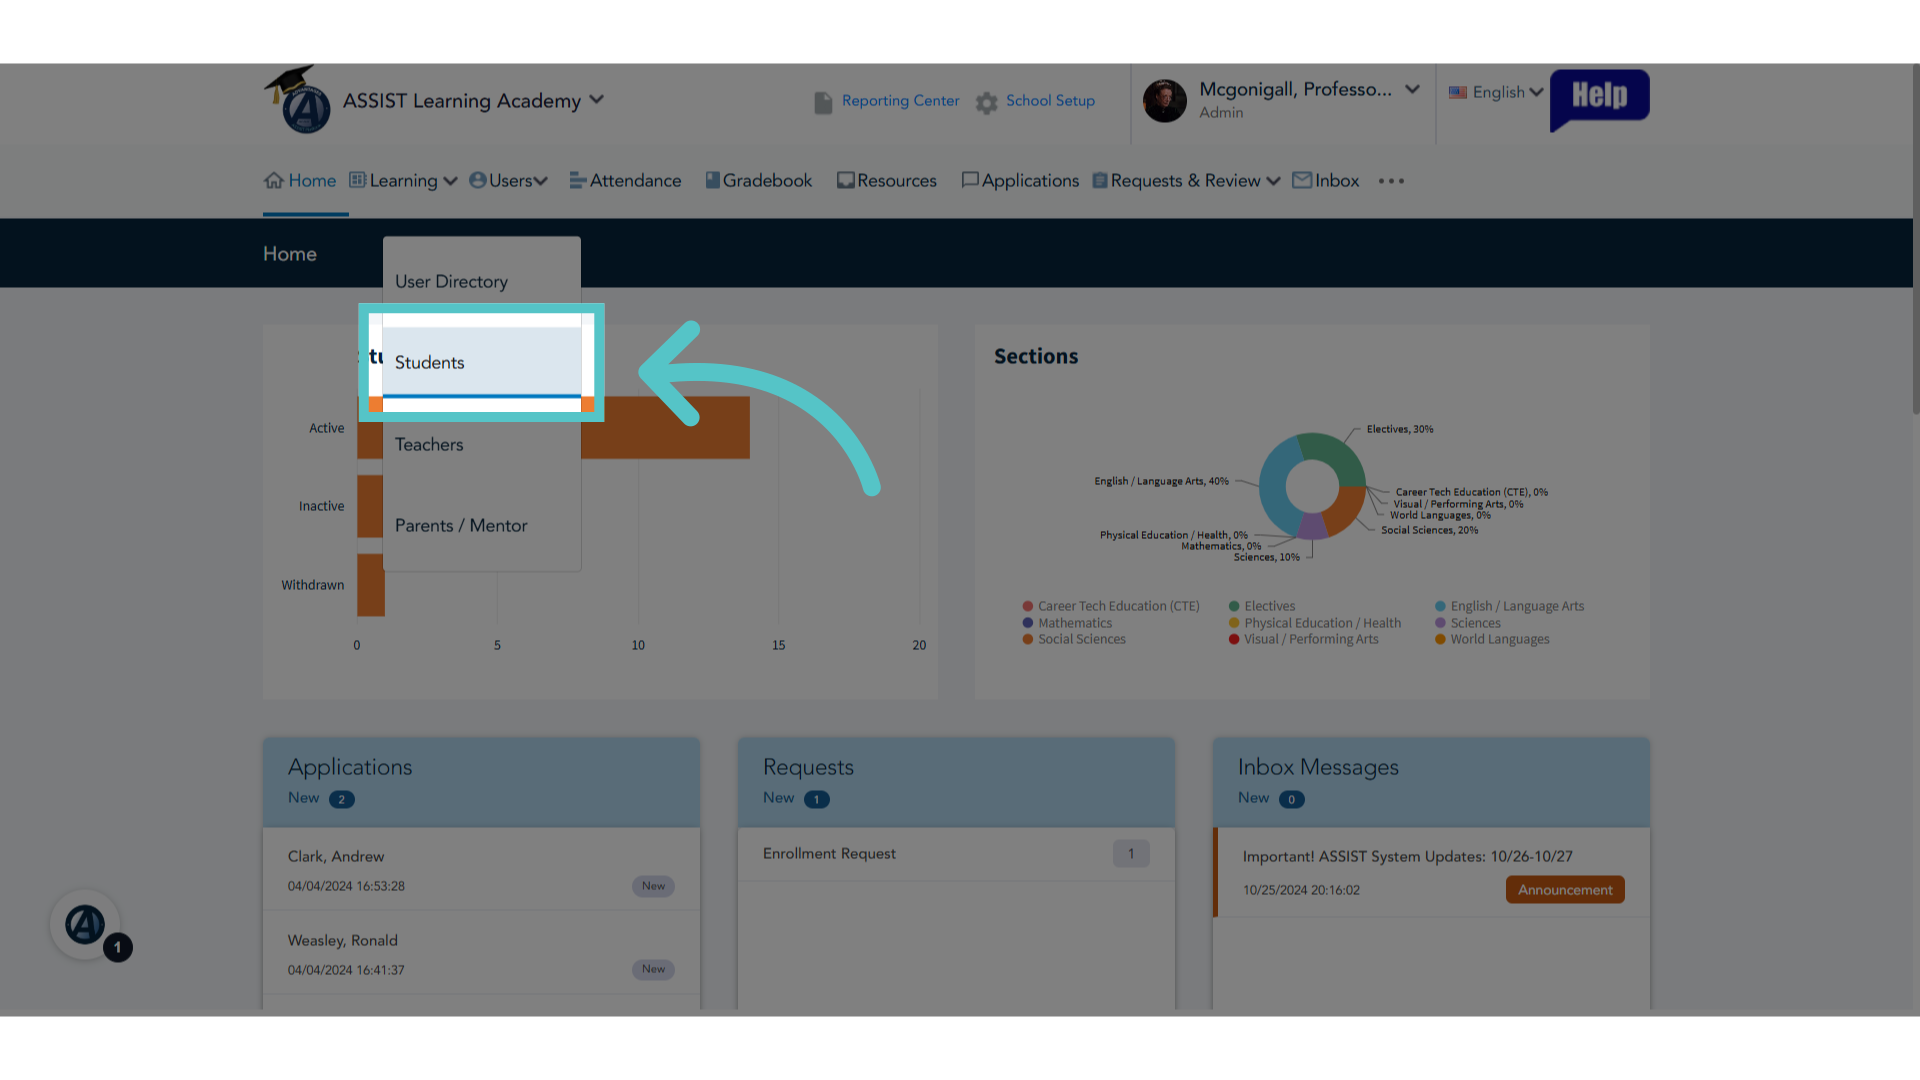
3. Click "Students"
Choose "Students" from the dropdown menu.
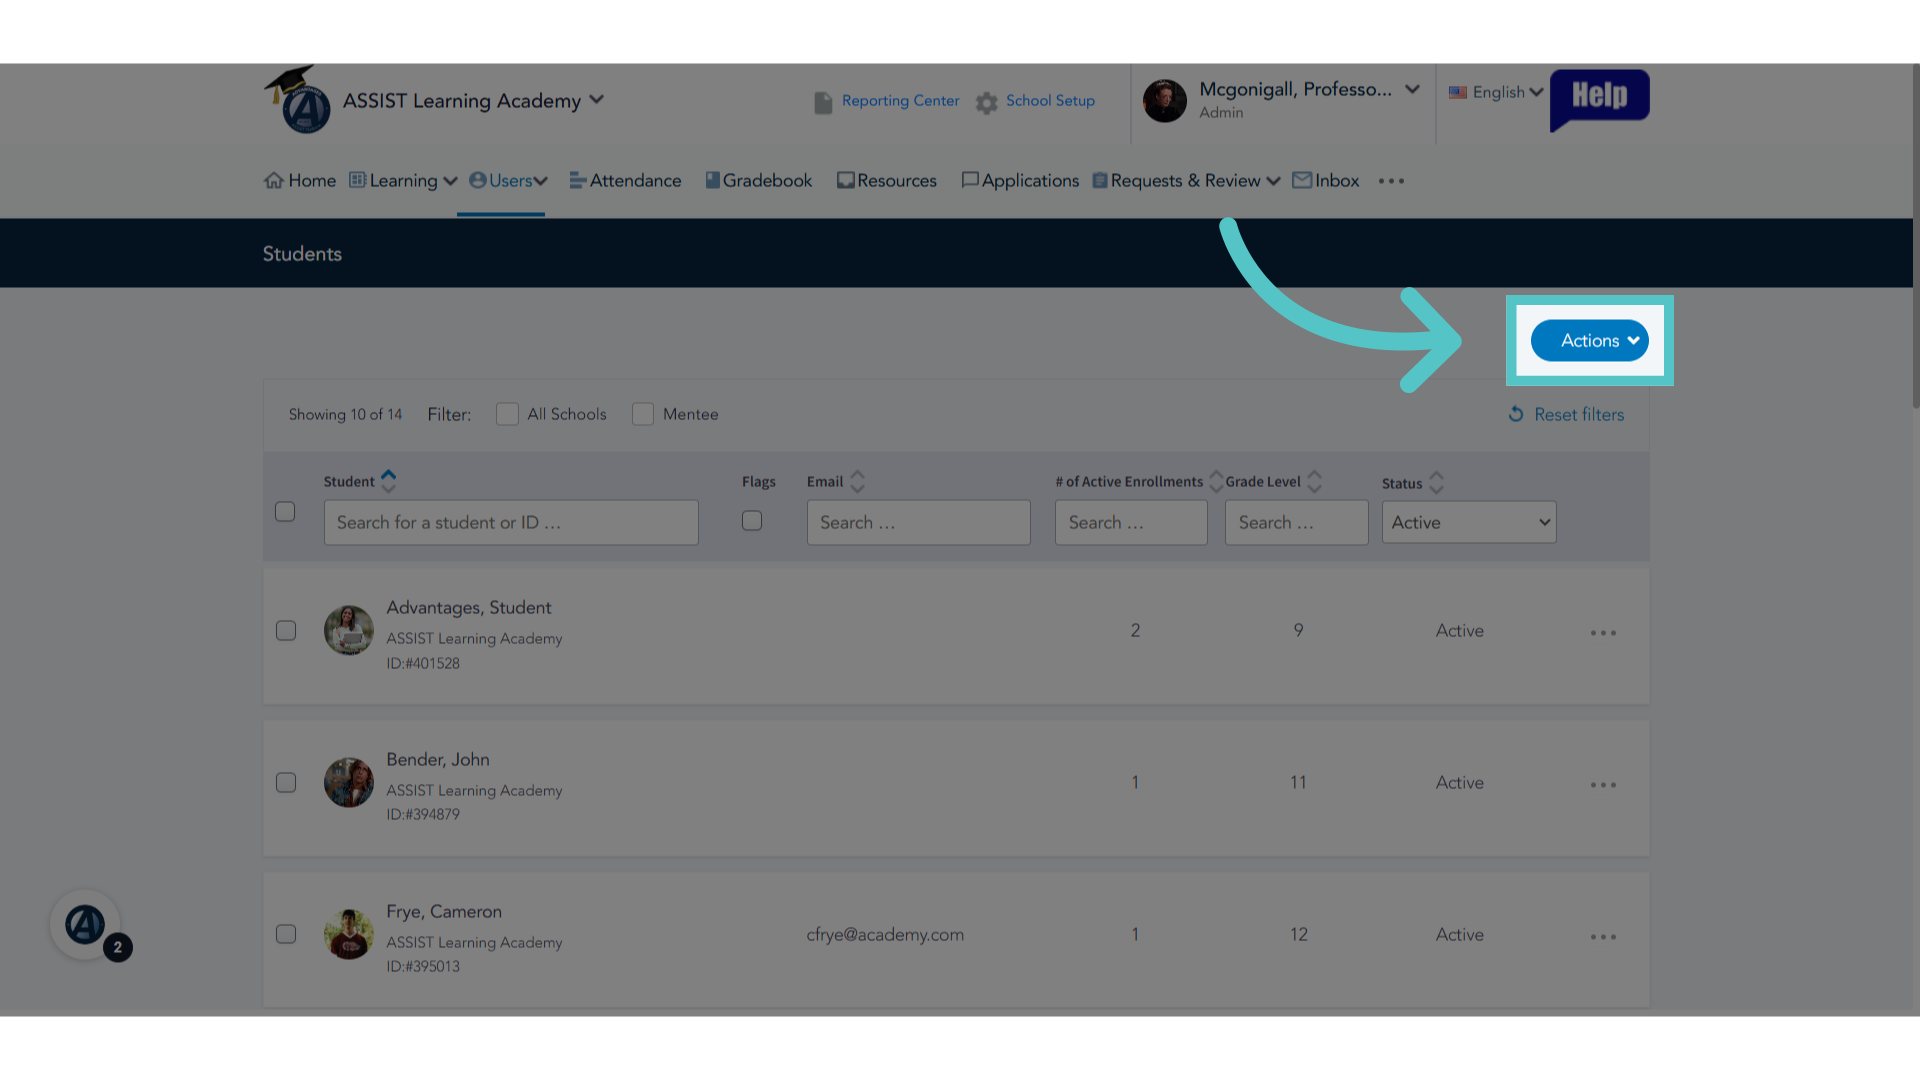
4. Click "Actions"
Click the Actions button.
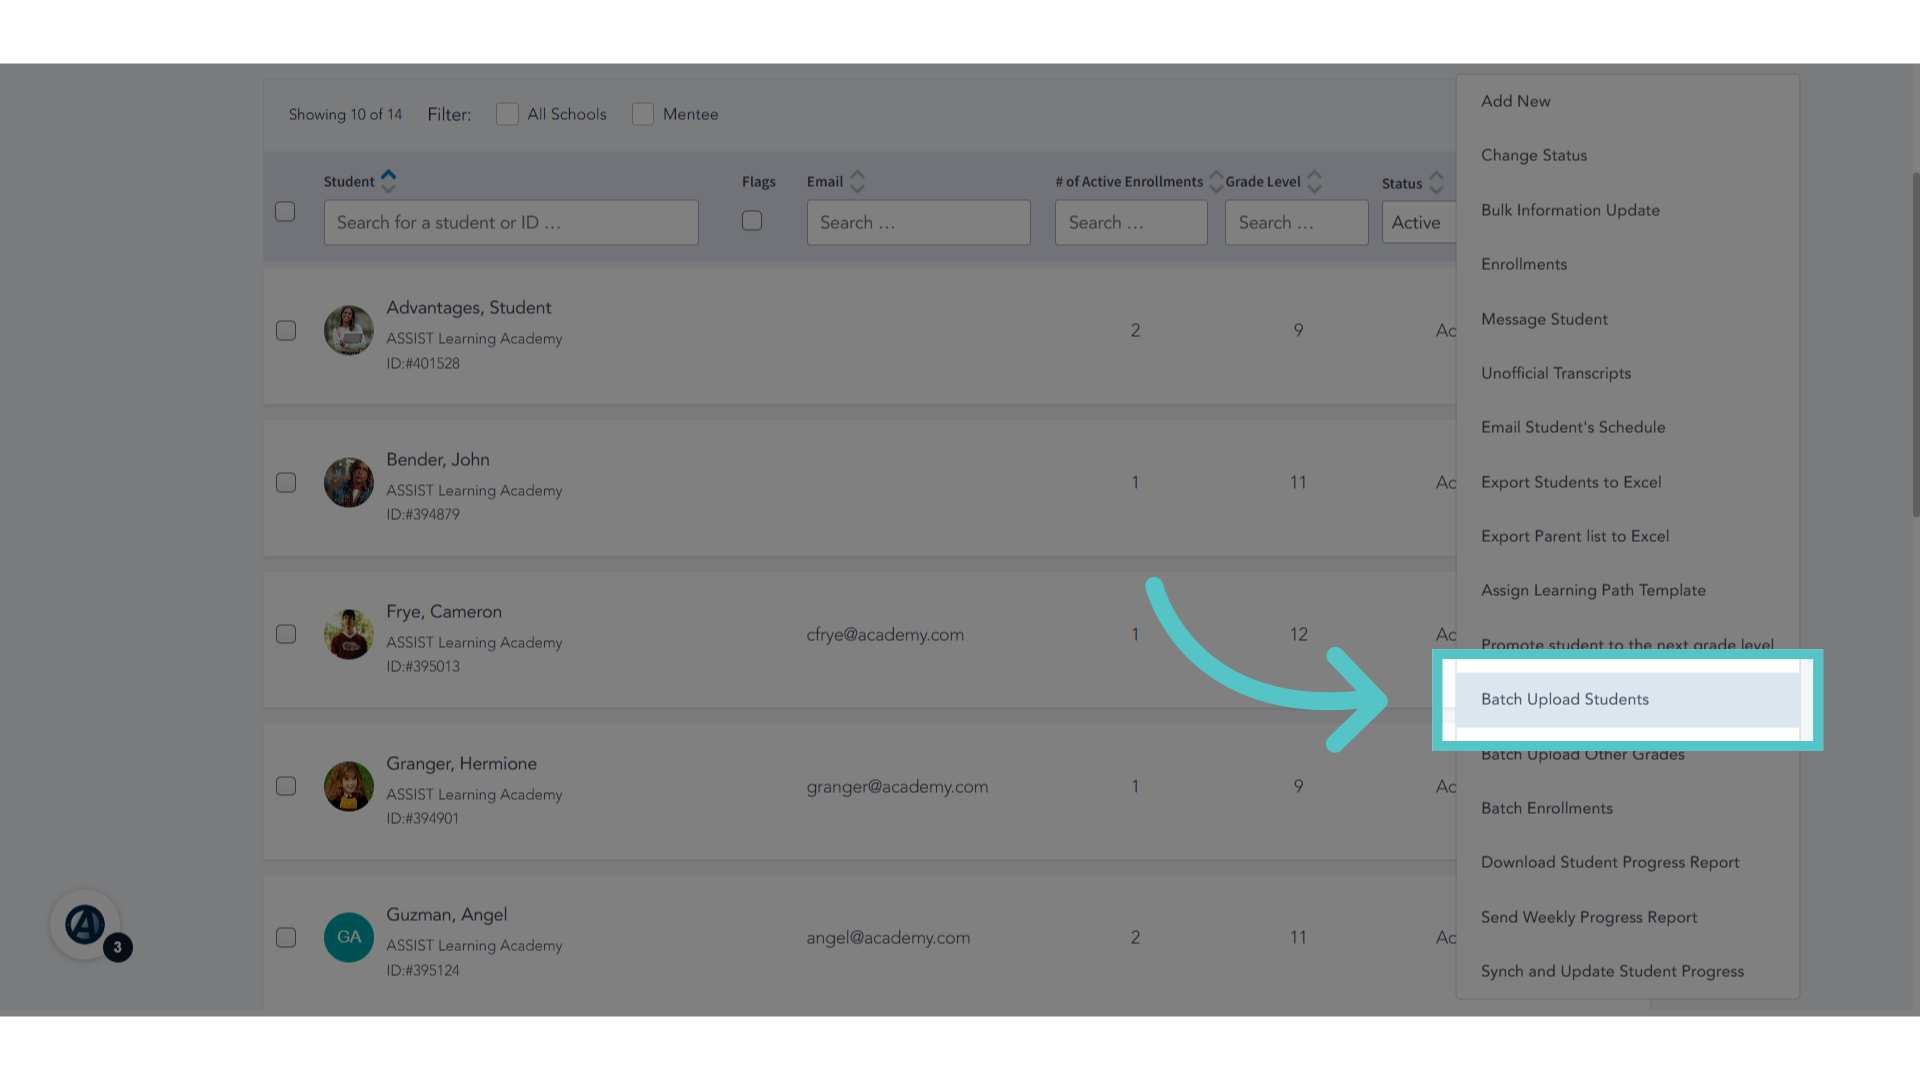
5. Click "Batch Upload Students"
Select "Batch Upload Students" from the dropdown menu.
6. Click "Here"
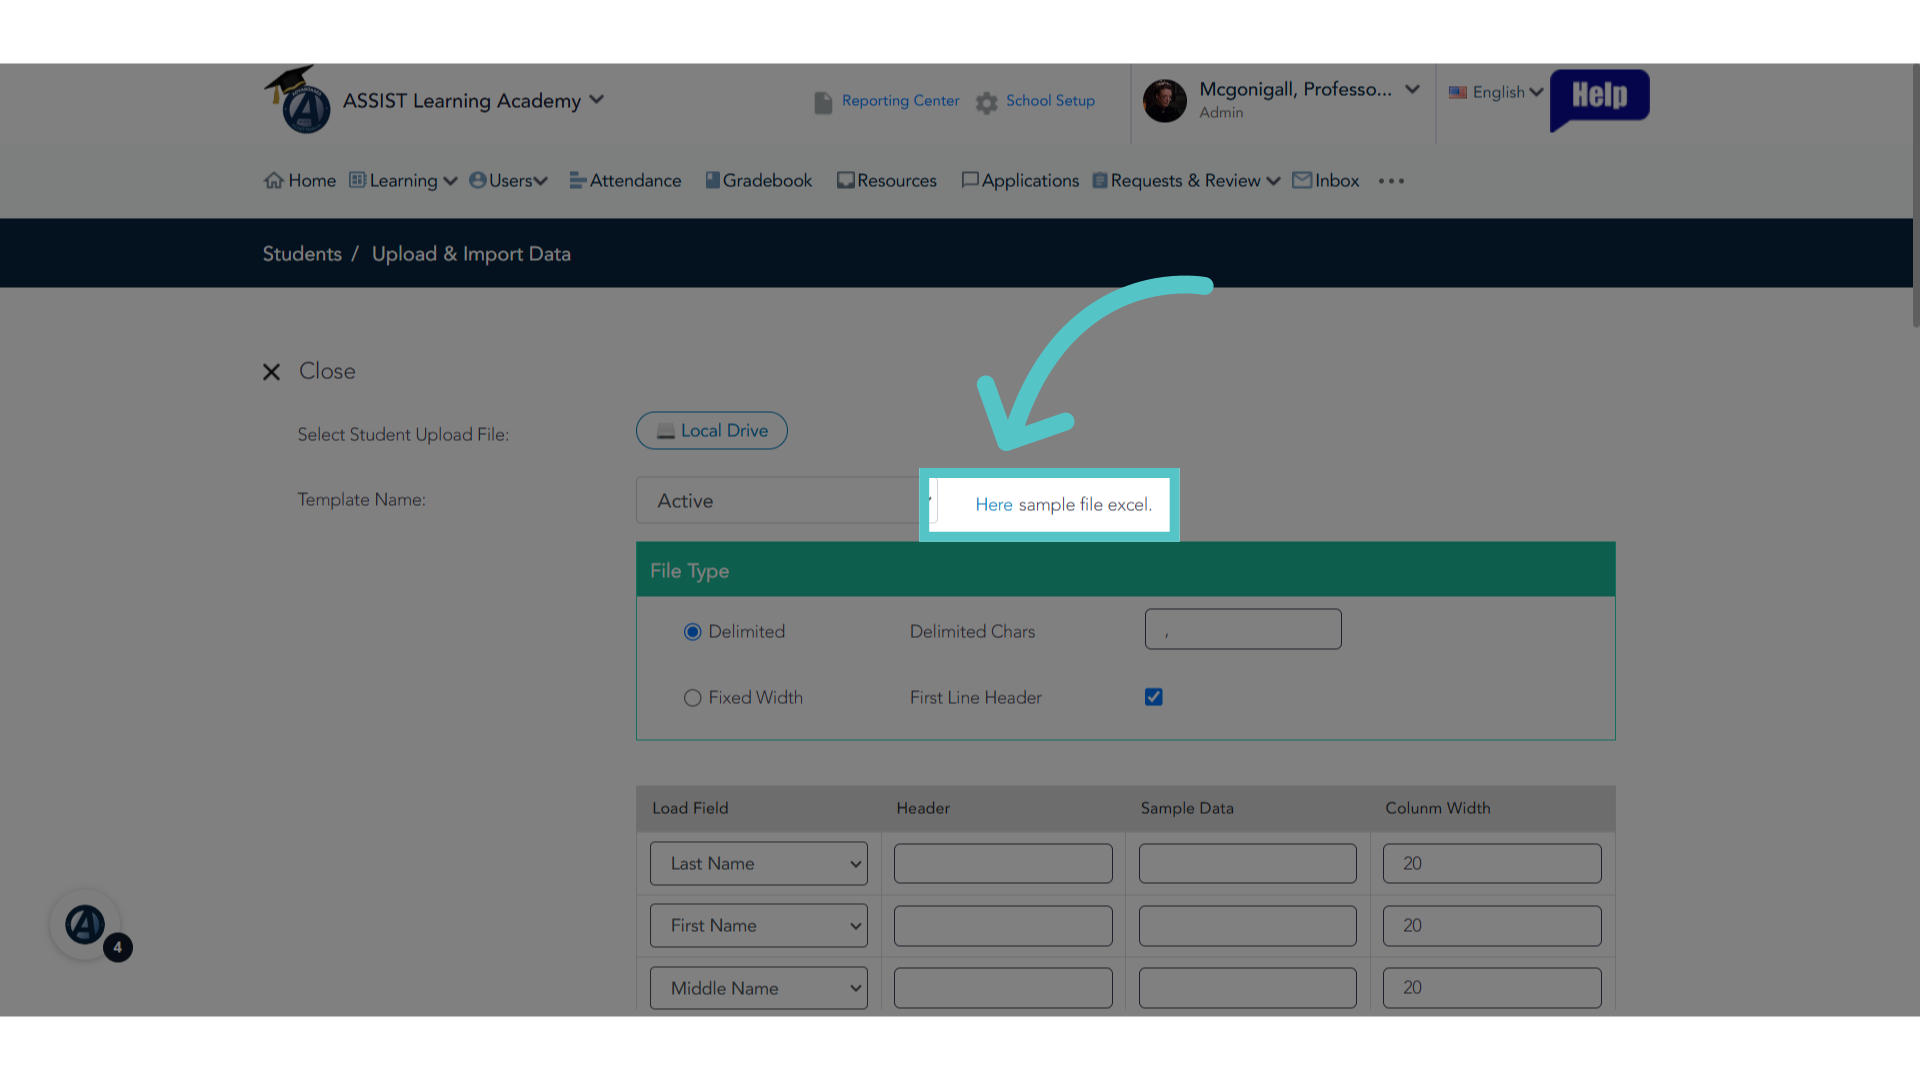
This page provides a spreadsheet template to upload student information efficiently. Click the word, "Here," to download the template.
7. Fill in the Batch Upload Template
Next, let's fill in the Batch Upload Template.

8. Spreadsheet Template
Open the spreadsheet template on your device to add student data.
9. Headings
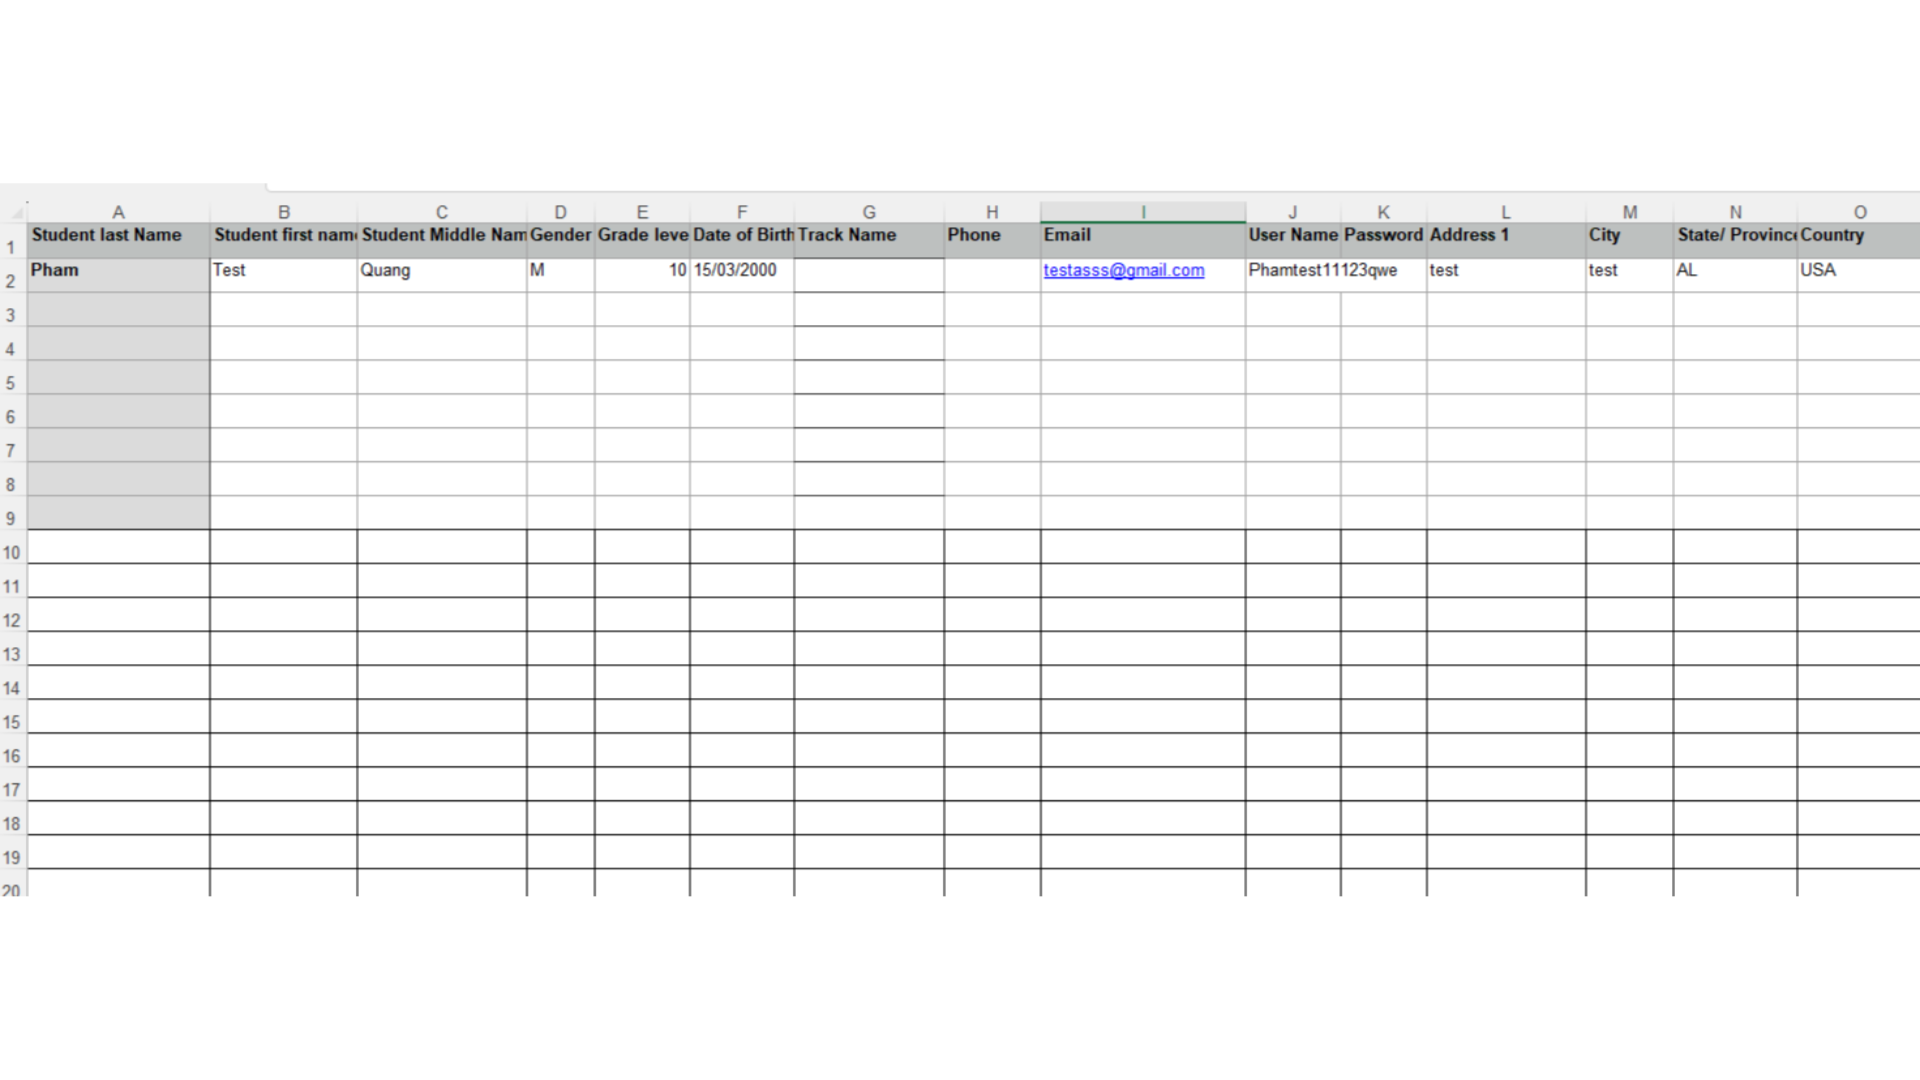
Please do not change column headings. These cannot be edited. Doing so will prevent data from uploading correctly.
10. Sample
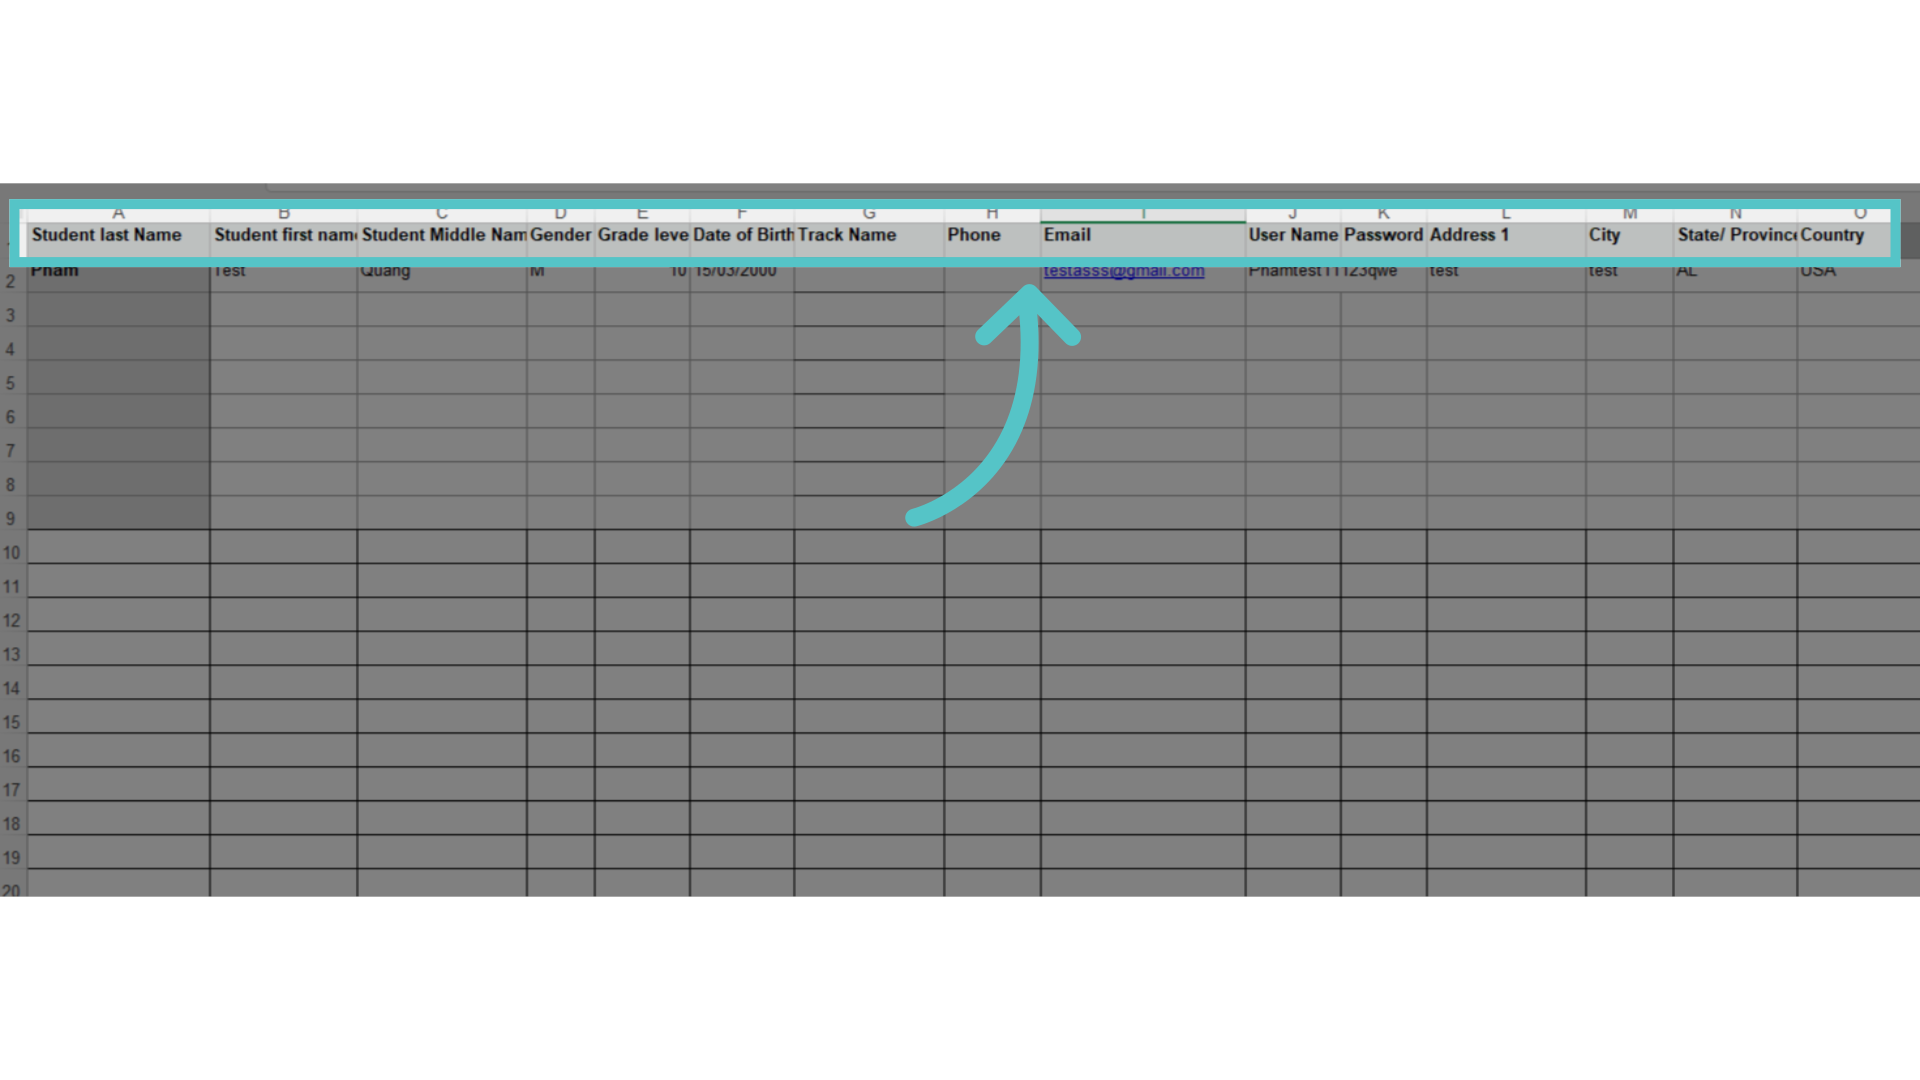
Sample data is provided in the first row. This is just an example and you will not want this information in your ASSIST platform. Replace this data with actual student information to be uploaded.

11. Enter Data
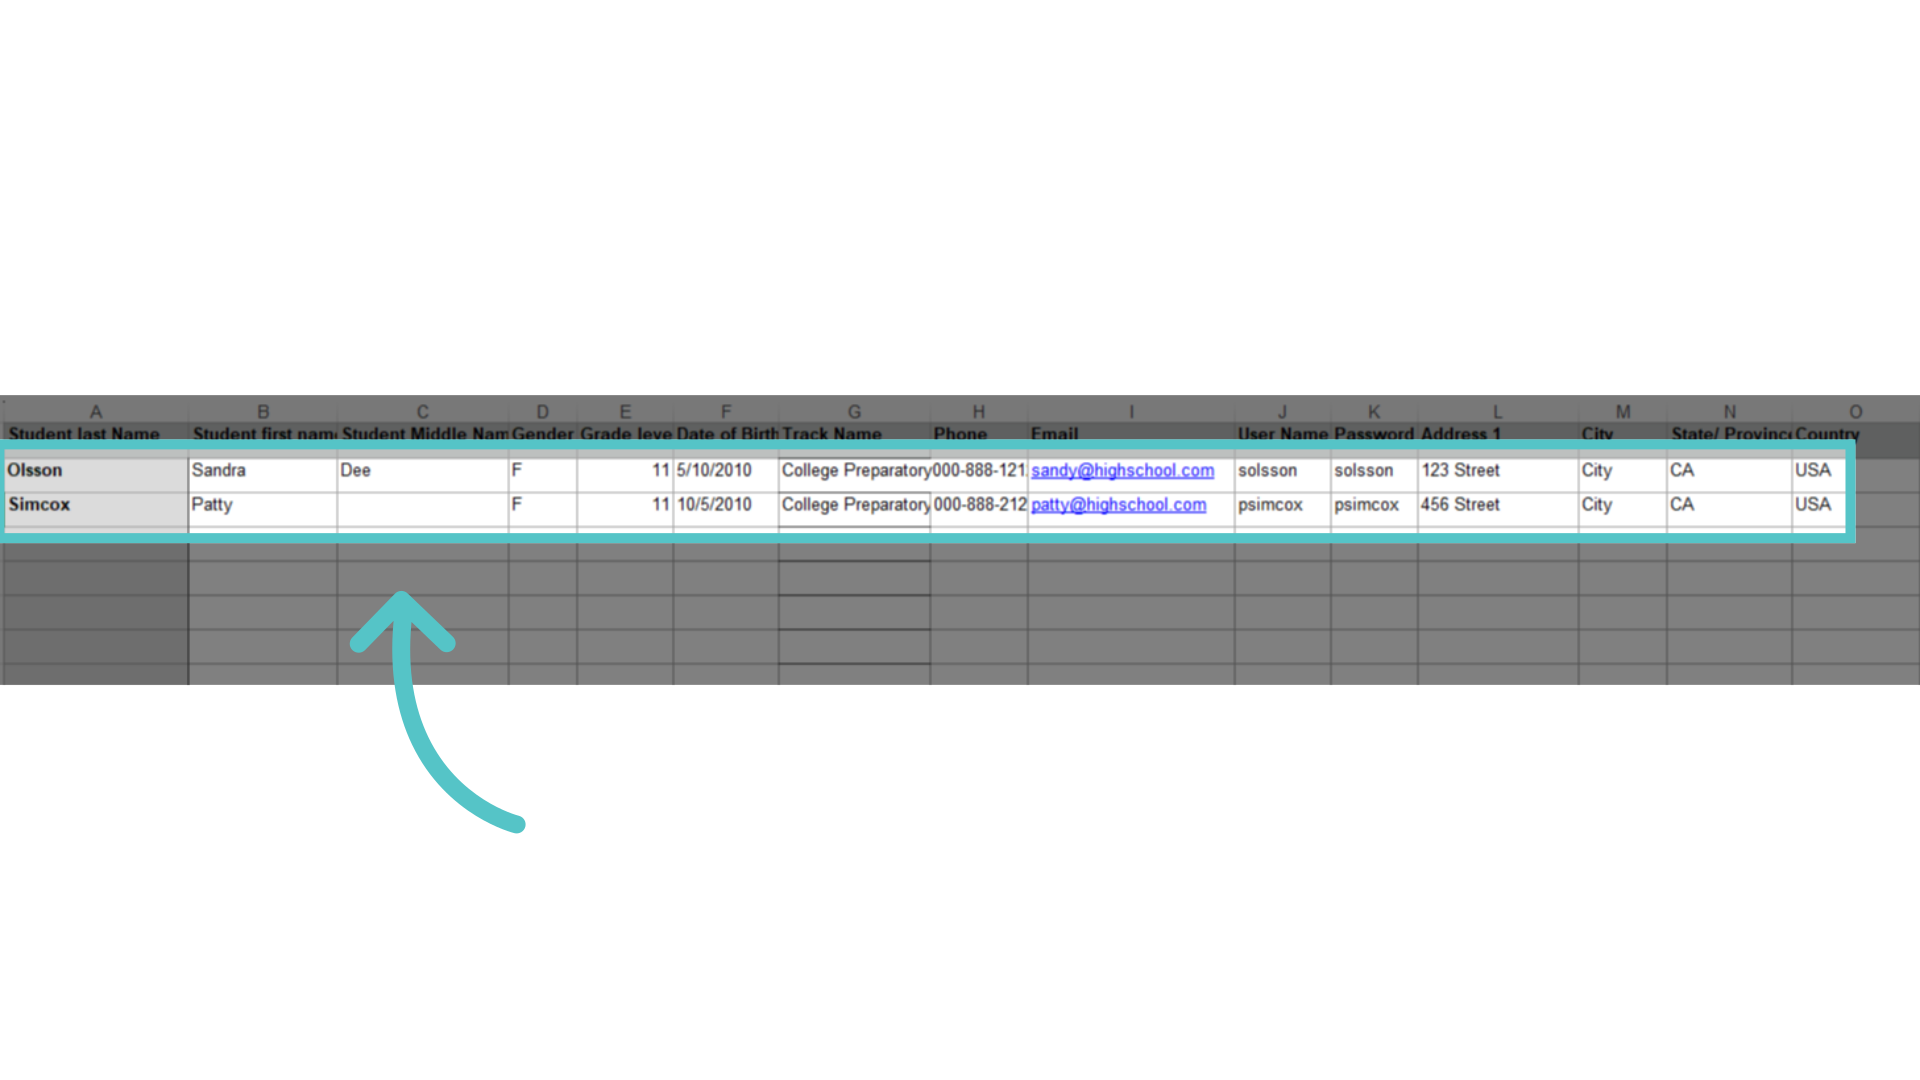
Enter all student data in the appropriate columns. If you do not have certain information, such as a phone number or middle name, you can leave the column blank. This will not affect upload.
12. Avoid
Please avoid typing any special characters or accent marks on the spreadsheet template. These will not upload correctly in ASSIST. Special characters can be added after uploading information in bulk.

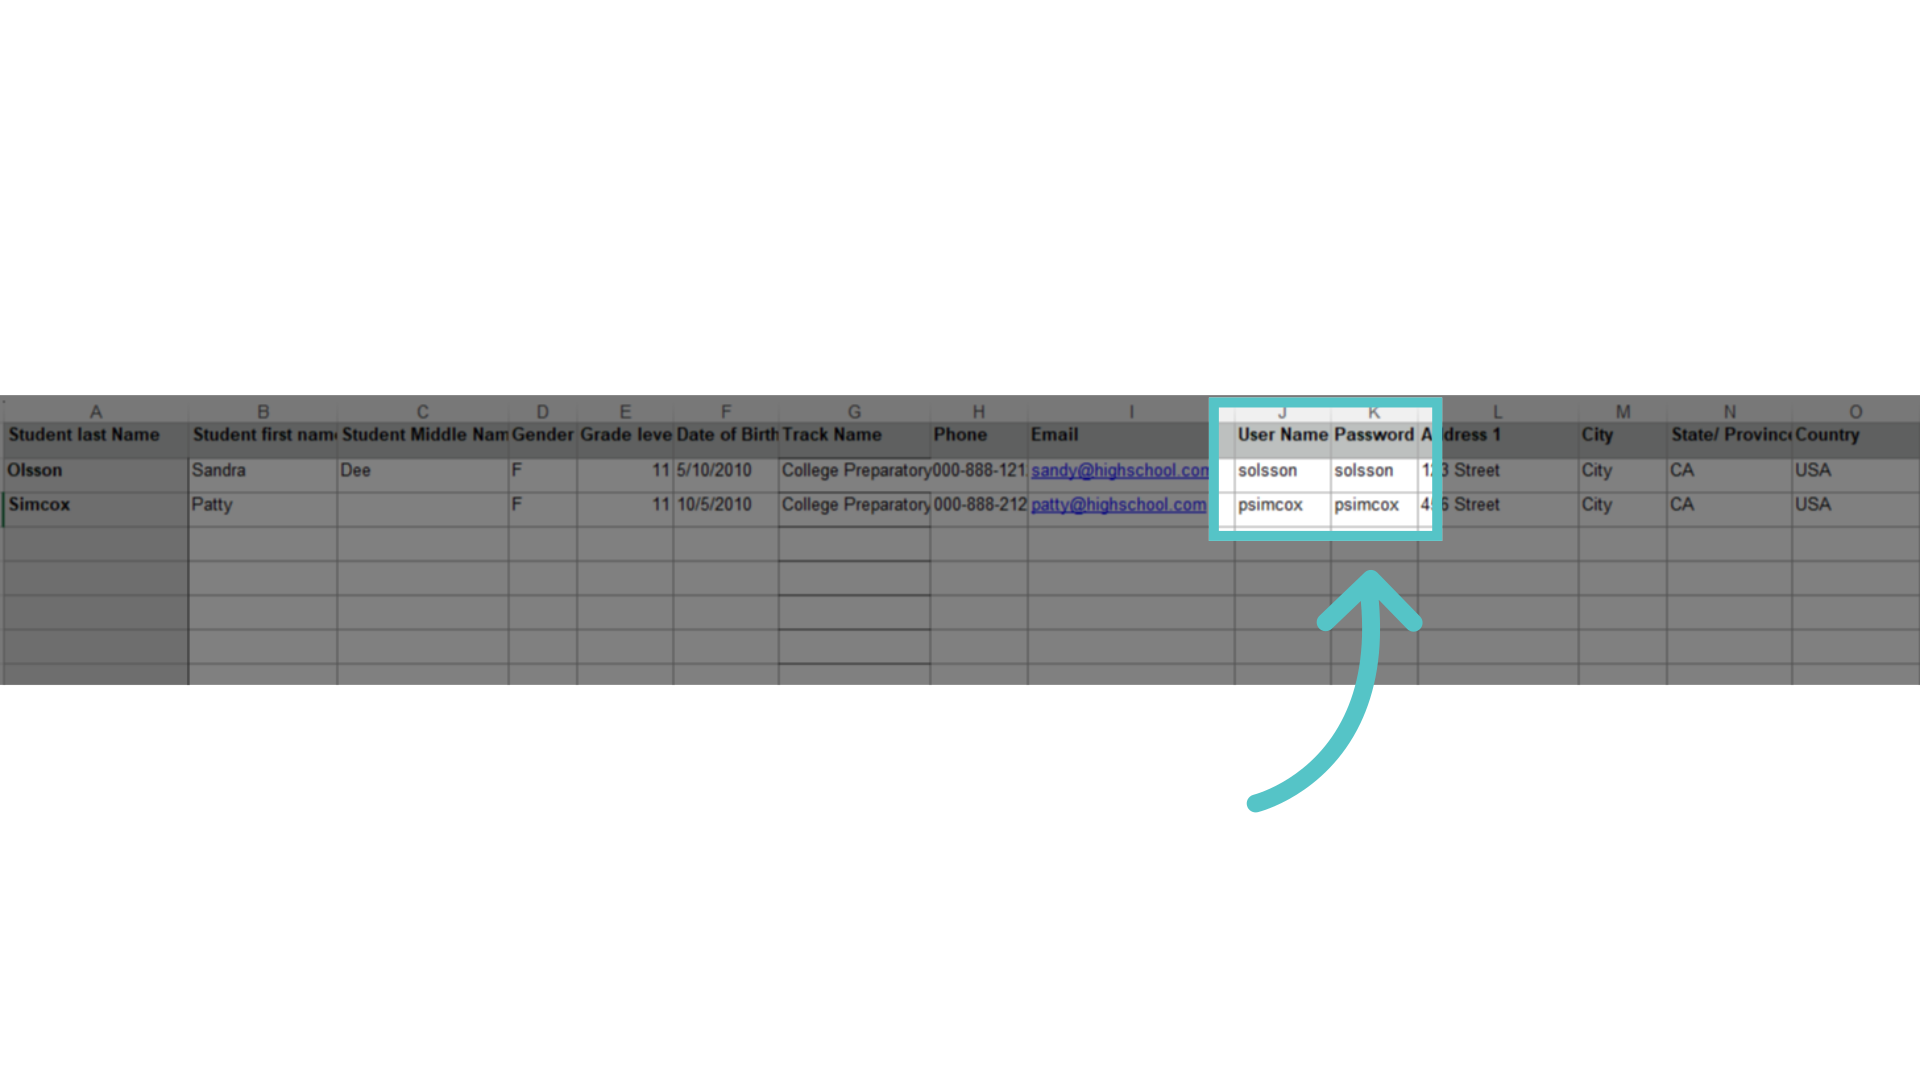
13. Username/Password
Be sure to enter a username and password for each person. This is how they will access ASSIST. They can change the password when they login.
14. Parent Data
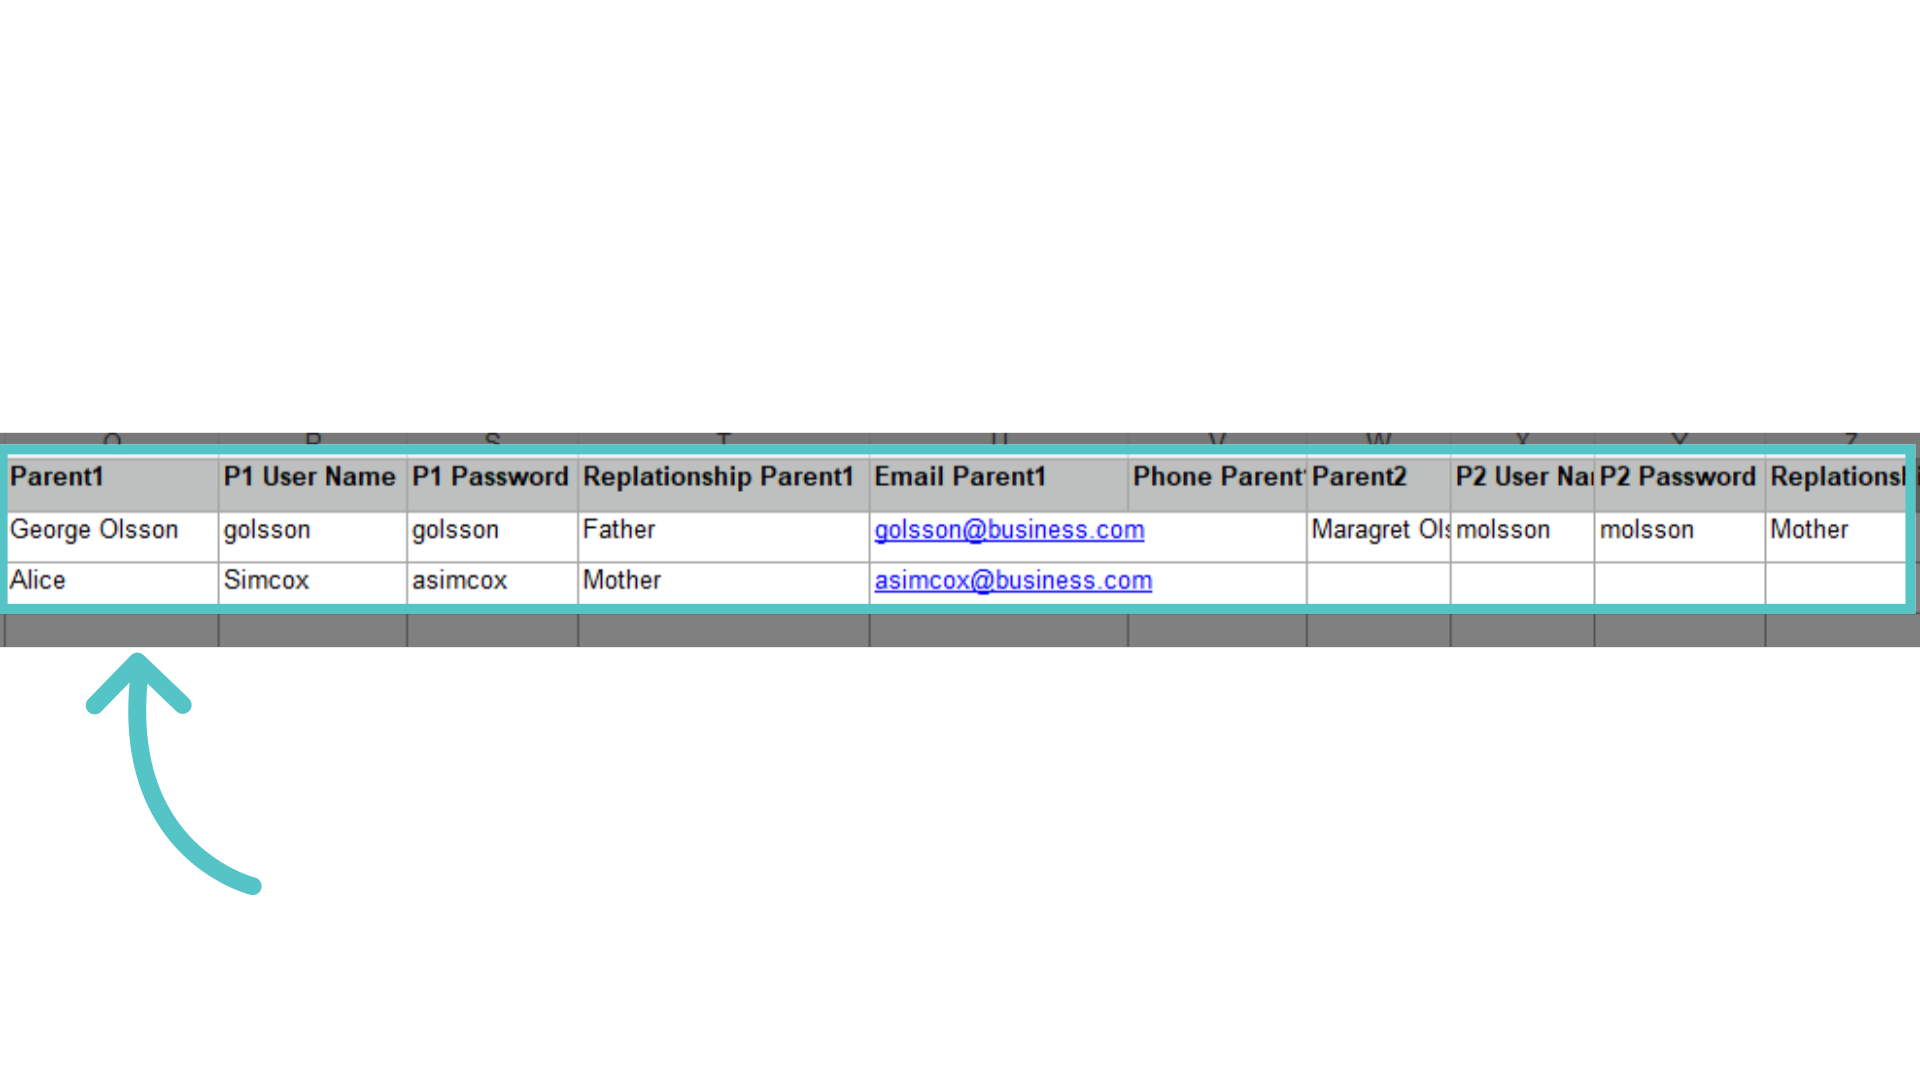
As you scroll to the right on the spreadsheet, you will find columns for parent information as well. This is a great way to add all students and their parents at the same time. Include information that you have available and assign usernames and passwords. Blank columns will not affect upload.
15. Saved File
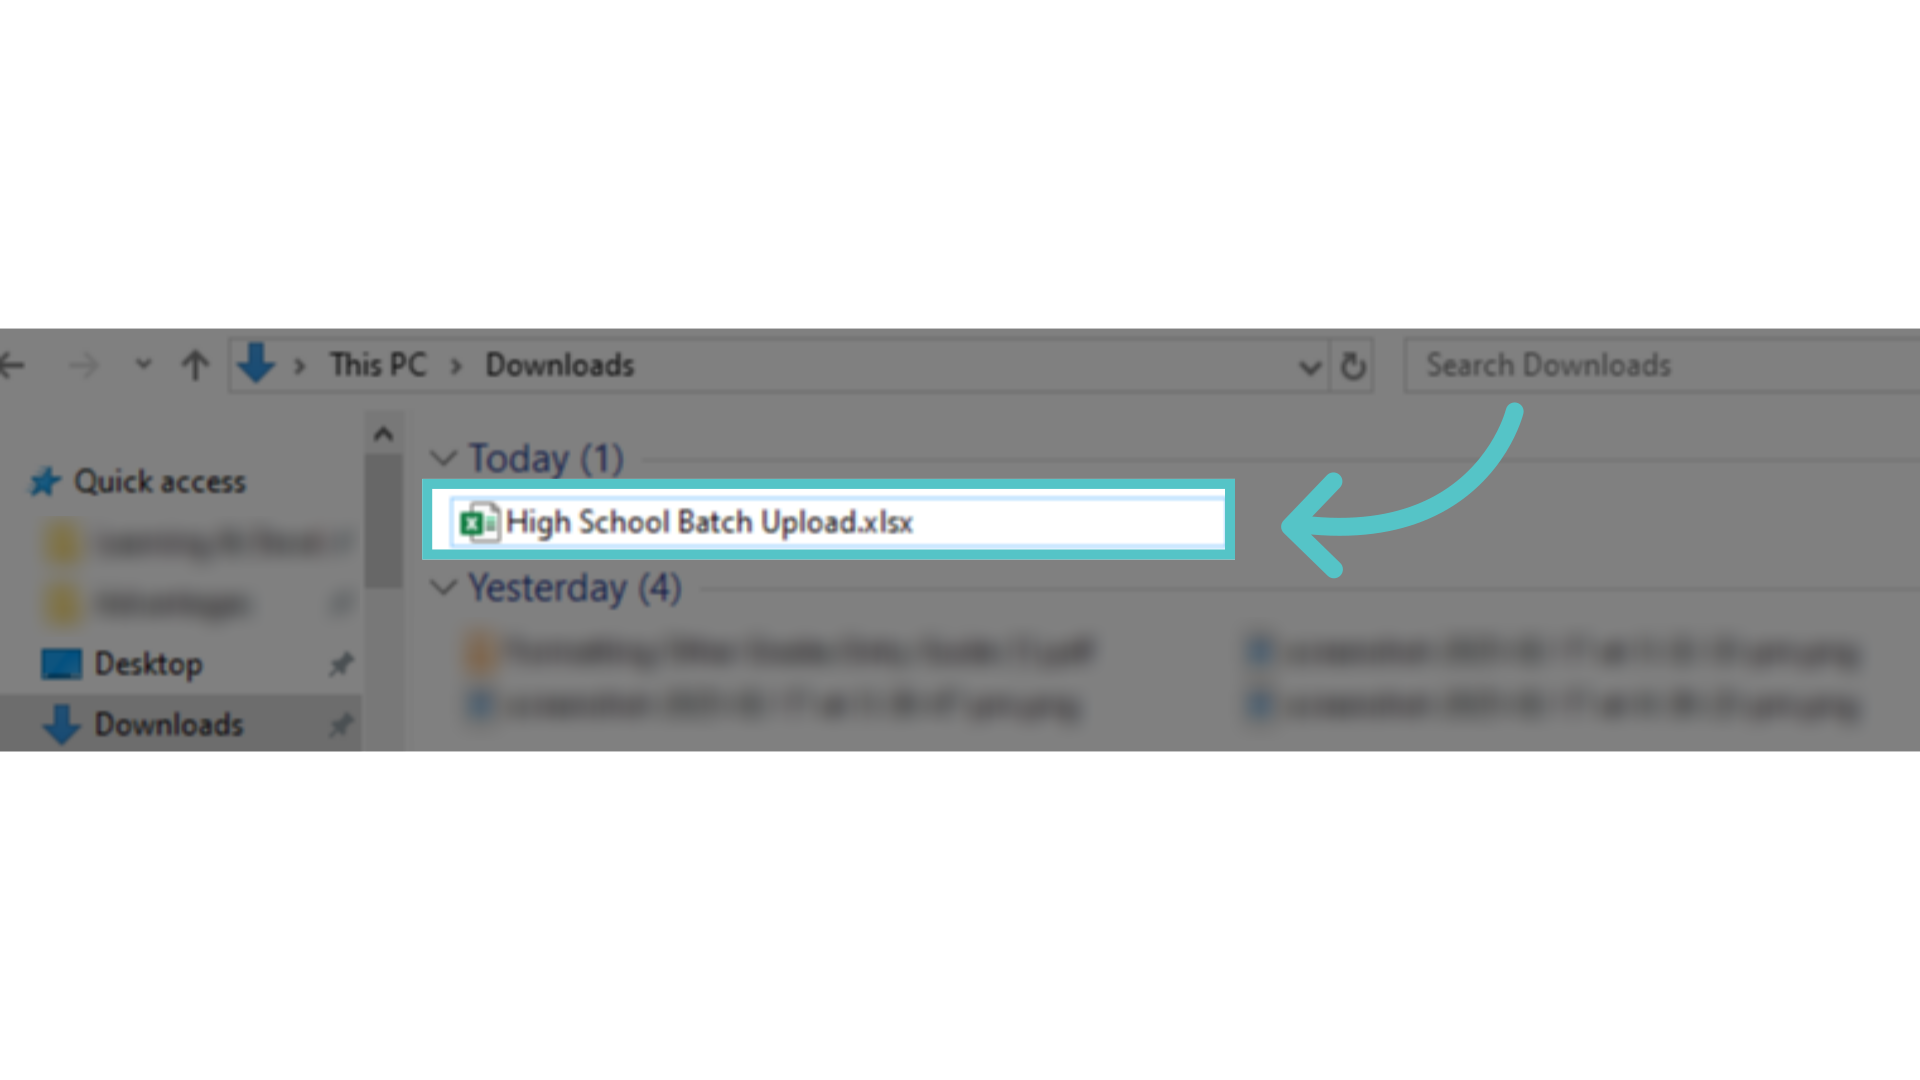
Save the spreadsheet file to your device.
16. 3. Upload Template
Now, let's upload the Template to ASSIST.

17. Local Drive
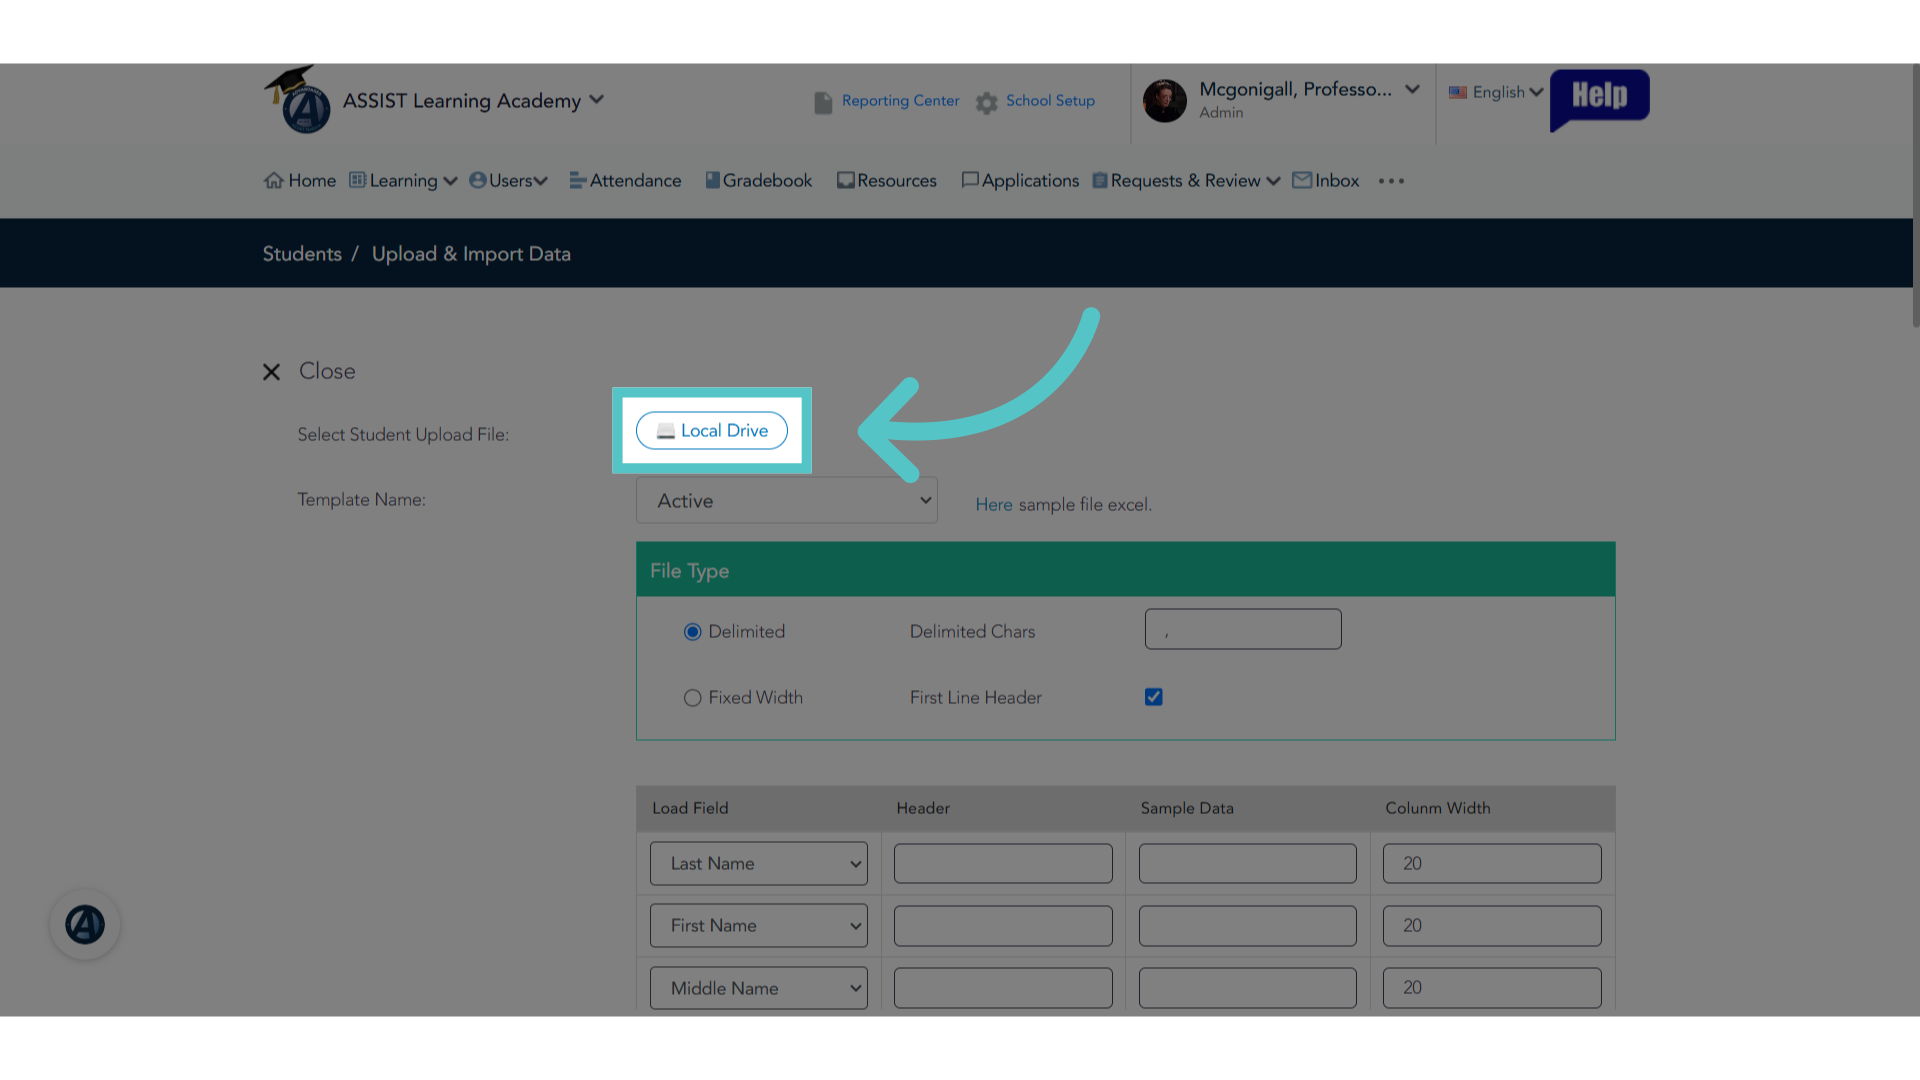
Return to ASSIST to upload your completed spreadsheet. Click the "Local Drive" button to access files on your device.
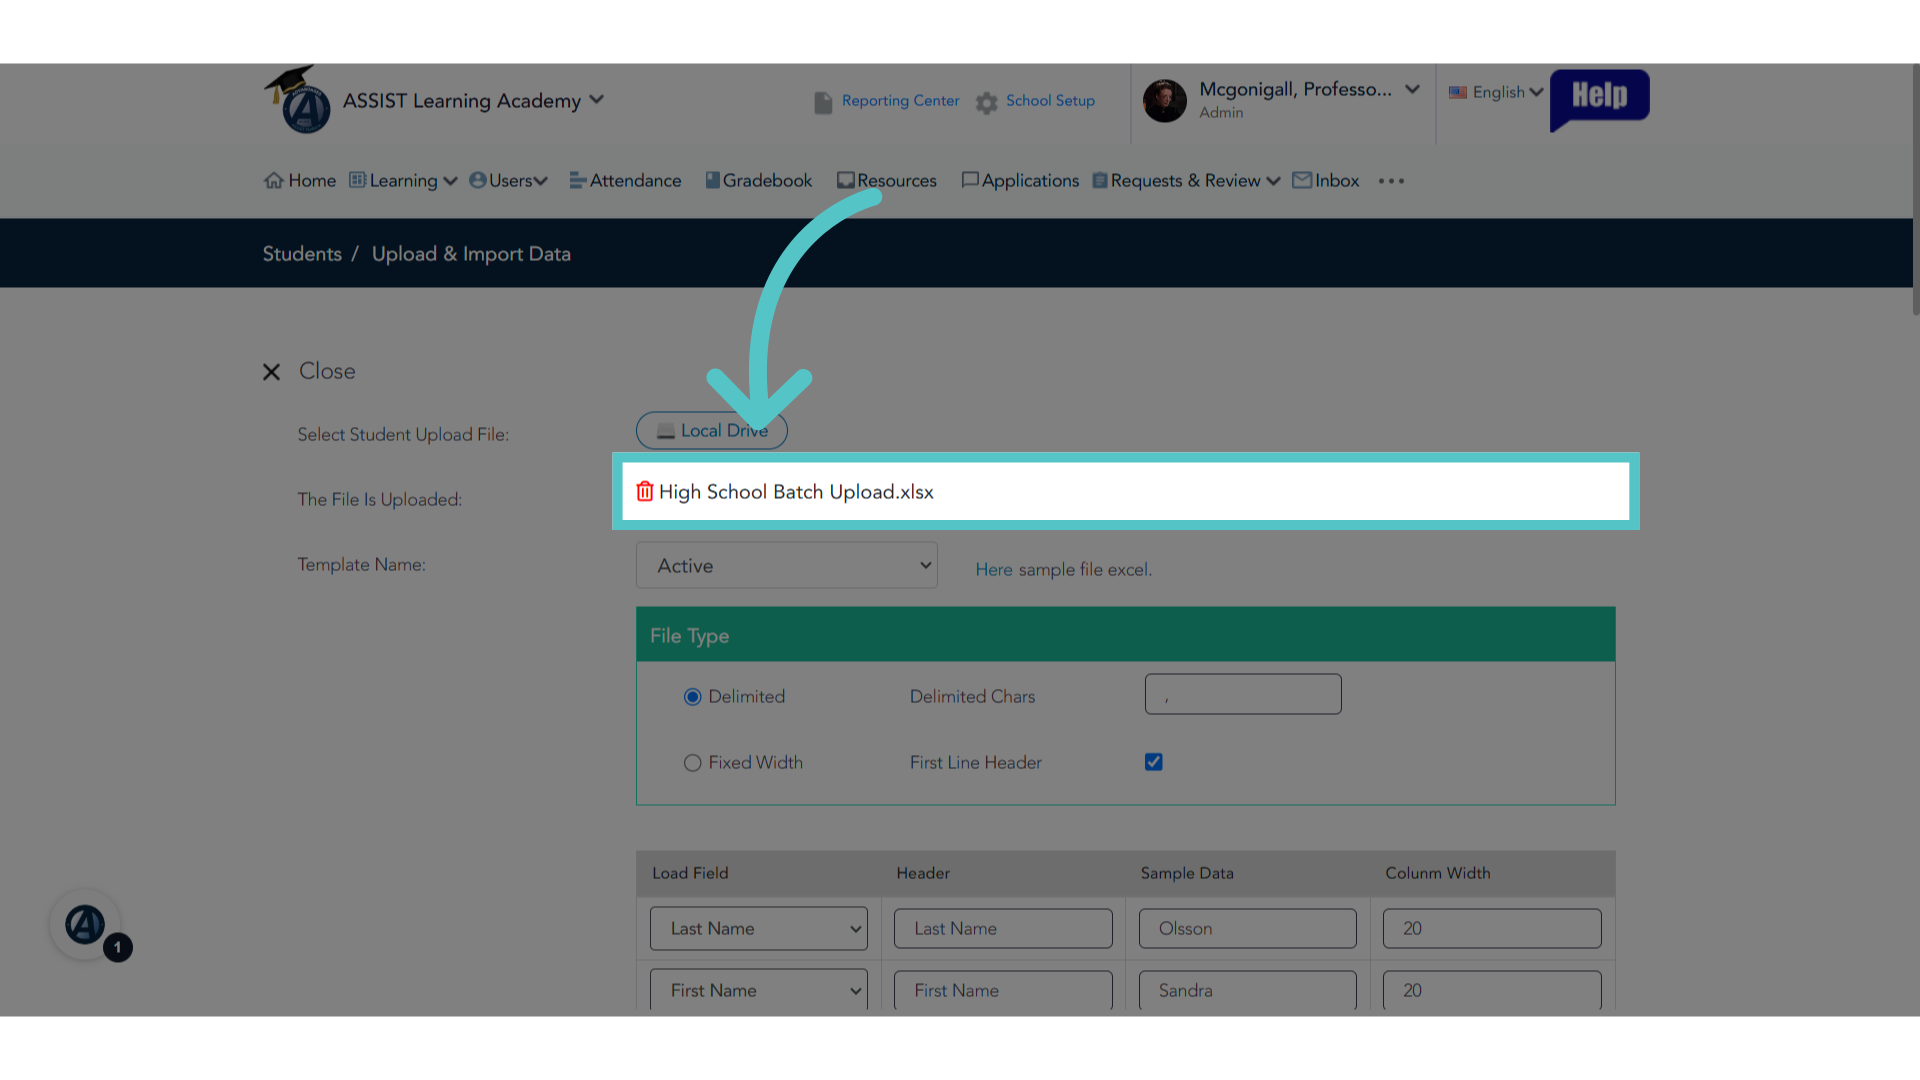
18. Select File
The file you select will appear listed for uploading.
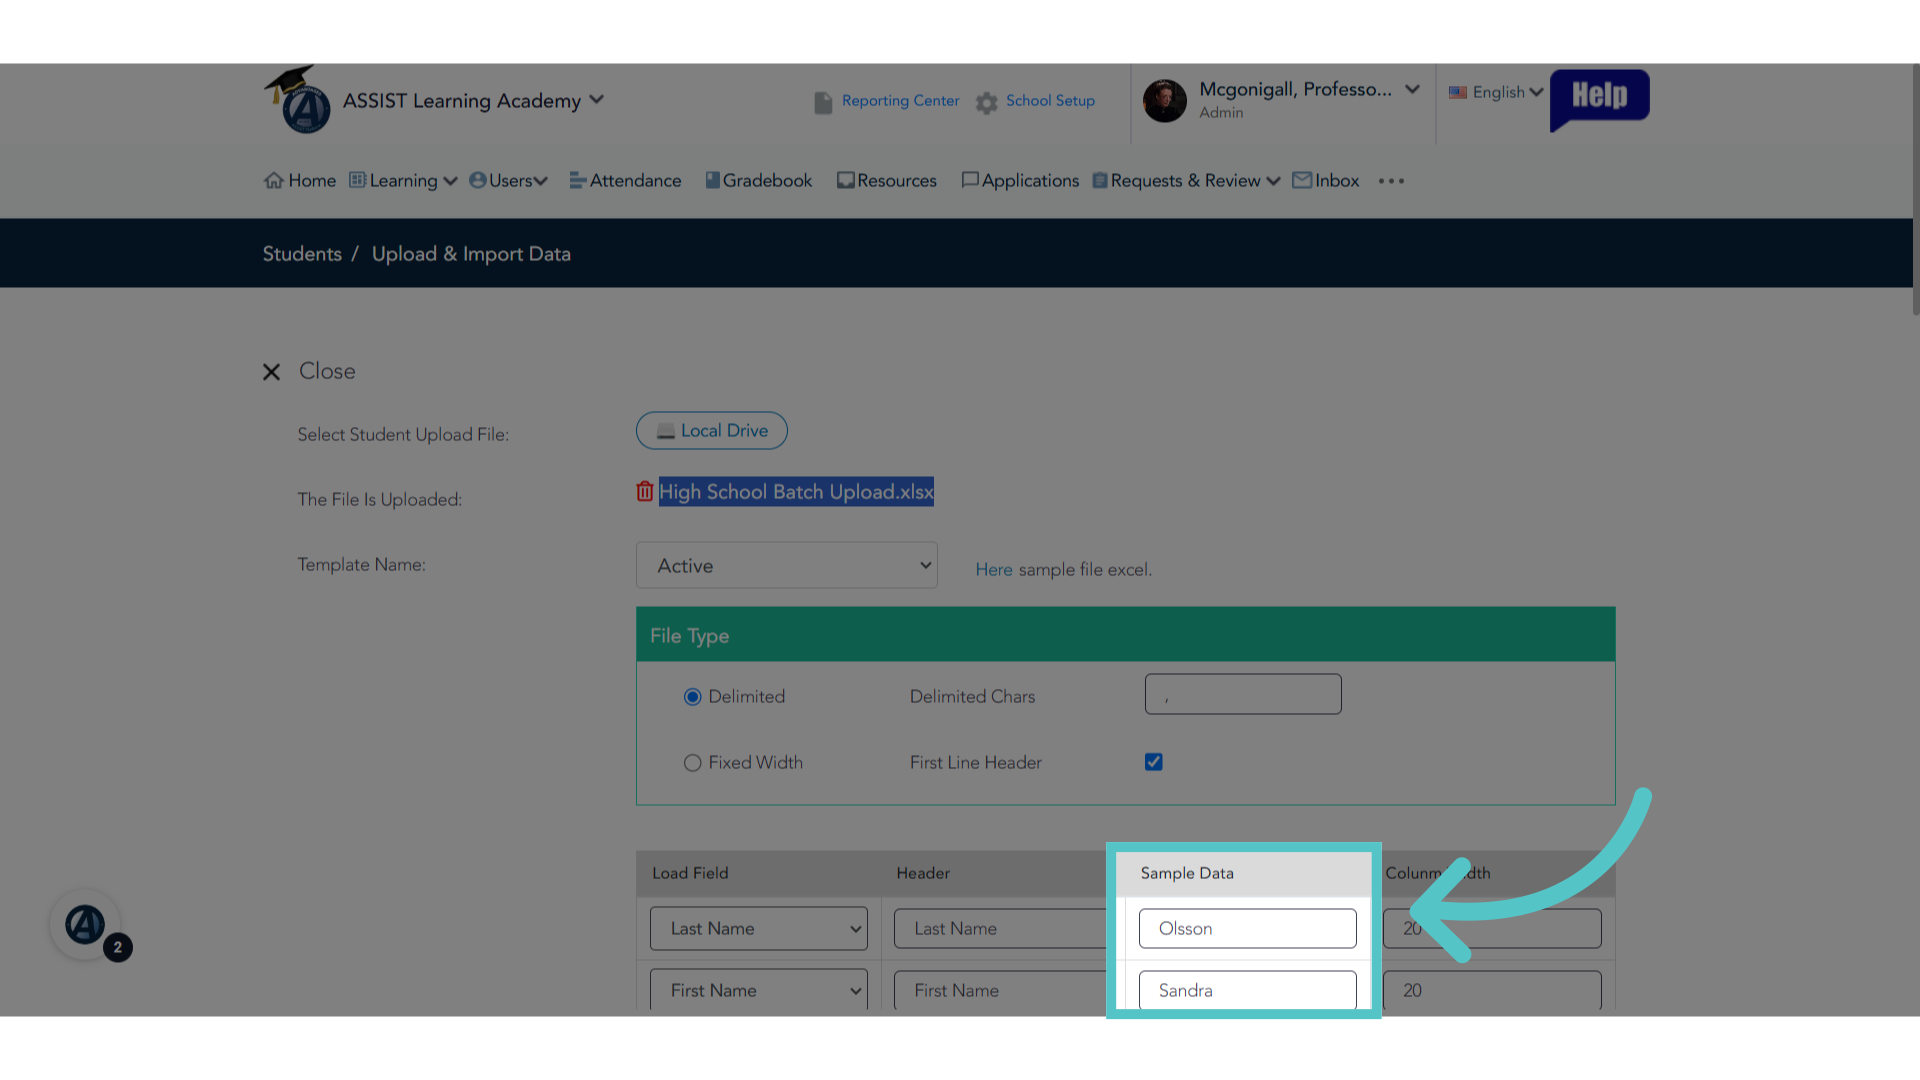
19. Data
Data from the spreadsheet will appear in the grid below. Do not edit this data.
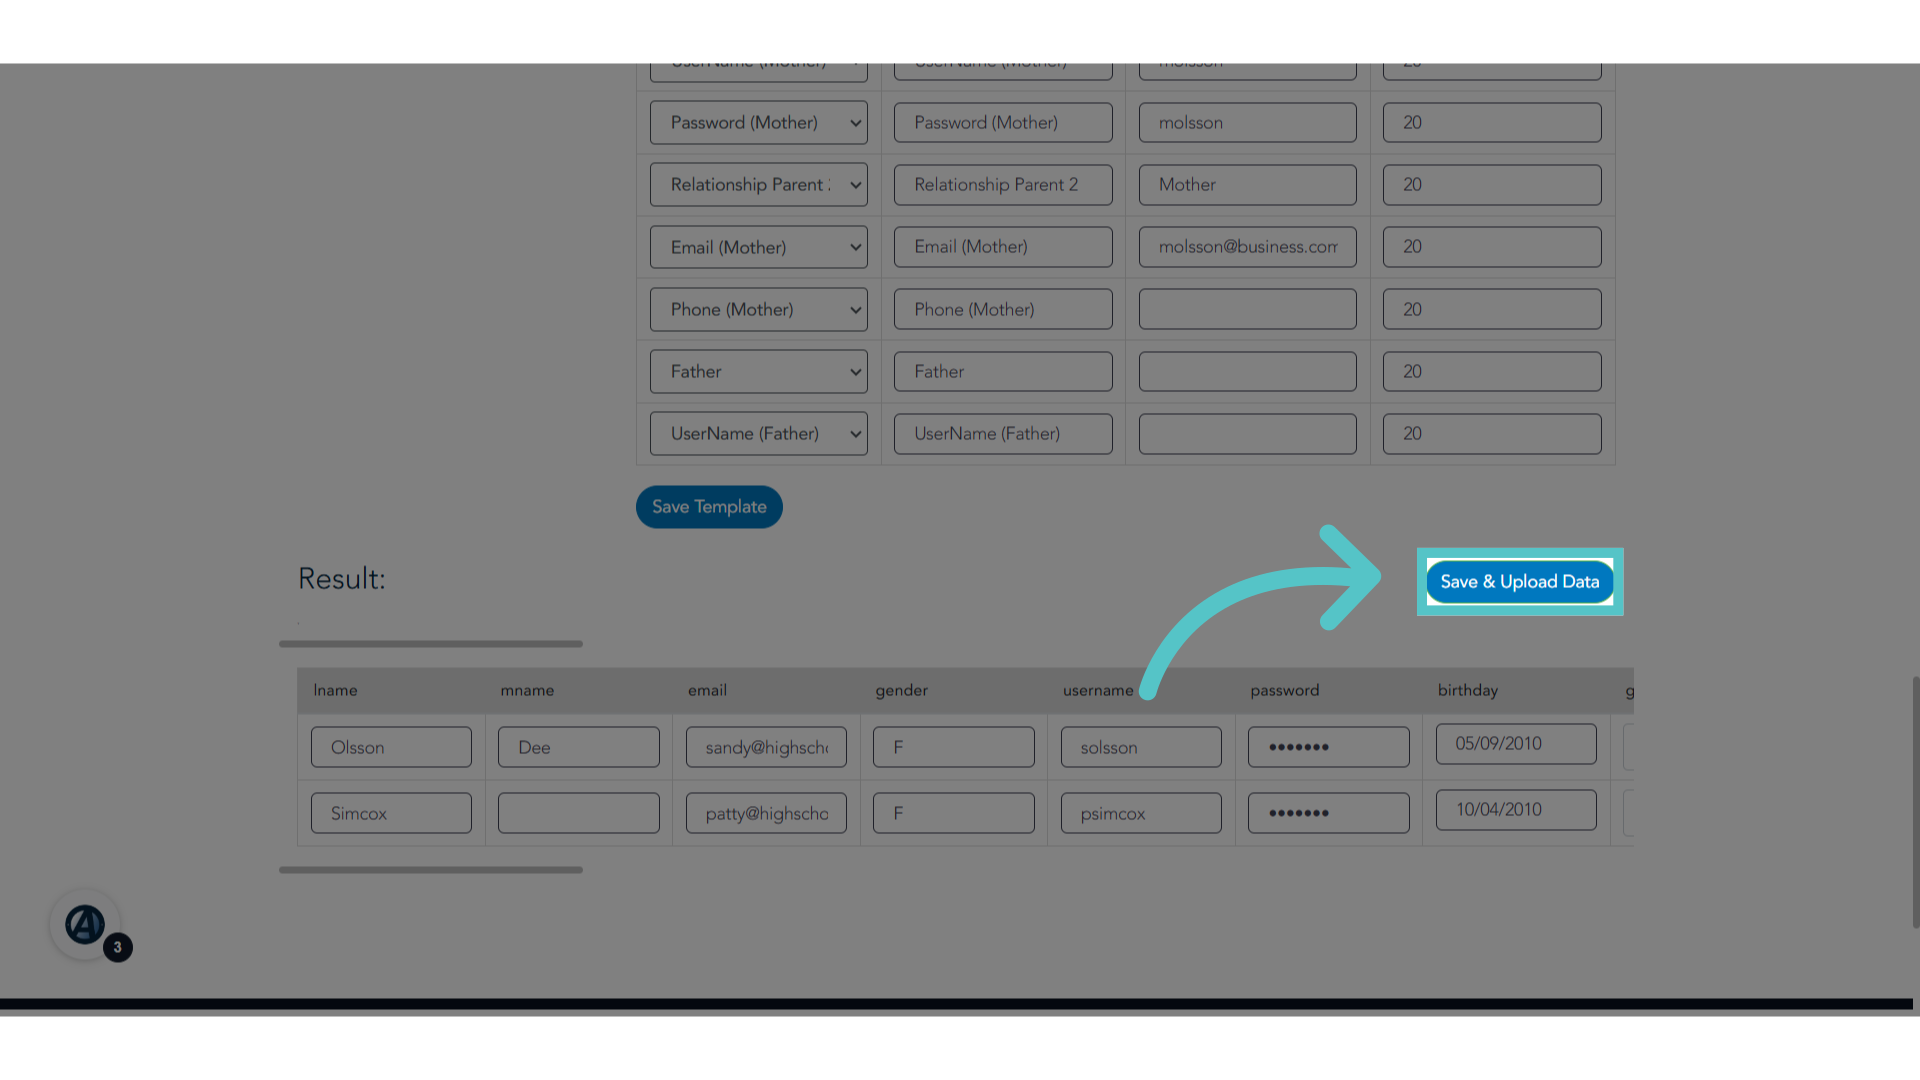
20. Click "Save & Upload Data"
Scroll to the bottom of the grid to click "Save and Upload Data." This will upload all information from the spreadsheet to ASSIST, creating a new file for each new student.
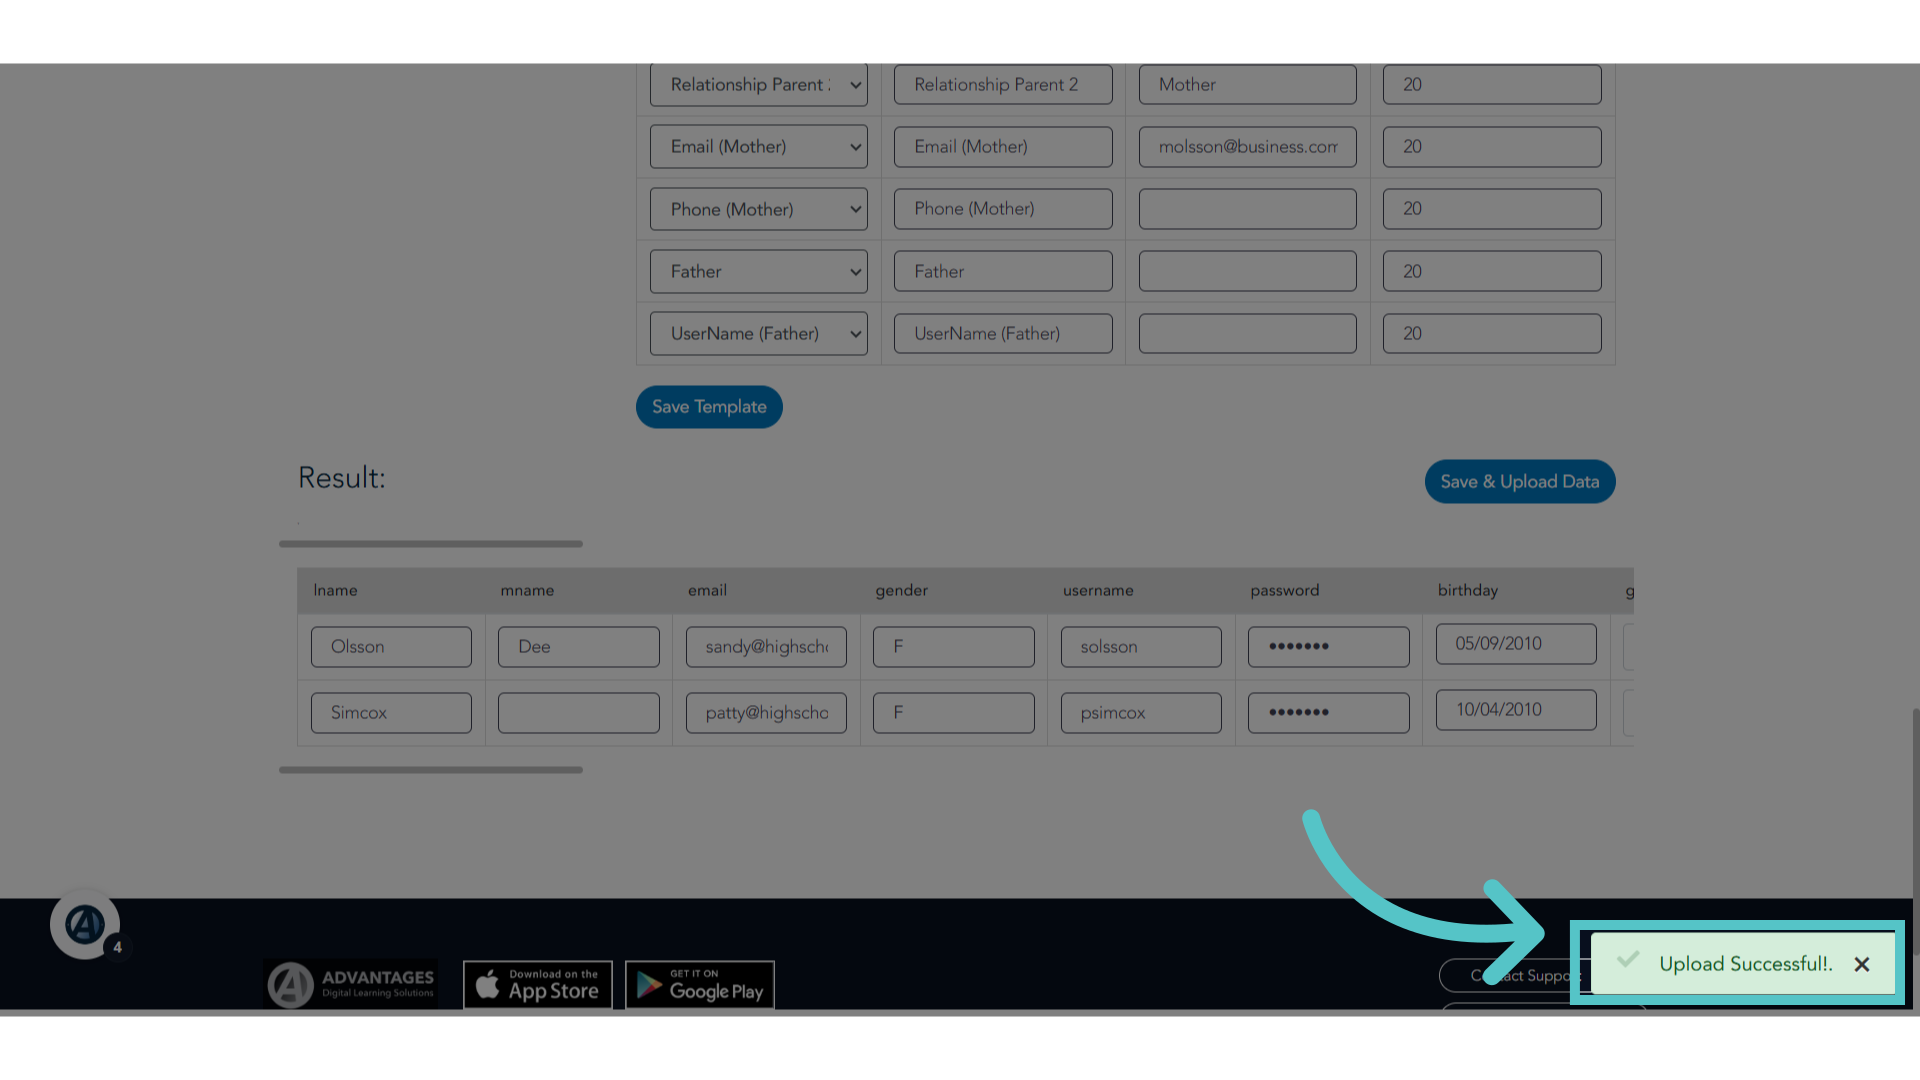
21. Upload Successful
ASSIST will indicate when the upload is complete with the message "Upload Successful" in the bottom right corner.
22. 4. Activate New Students
Finally, let's activate the new students.

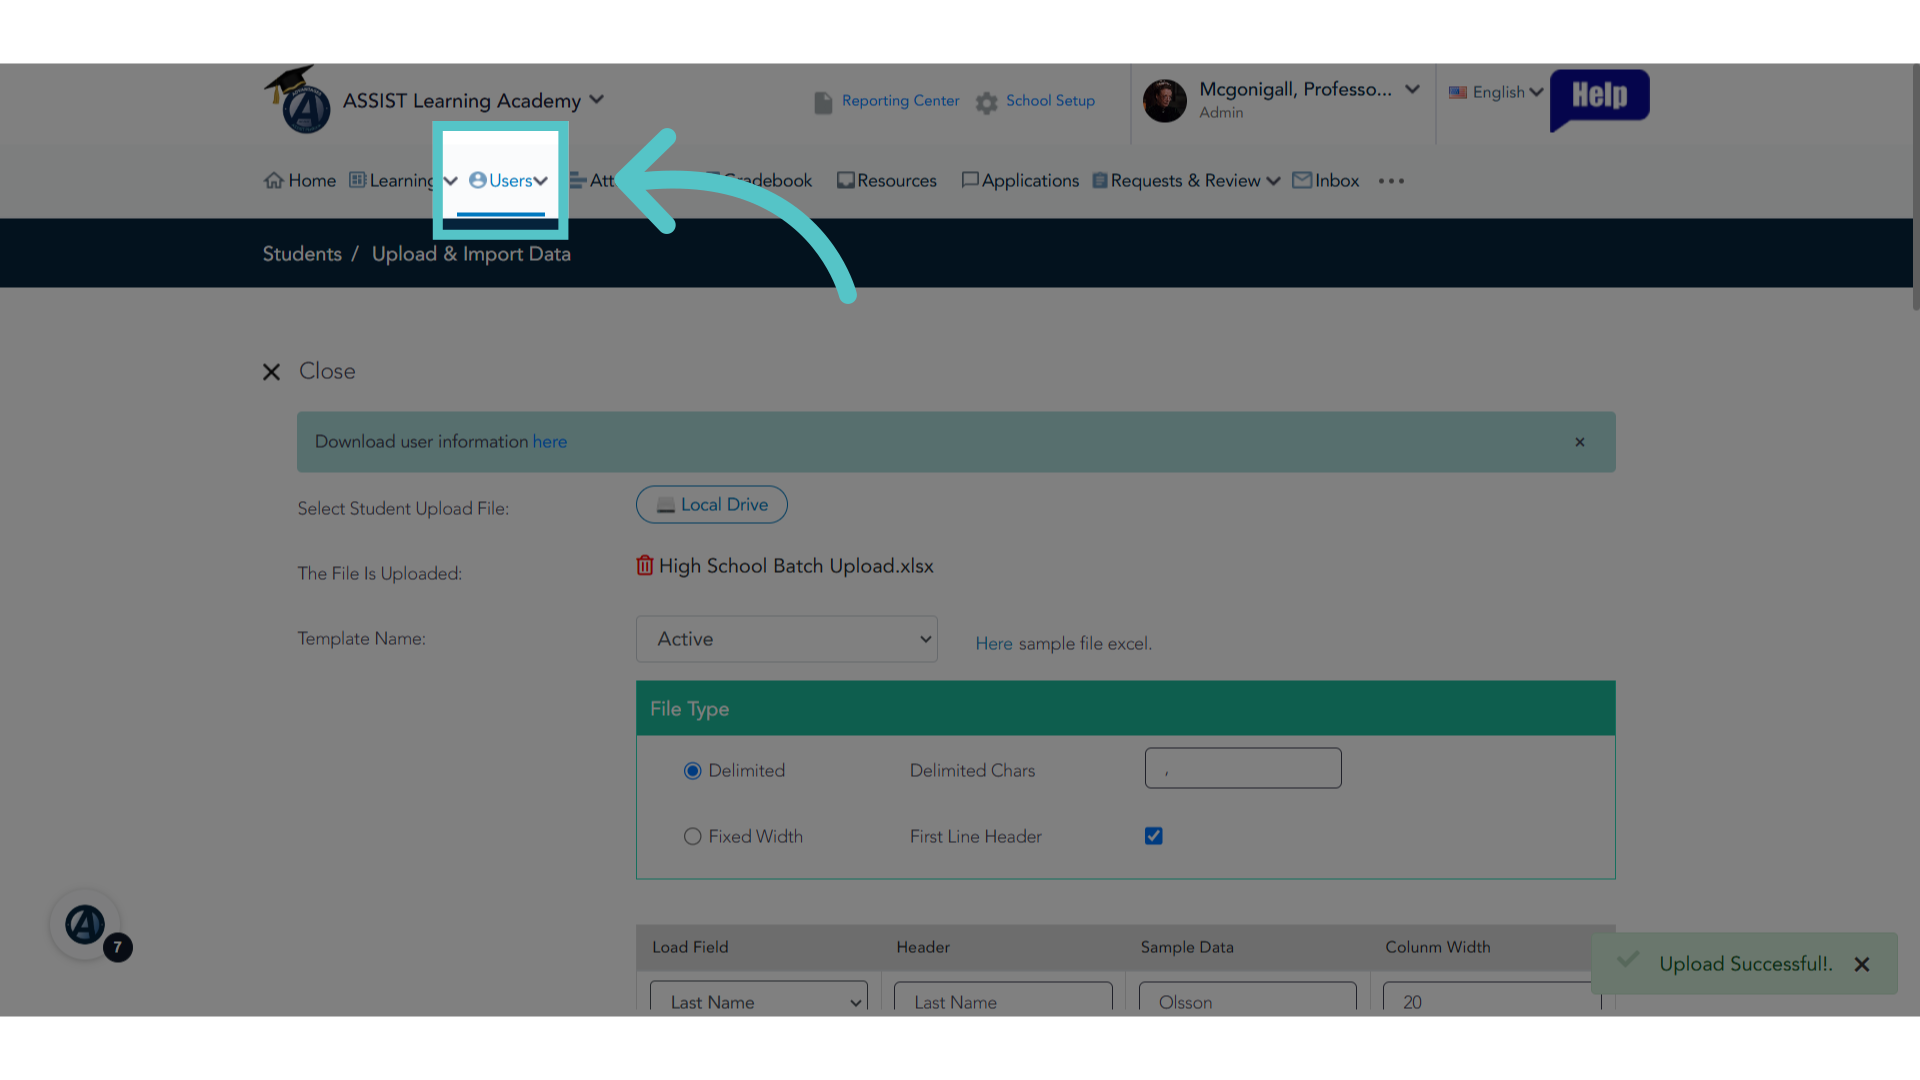
23. Click "Users"
To see the new student files, click the Users Tab.
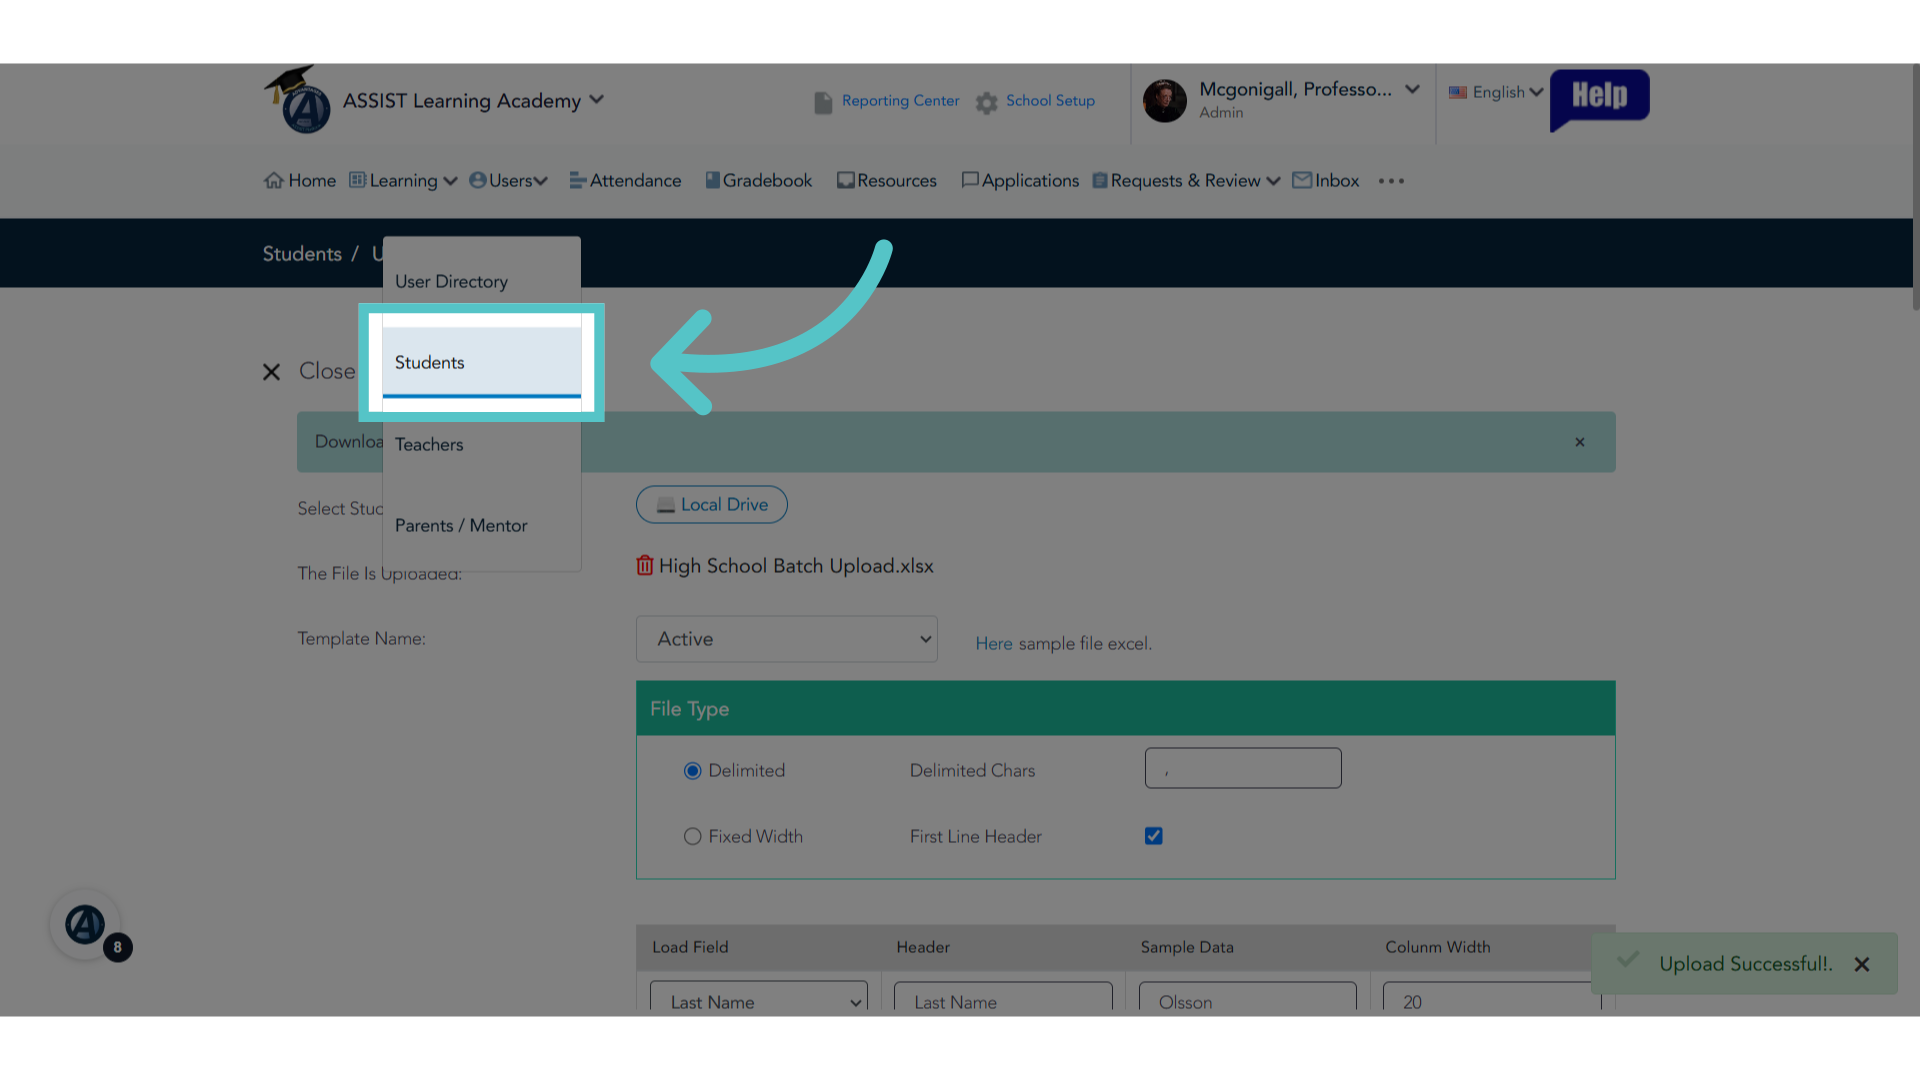
24. Click "Students"
Access the "Students" section.
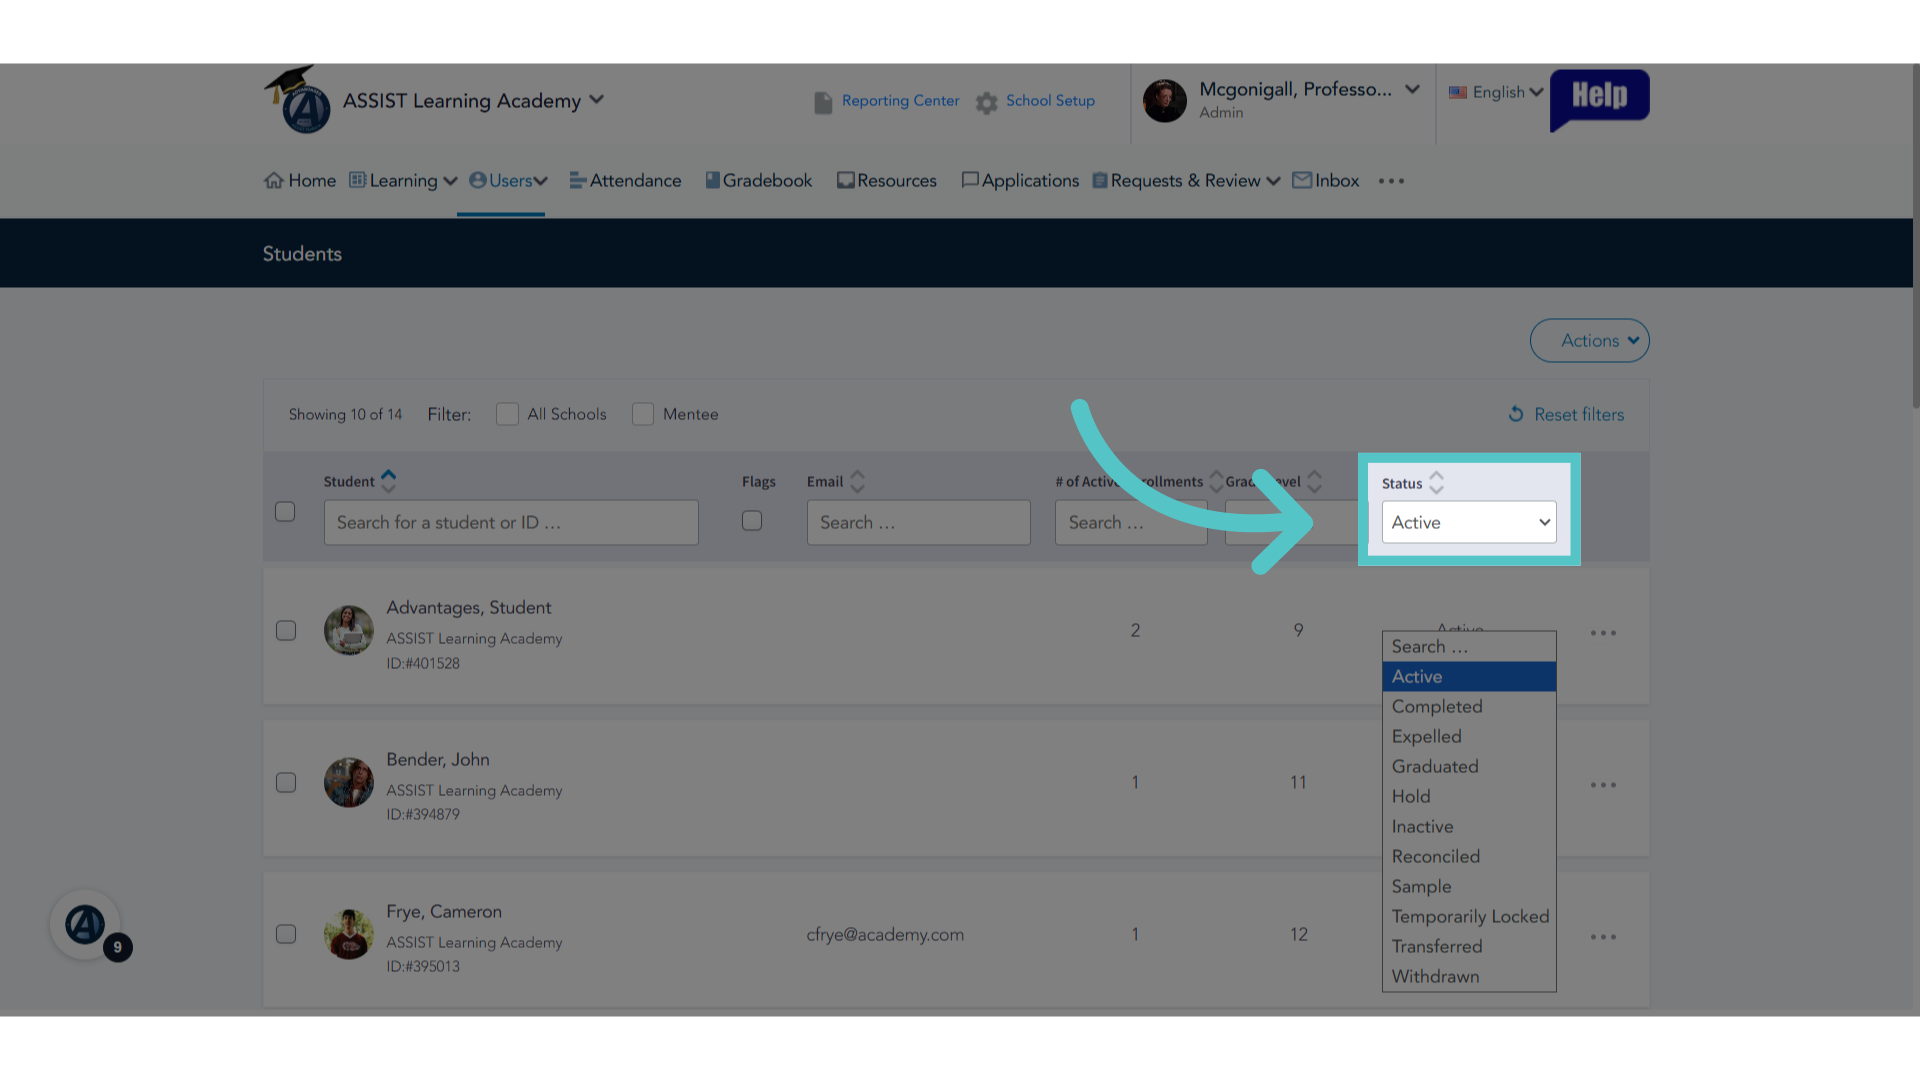
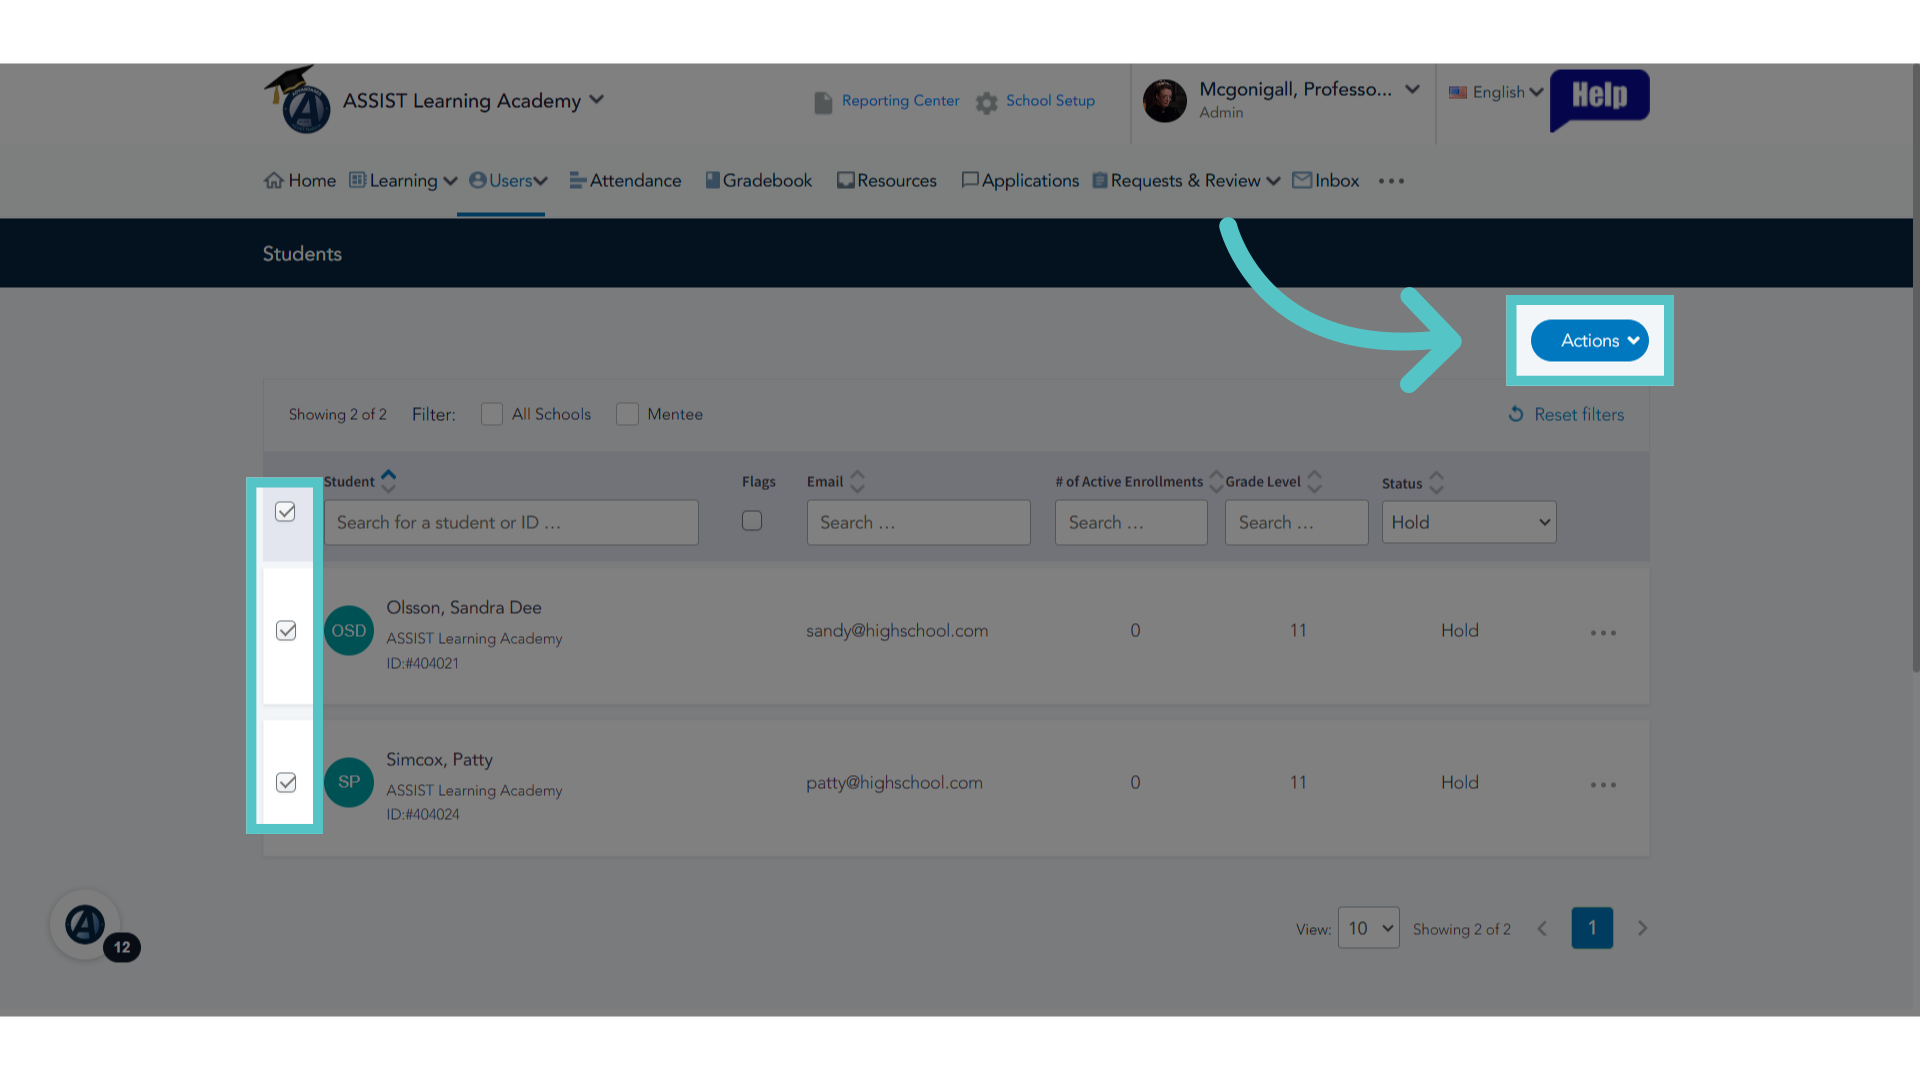
25. Status
New students will not appear in this Active student list. Use the status filter to find students on "Hold" status. All new students are added to the ASSIST platform on Hold.
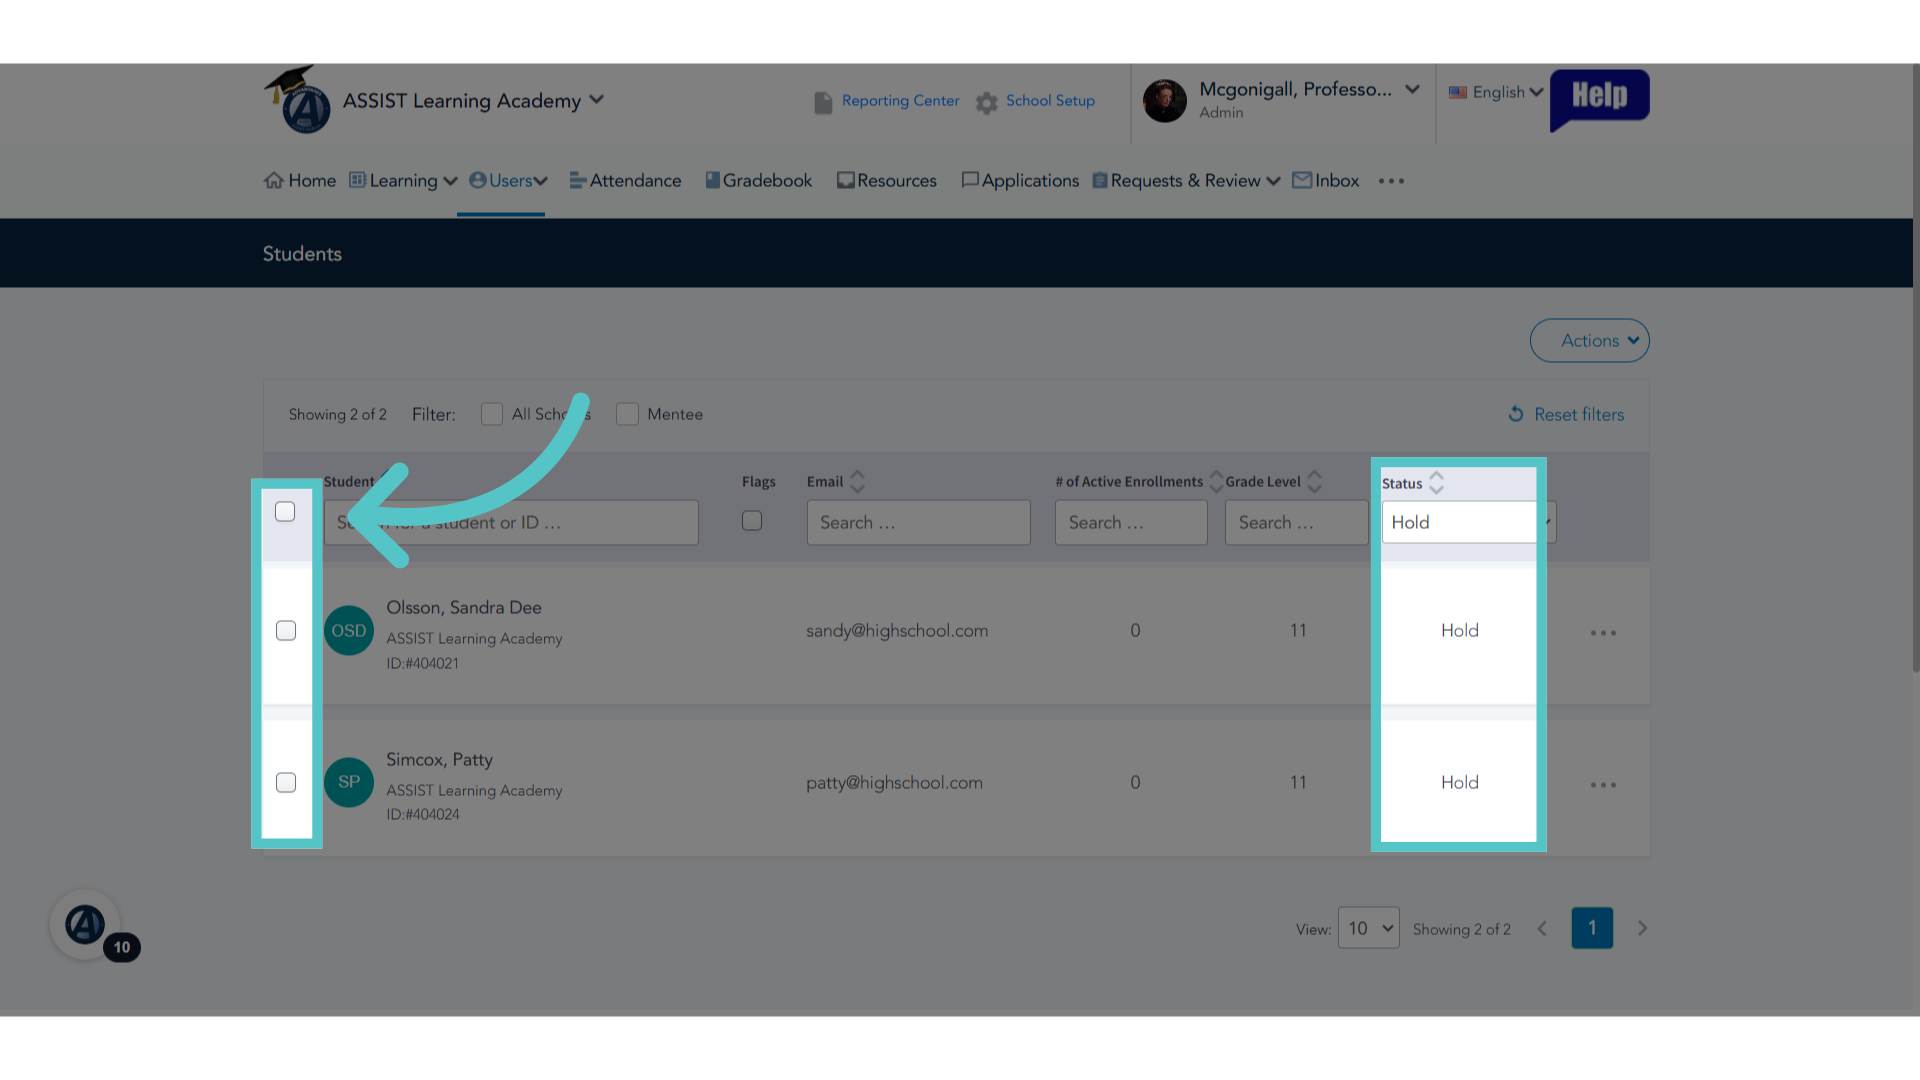
26. Check Box
To change students to active status, check the boxes on the far left of student names.
27. Click "Actions"
Access the "Actions" menu.
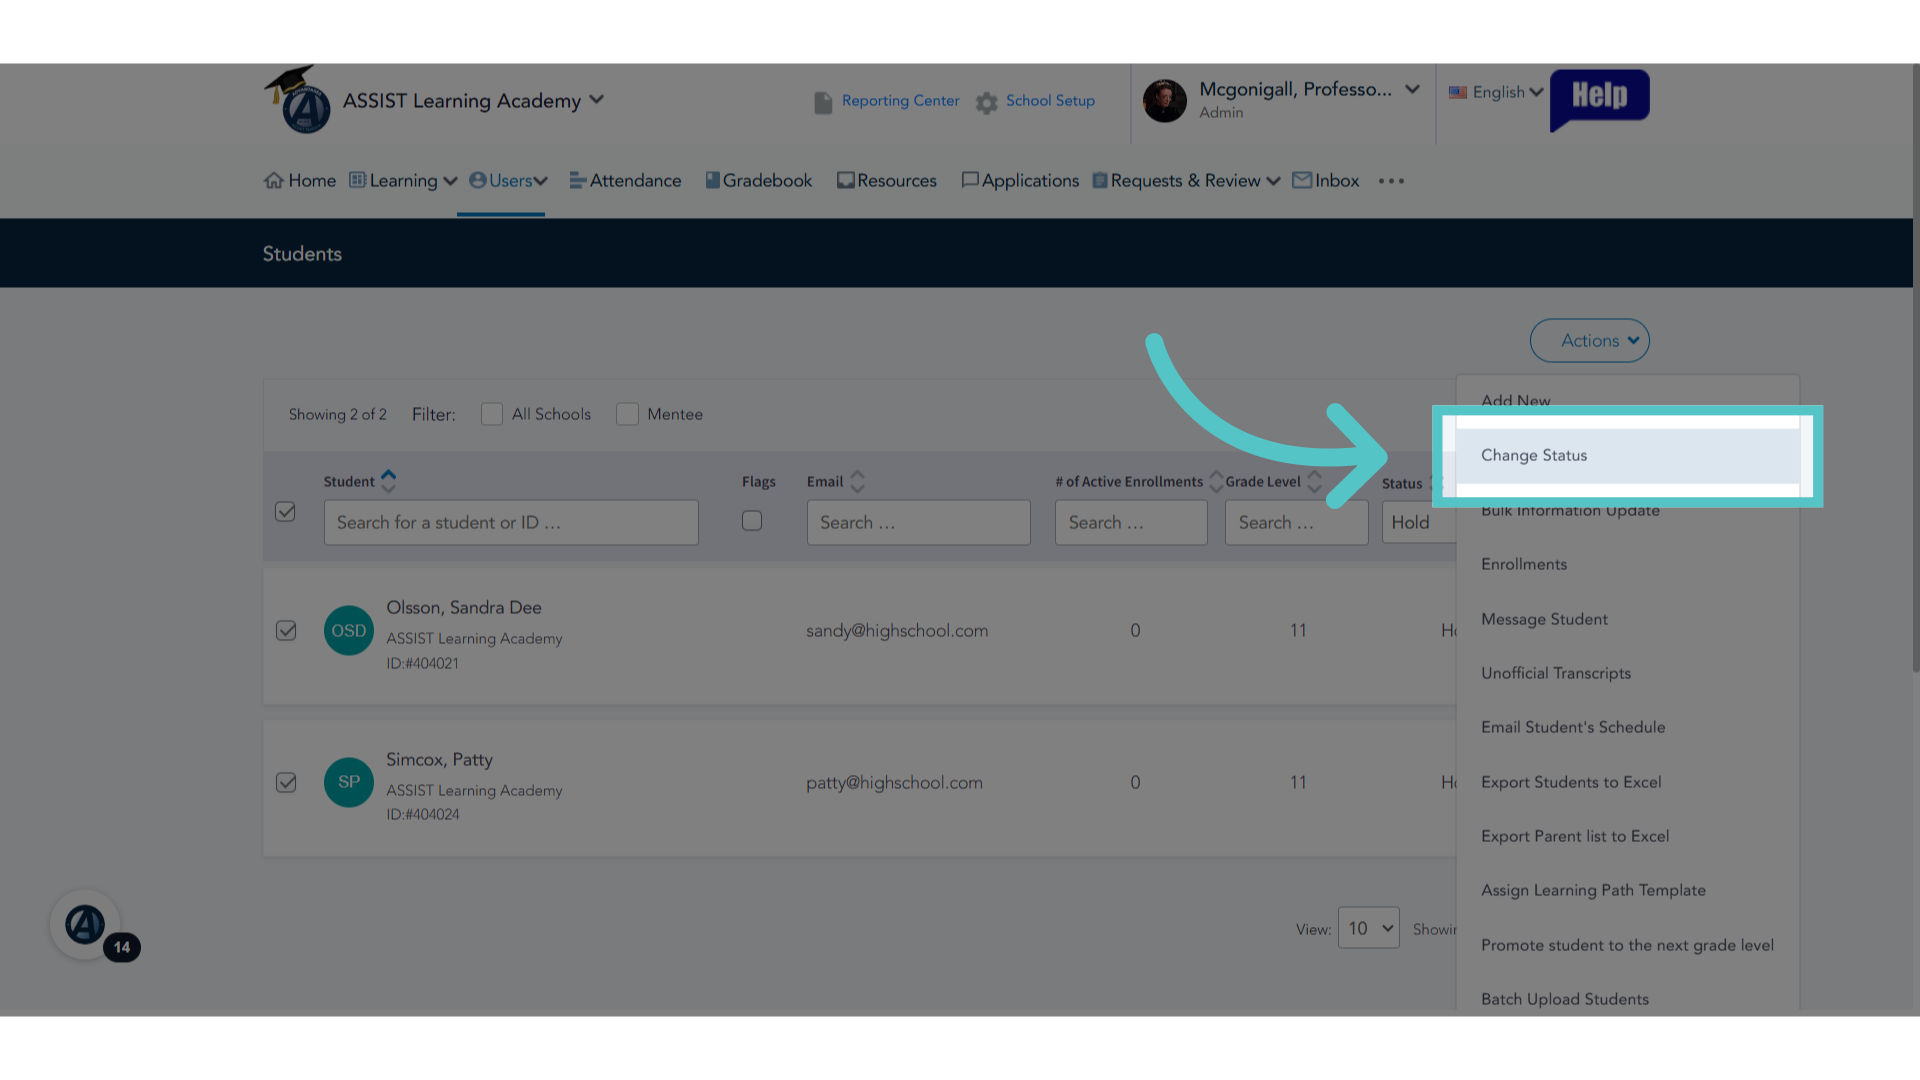
28. Click "Change Status"
Select "Change Status" from the options.
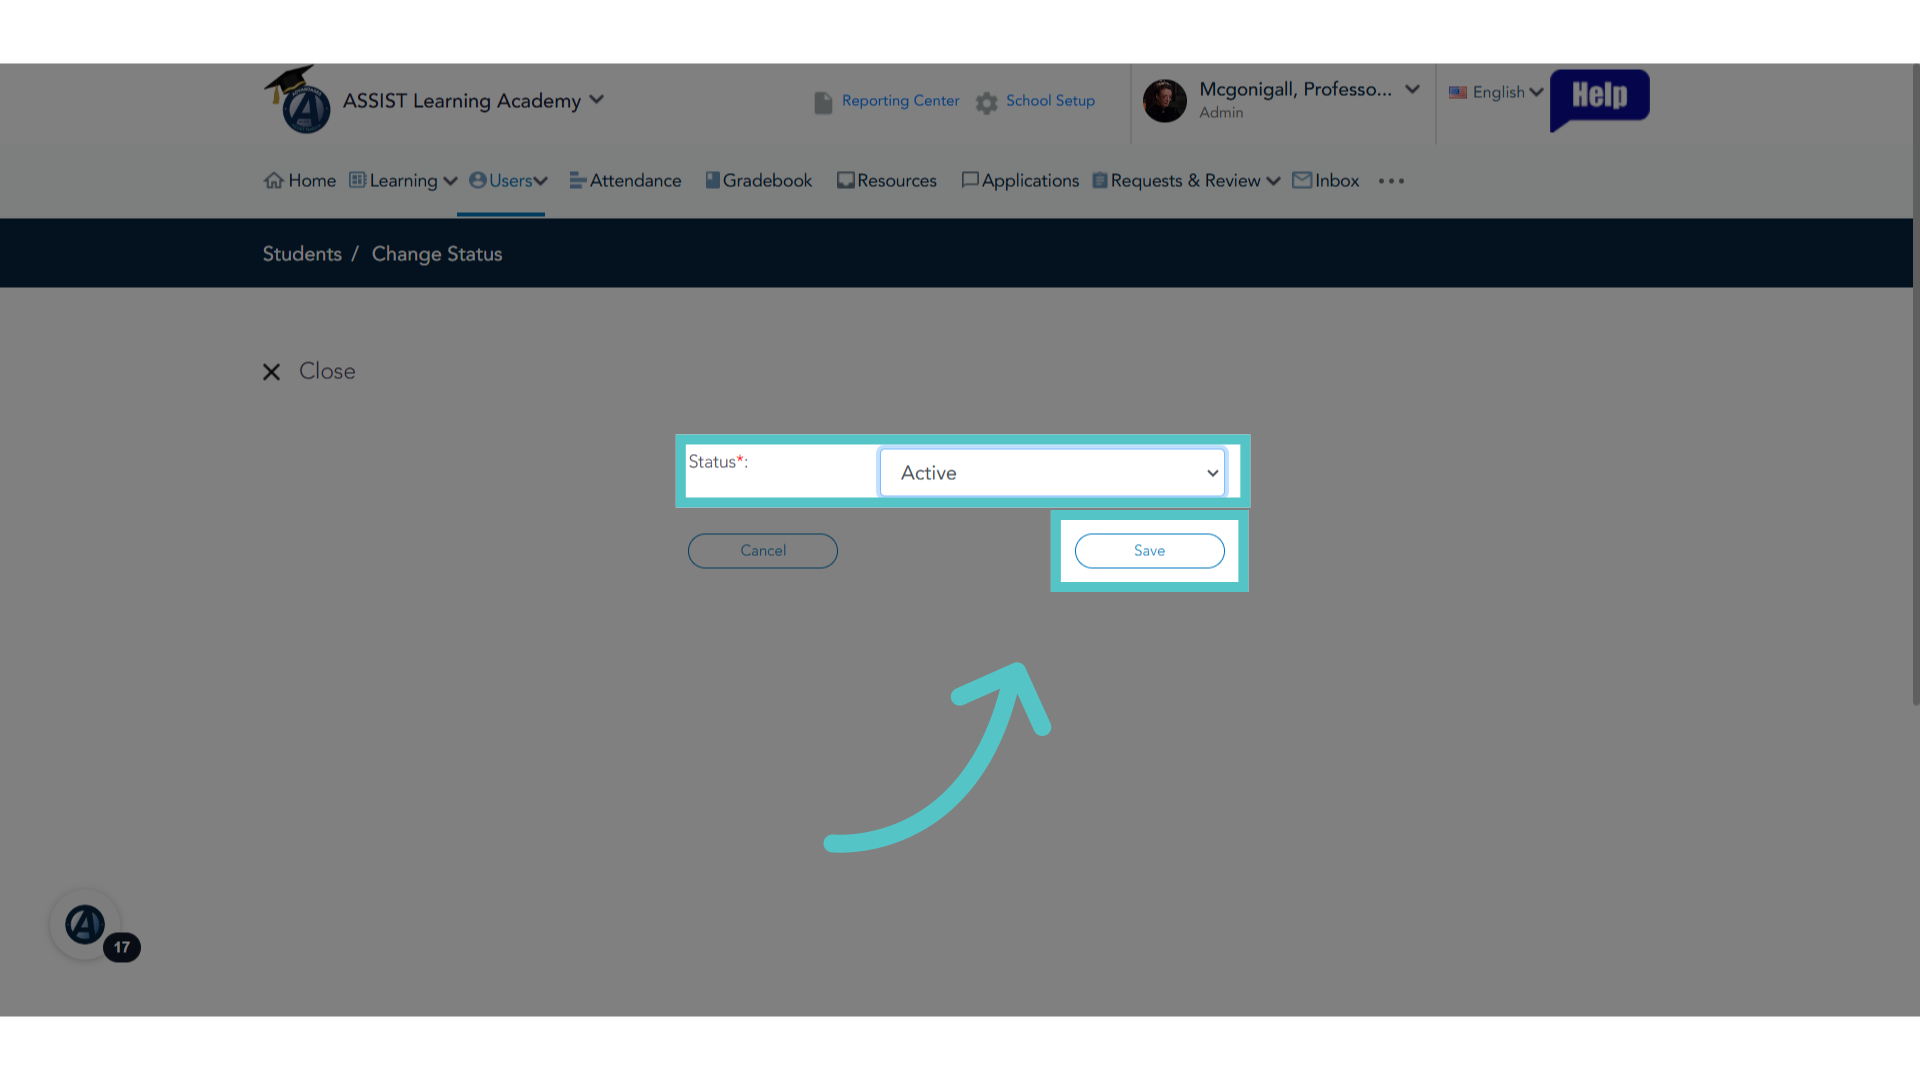
29. Active
Select "Active" for the status and save changes.
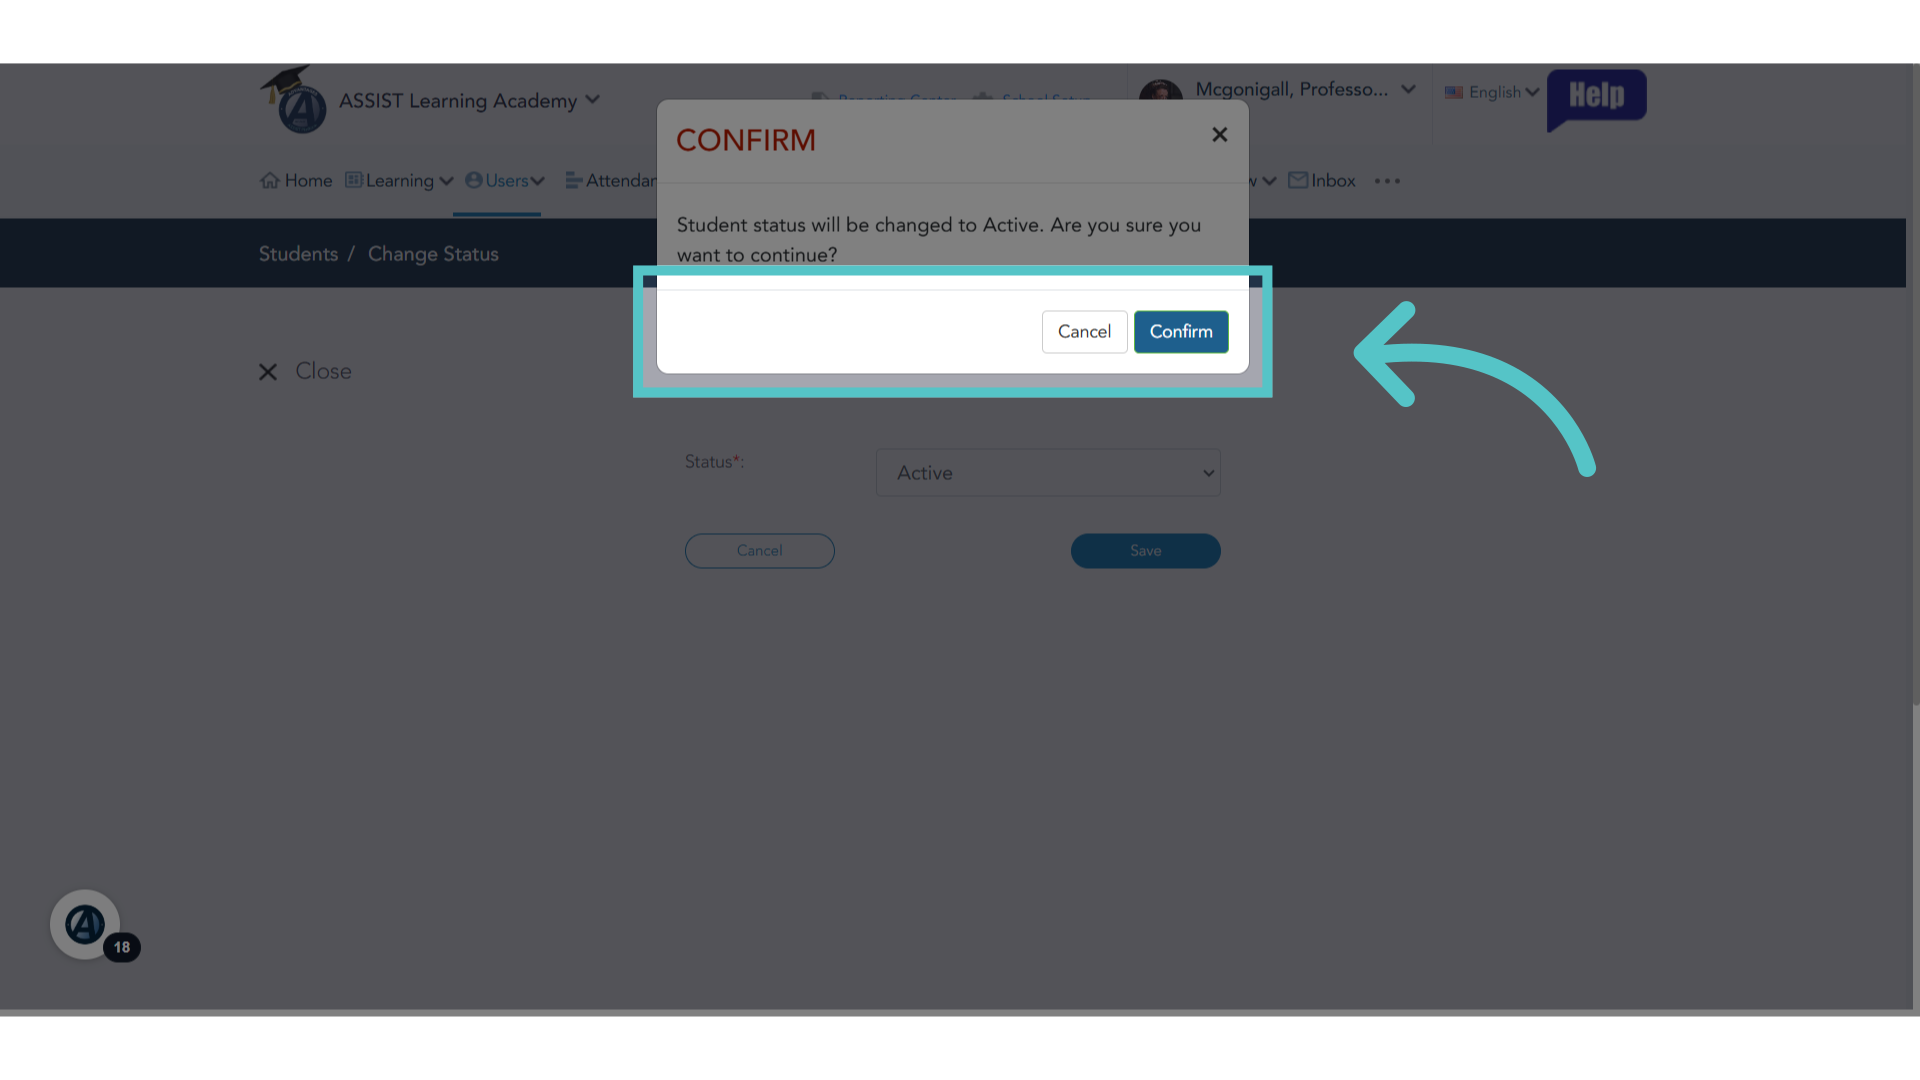
30. Click "Confirm"
Confirm the status change to activate new students.
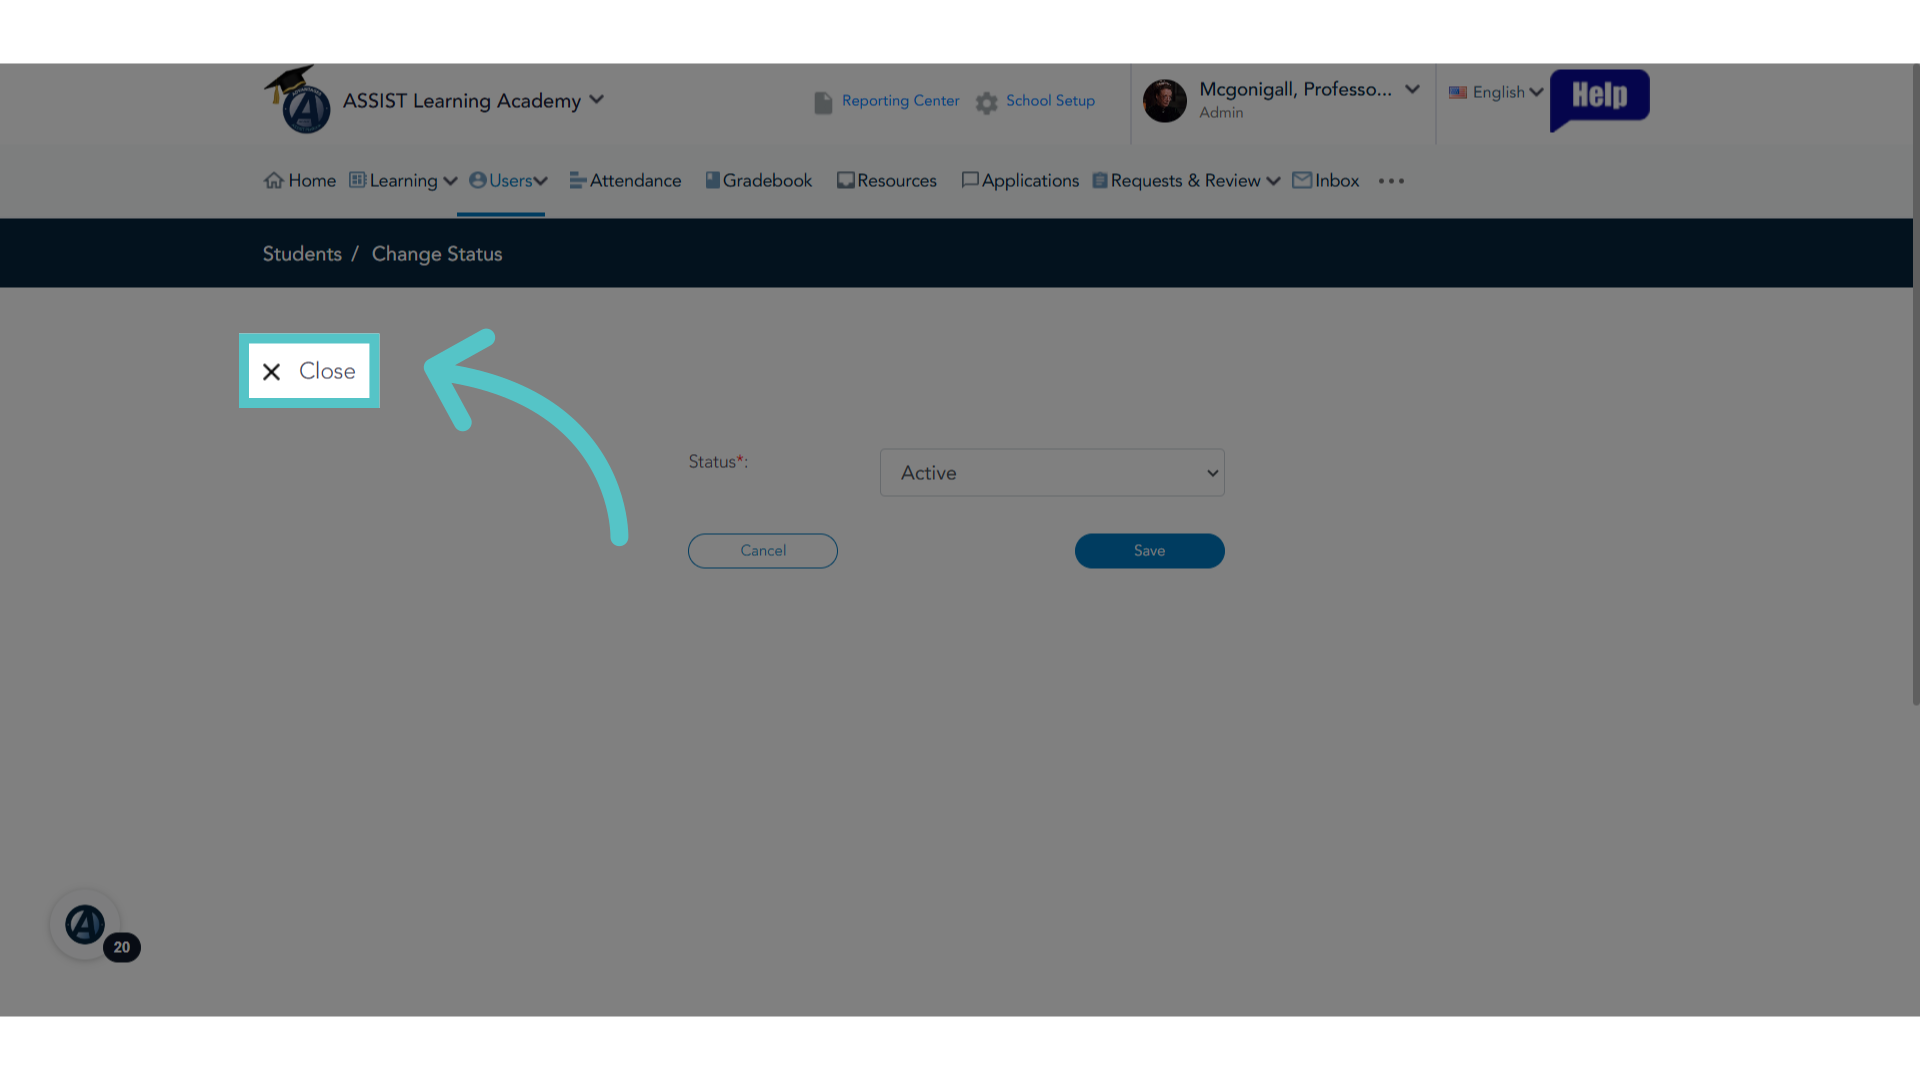
31. Click "Close"
Close the Change Status window to return to the student list. Students are now active on the ASSIST platform and should have received a notification of login information in their email.
If you have any questions about the information in this tutorial, please click "Contact Support" to submit a help request. Contact Support